
Proxmox VE 4 supports groups of up to 32 physical nodes. La gestión centralizada Proxmox hace que sea fácil de configurar todos los nodos disponibles desde un solo lugar. There are many advantages if using a Proxmox cluster e.g. es fácil migrar una máquina virtual de un nodo a otro nodo. You can use 2 Proxmox servers for a multi-node configuration, but if you want to configure Proxmox for high availability, you need 3 or more Proxmox nodes.
In this tutorial, we are going to set up a Proxmox 4 cluster with 3 Proxmox servers and 1 NFS storage server.
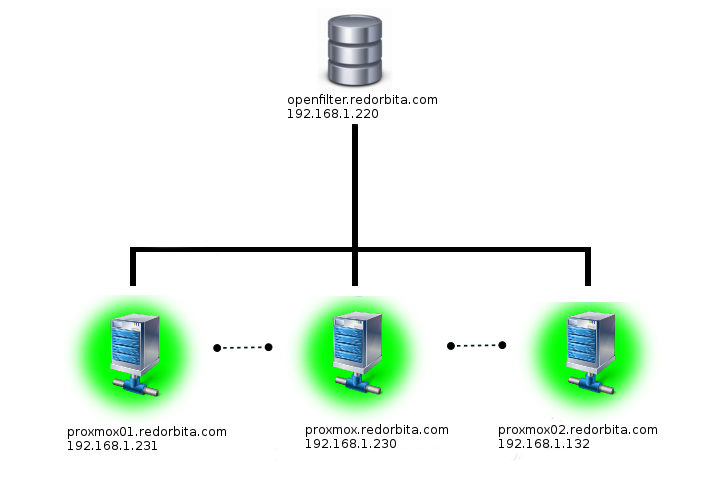
Network scheme:
Requirements:
proxmox (Master)

IP          : 192.168.1.230

FQDN     : proxmox.redorbita.com
proxmox01

IP          : 192.168.1.231

FQDN     : proxmox01.redorbita.com
proxmox01

IP          : 192.168.1.232

FQDN     : proxmox02.redorbita.com
openfiler  (Storage)

IP          : 192.168.1.220

FQDN     : openfilter.redorbita.com
Create volume
Primero debemos crear un volumen y exportarlo mediante NFS en el servidor de almacenamiento, yo en mi caso voy a utilizar openfilter, tu puedes realizarlo mediante otro tipo de cabinas de almacenamiento (freenas, openmediavault, netapp..etc) o mediante un servidor NFS
Crear volumen y exportarlo mediante NFS en openfilter
Configure hosts file
We must configure the hosts file of the three nodes as follows:
cat /etc/hosts
192.168.1.231 proxmox01.redorbita.com proxmox01 pvelocalhost

192.168.1.230 proxmox.redorbita.com proxmox pvelocalhost

192.168.1.232 proxmox02.redorbita.com proxmox02 pvelocalhost
To create a cluster in proxmox we must predefine one of the nodes as master, in our case we have chosen the server: proxmox.redorbita.com – 192.168.1.230
root@proxmox:~# pvecm create proxmoxclusterWe access the other two servers and execute the following command:
PROXMOX01
root@proxmox01:~# pvecm add 192.168.1.230

The authenticity of host ‘192.168.1.230 (192.168.1.230)’ can’t be established.

ECDSA key fingerprint is 72:ed:38:4e:5f:35:32:c4:a7:5f:5e:5c:7f:49:1f:11.

Are you sure you want to continue connecting (yes/no)? yes

root@192.168.1.230’s password:

copy corosync auth key

stopping pve-cluster service

backup old database

waiting for quorum…OK

generating node certificates

merge known_hosts file

restart services

successfully added node ‘proxmox02’ to cluster.
PROXMOX02
root@proxmox02:~# pvecm add 192.168.1.230

The authenticity of host ‘192.168.1.230 (192.168.1.230)’ can’t be established.

ECDSA key fingerprint is 72:ed:38:4e:5f:35:32:c4:a7:5f:5e:5c:7f:49:1f:11.

Are you sure you want to continue connecting (yes/no)? yes

root@192.168.1.230’s password:

copy corosync auth key

stopping pve-cluster service

backup old database

waiting for quorum…OK

generating node certificates

merge known_hosts file

restart services

successfully added node ‘proxmox02’ to cluster.
We check if we have the nodes correctly joined to the cluster:
root@proxmox:~# pvecm status

Quorum information

——————

Date:             Tue Mar 29 11:37:53 2016

Quorum provider:  corosync_votequorum

Nodes:            3

Node ID:          0x00000001

Ring ID:          32

Quorate:          Yes
Votequorum information

———————-

Expected votes:   3

Highest expected: 3

Total votes:      3

Quorum:           2

Flags:            Quorate
Membership information

———————-

Nodeid      Votes Name

0x00000001          1 192.168.1.230 (local)

0x00000003          1 192.168.1.231

0x00000002          1 192.168.1.232
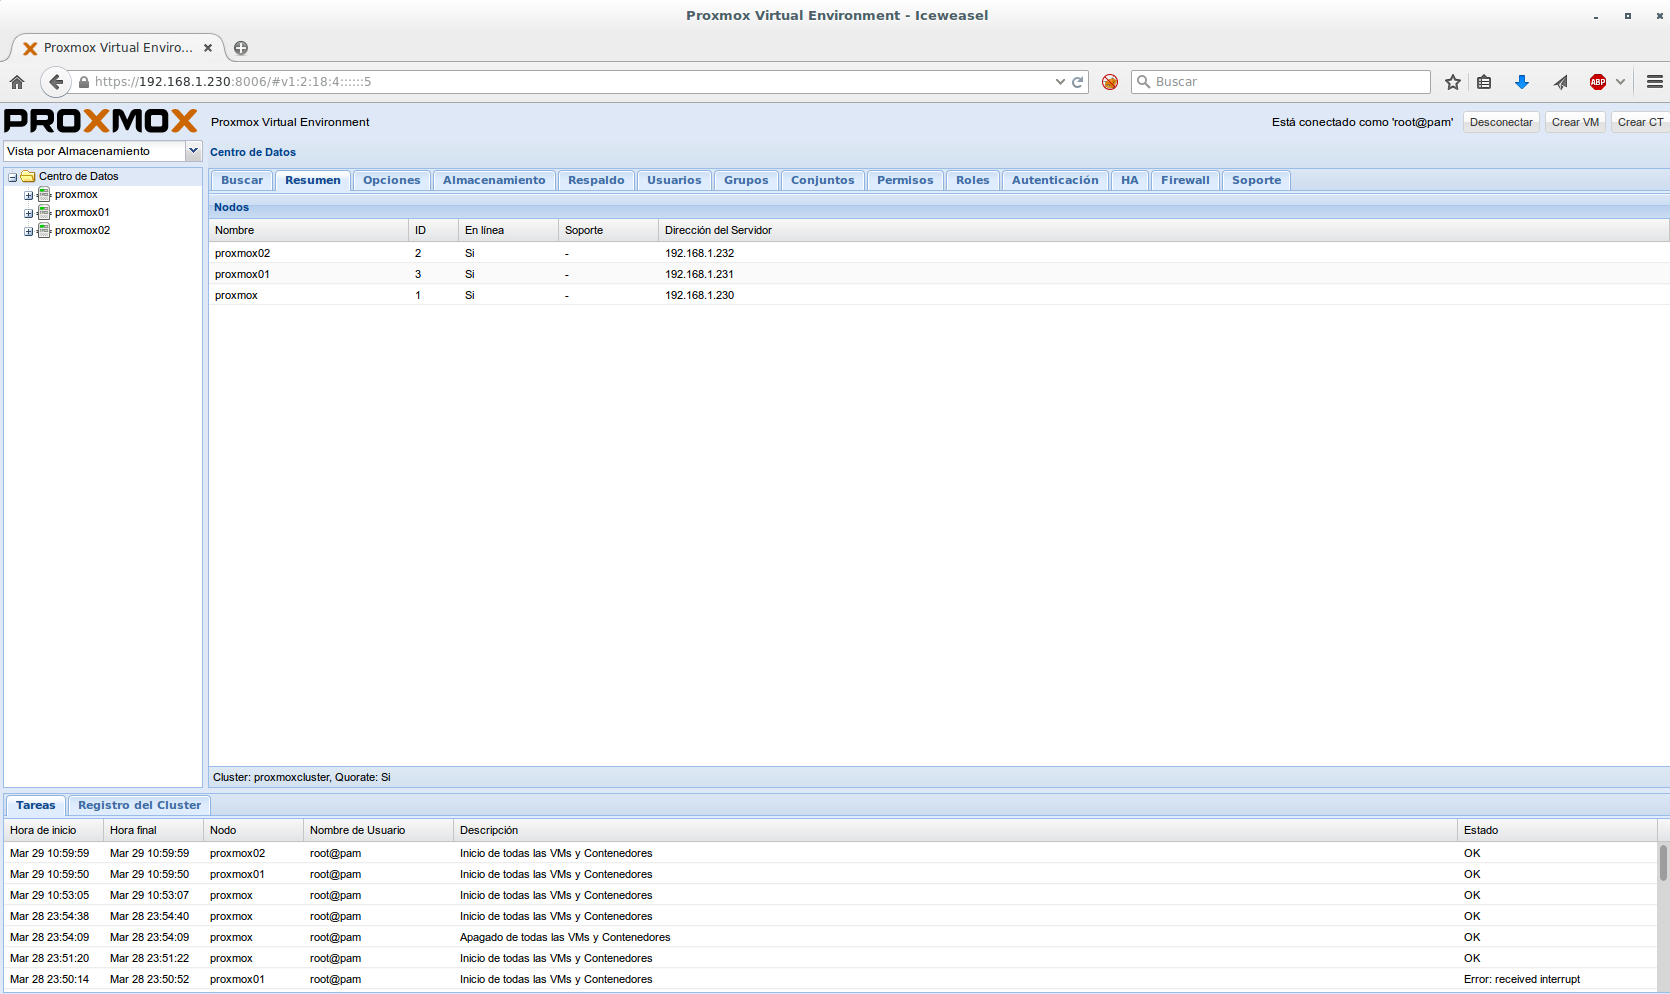
Once joined, we access the graphical interface through our web browser and check that our nodes are joined.
NFS Configuration
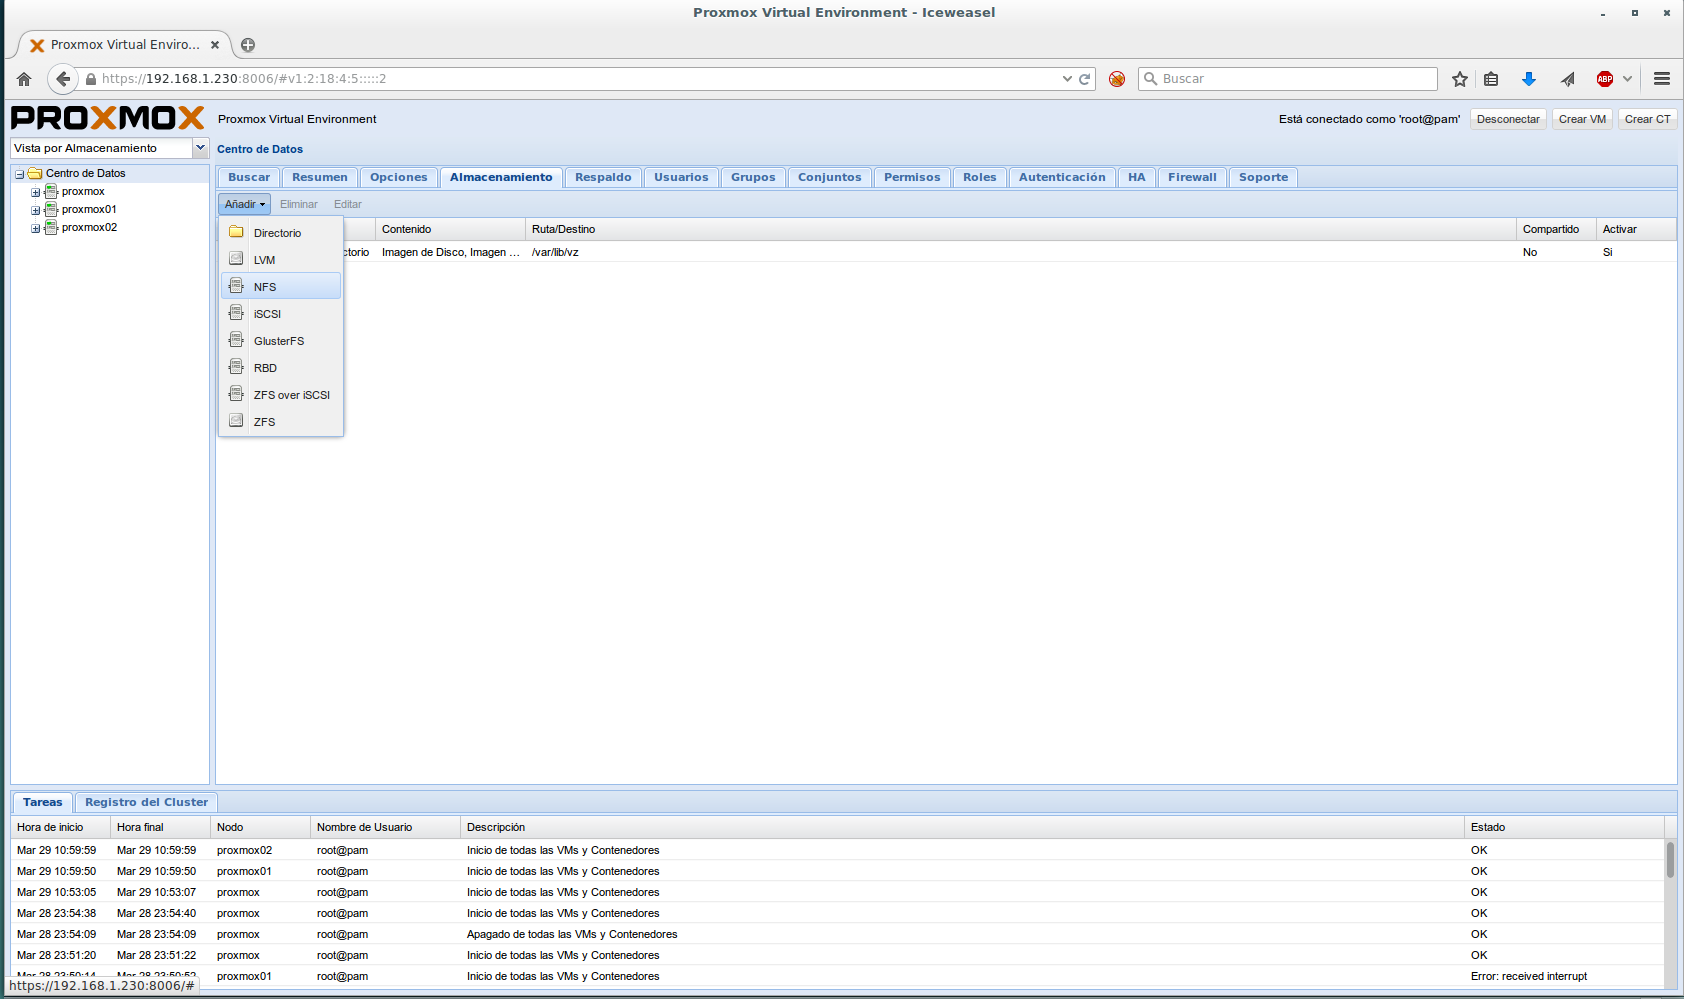
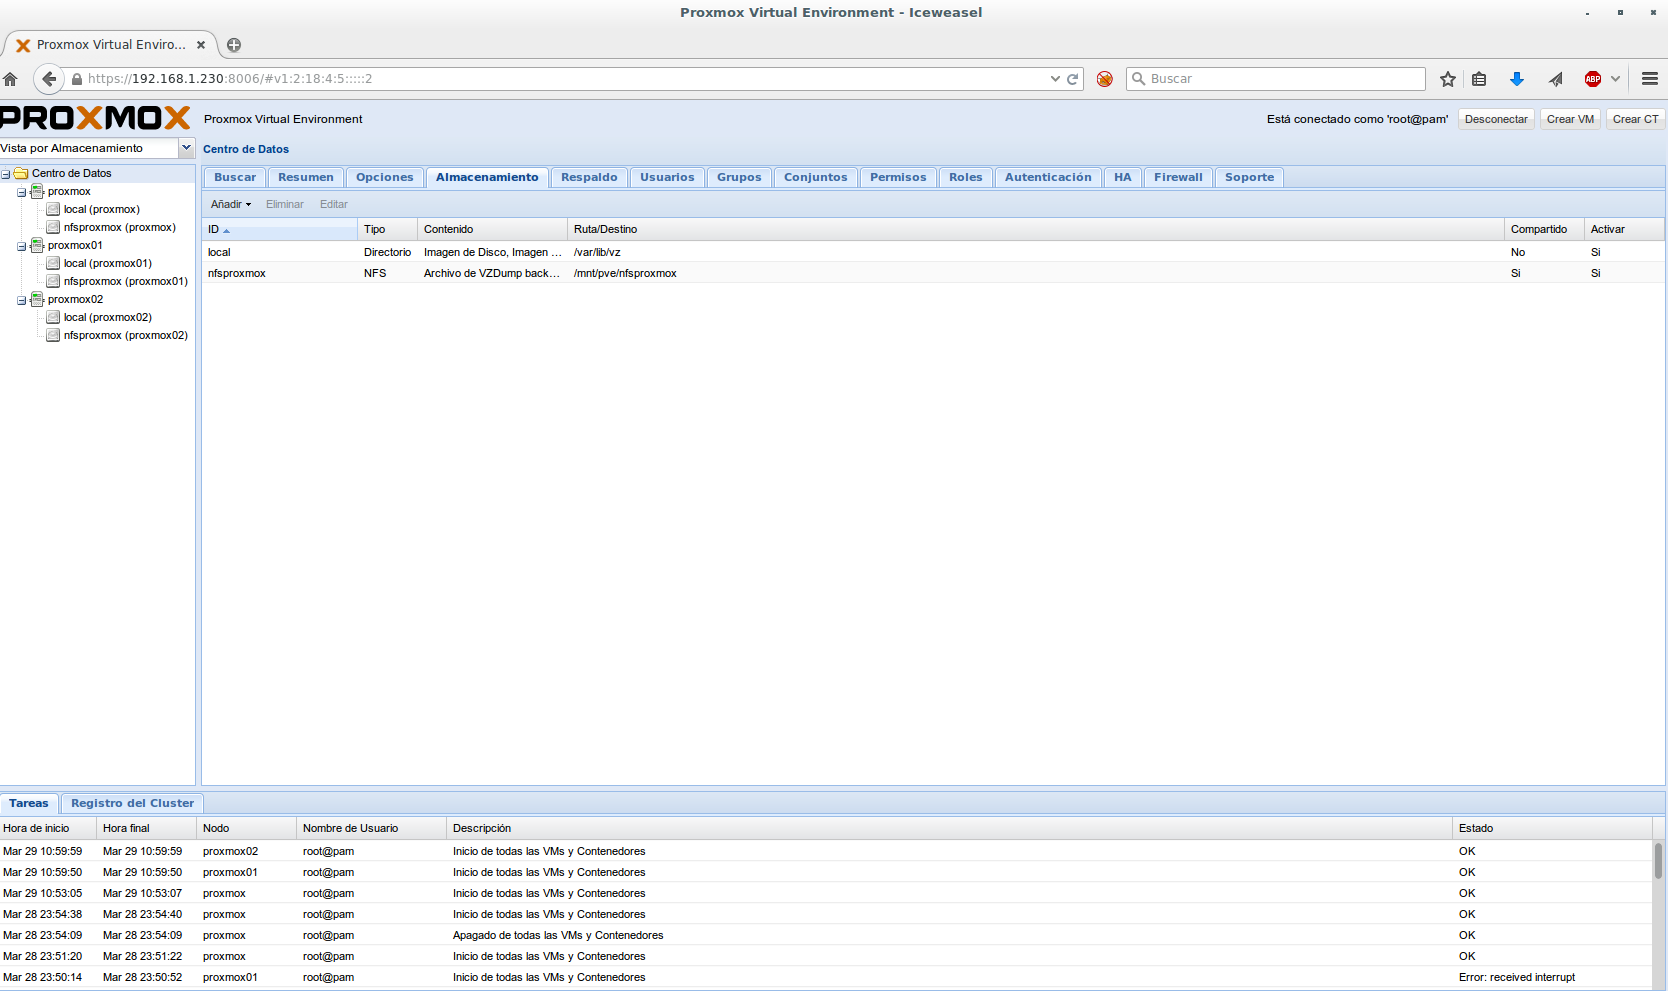
To configure the shared service we must go to Storage > Add > NFS
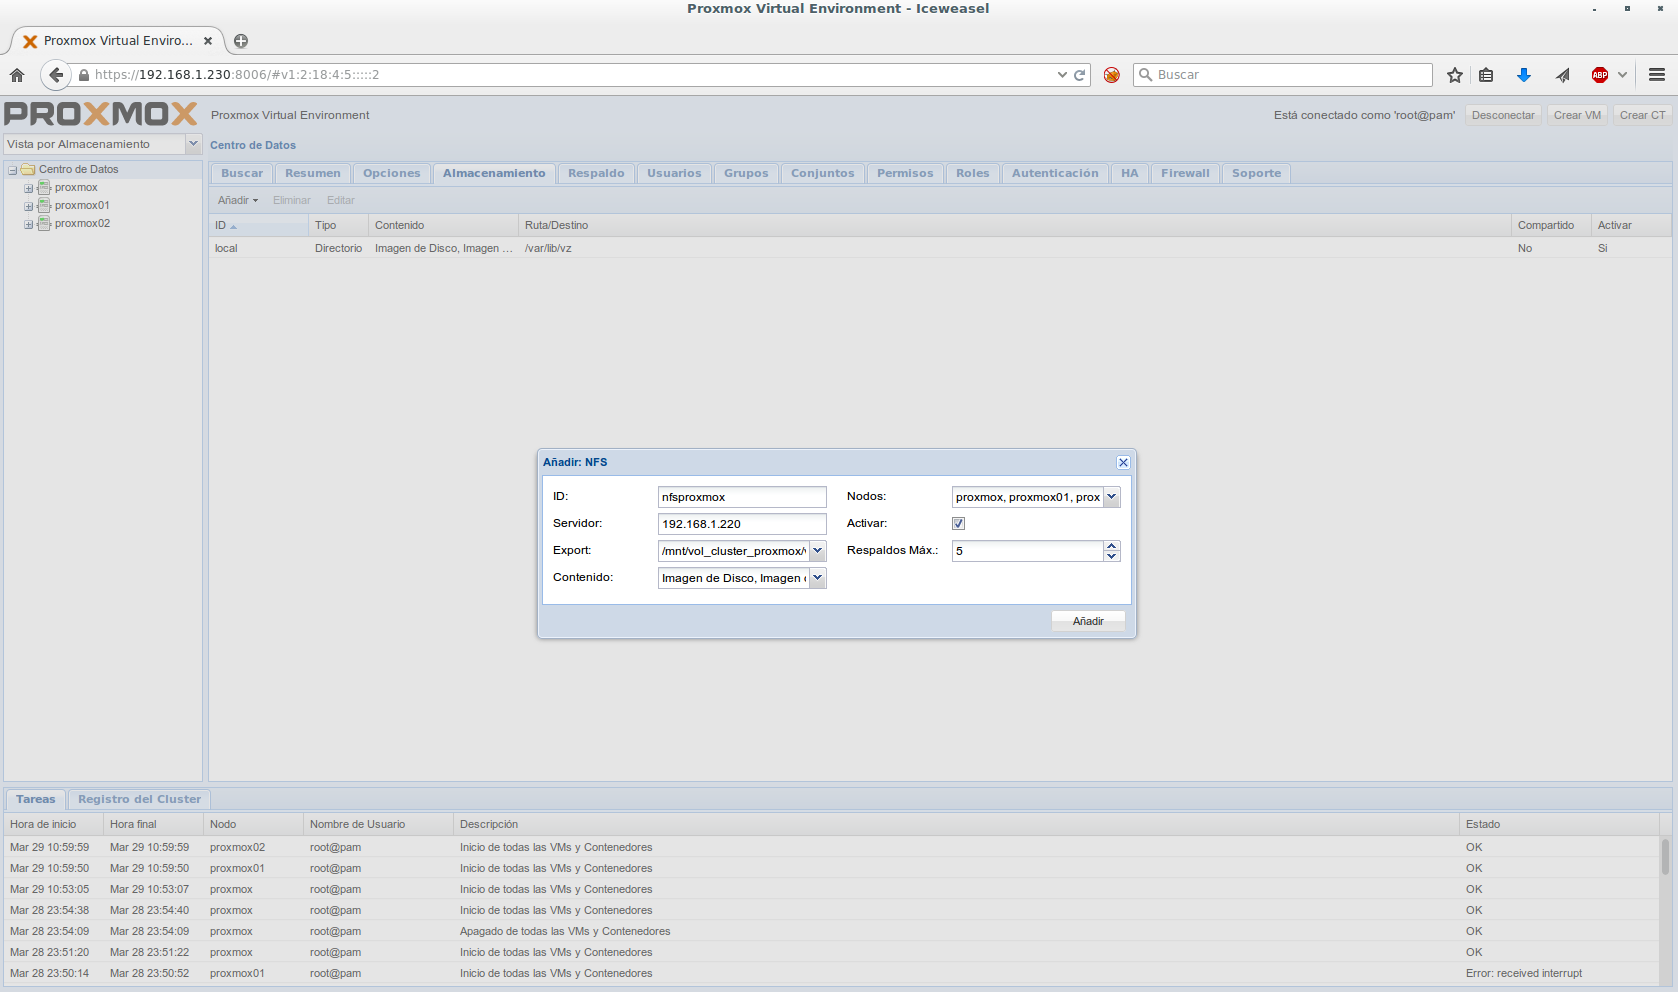
ID: Name of the share in our PROXMOX cluster
Server: NFS server (openfiler)
Export: Shared resource to export
Content: What are we going to use this resource for?
Nodes: the nodes that we are going to include.
Once configured, we check that the file system is correctly mounted on all nodes.
root@proxmox01:~# df -h

Filesystem                                                                       Size  Used Avail Use% Mounted on

udev                                                                              10M     0   10M   0% /dev

tmpfs                                                                            401M  5.7M  395M   2% /run

/dev/dm-0                                                                        3.9G  1.1G  2.6G  31% /

tmpfs                                                                           1001M   60M  941M   6% /dev/shm

tmpfs                                                                            5.0M     0  5.0M   0% /run/lock

tmpfs                                                                           1001M     0 1001M   0% /sys/fs/cgroup

/dev/mapper/pve-data                                                             8.4G   20M  8.4G   1% /var/lib/vz

tmpfs                                                                            100K     0  100K   0% /run/lxcfs/controllers

cgmfs                                                                            100K     0  100K   0% /run/cgmanager/fs

/dev/fuse                                                                         30M   24K   30M   1% /etc/pve

192.168.1.220:/mnt/vol_cluster_proxmox/vol_cluster_proxmox/vol_cluster_proxmox/  108G   33M  108G   1% /mnt/pve/nfsproxmox
Enable High Availbility to a VM and a CT
first we must add the VM or CT
Syntax:
ha-manager add vm:<VM ID/CT>
root@proxmox:/etc/pve# ha-manager add vm:100

root@proxmox:/etc/pve# ha-manager add vm:101
Once added we must enable it
Syntax:
ha-manager enable vm:<VM ID/CT>
root@proxmox:/etc/pve# ha-manager enable vm:100

root@proxmox:/etc/pve# ha-manager enable vm:101
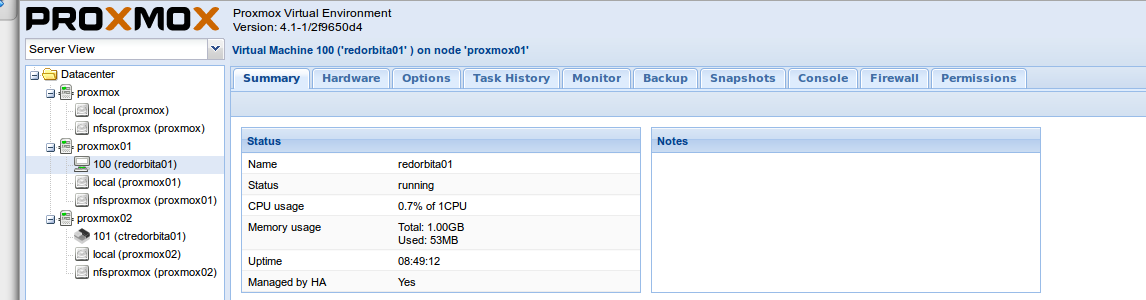
If we access through our browser and select the server we can see in the Summary tab if it is enabled correctly.
High-availability testing
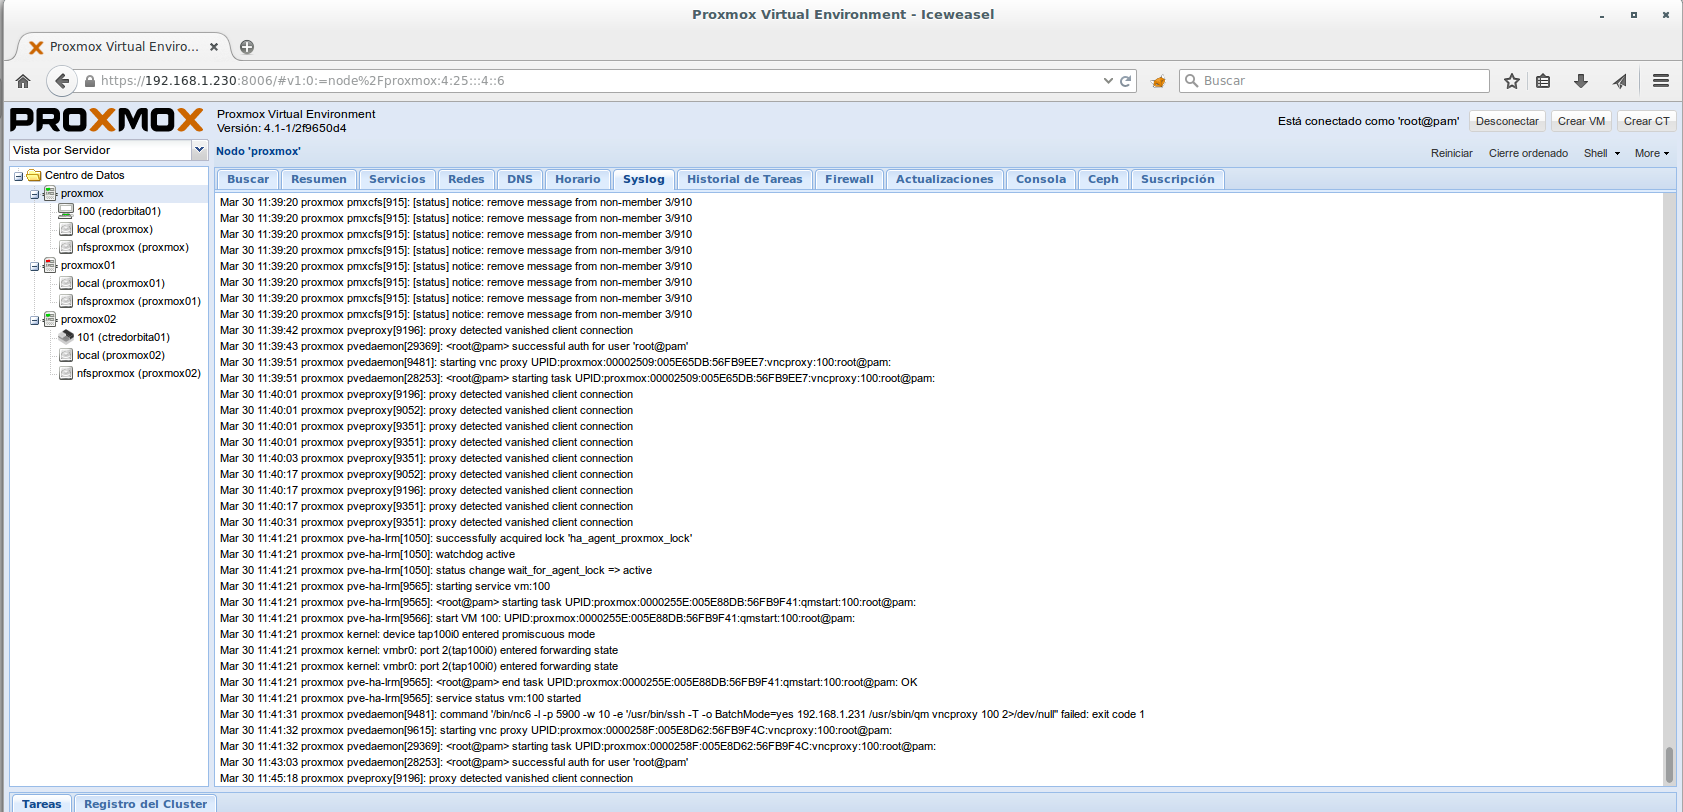
We are going to proceed to turn off the proxmox01 node and check if it detects its failure and proceed to migrate VM 100 (rredorbita01)
If everything goes correctly, as you see in the log, it should detect the node down and migrate to another node.
All the best.
:wq!
Comments