
What is openVZ?
OpenVZ It is a technology virtualization at the level of operating system for Linux. OpenVZ allows a physical server to run multiple instances of isolated operating systems, known as Virtual Private Servers (SPV or VPS in English) or Virtual Environments (EV).
If compared to virtual machines such as vmware, VirtualBox and virtualization technologies such as Xen, OpenVZ offers less flexibility in the choice of operating system: both guests and hosts must be Linux (although GNU/Linux distributions may be different on different EVs). However, OpenVZ operating system-level virtualization provides better performance, scalability, density, dynamic resource management, and ease of administration than the alternatives.
OpenVZ is a base of Virtuozzo which is a commercial software Developed by SWsoft, Inc., OpenVZ is a product of free software and licensed under the terms of the license GNU GPL version 2.
OpenVZ It consists of the core and user-level tools.
Facility
We add the repository
echo "deb https://download.openvz.org/debian wheezy main" >> /etc/apt/sources.list
We import the key
wget http://ftp.openvz.org/debian/archive.key
apt-key add archive.key
We update the repository database
apt-get update
We install the kernel
apt-get install linux-image-openvz-amd64
We make a backup copy of the sysctl.conf configuration file
cp /etc/sysctl.conf /etc/sysctl.conf.bck
Once we have our backup we must adjust some parameters:
# On Hardware Node we generally need
# packet forwarding enabled and proxy arp disabled
net.ipv4.ip_forward = 1
net.ipv6.conf.default.forwarding = 1
net.ipv6.conf.all.forwarding = 1
net.ipv4.conf.default.proxy_arp = 0# Enables source route verification
net.ipv4.conf.all.rp_filter = 1# Enables the magic-sysrq key
kernel.sysrq = 1# We do not want all our interfaces to send redirects
net.ipv4.conf.default.send_redirects = 1
net.ipv4.conf.all.send_redirects = 0
We install the tools
apt-get install vzctl vzquota ploop vzstats
We modify the GRUB so that it starts with the openVZ kernel, in my case since the openVZ kernel is in option 3, I modify GRUB_DEFAULT indicating that it starts with the third option
cat /etc/default/grub
# If you change this file, run 'update-grub' afterwards to update
# /boot/grub/grub.cfg.
# For full documentation of the options in this file, see:
# info -f grub -n ‘Simple configuration’GRUB_DEFAULT=3
GRUB_TIMEOUT=5
GRUB_DISTRIBUTOR=`lsb_release -i -s 2> /dev/null || echo Debian`
GRUB_CMDLINE_LINUX_DEFAULT=»quiet»
GRUB_CMDLINE_LINUX=»»
We proceed to reboot and if we have not modified GRUB, we select the openVZ kernel
Once the system has started, we are going to install OpenVZ Web Panel to manage it graphically
We download the latest version
wget https://storage.googleapis.com/google-code-archive-downloads/v2/code.google.com/ovz-web-panel/ovz-web-panel-2.4.tgz
We unzip the package
tar xvf ovz-web-panel-2.4.tgz -C /opt/
We install the required software:
apt-get install ruby rubygems libsqlite3-ruby
We configure the Ruby 1.8 version
update-alternatives –config ruby
There are 2 options for the ruby alternative (which provides /usr/bin/ruby).Selection Route Priority Status
————————————————————
* 0 /usr/bin/ruby1.9.1 51 auto mode
1 /usr/bin/ruby1.8 50 manual mode
2 /usr/bin/ruby1.9.1 51 manual modePress <Enter> to keep the default value [*] or press a selection number: 1
update-alternatives: using /usr/bin/ruby1.8 to provide /usr/bin/ruby (ruby) in manual mode
We start OpenVZ Web Panel
/opt/ovz-web-panel/script/owp start
Starting OpenVZ Web Panel…
Starting watchdog daemon…
[OK] Watchdog daemon was started.
Starting web server webrick on 0.0.0.0:3000…
[OK] Web server was started.
Syncing hardware nodes states…
[OK] Hardware nodes information was synced.
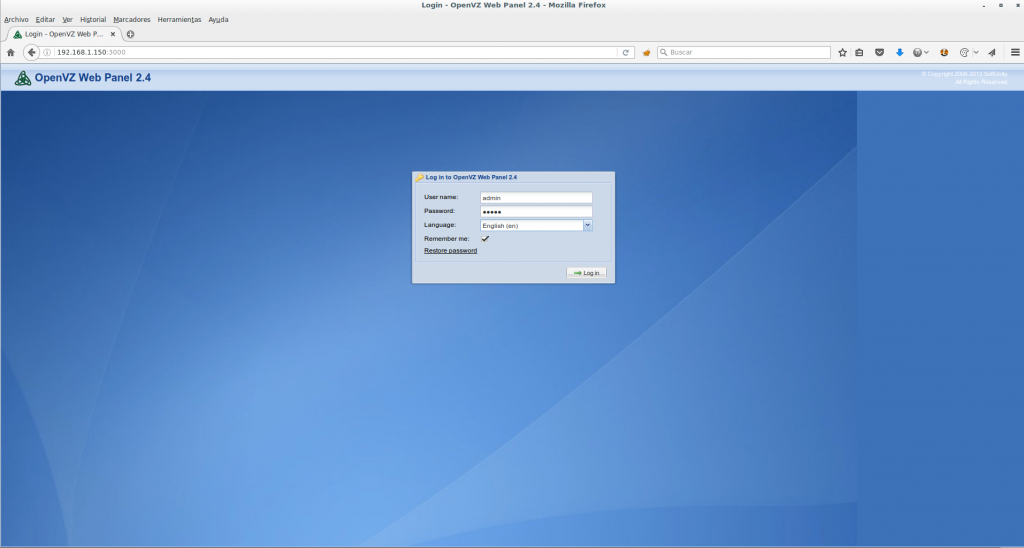
We access through our web browser http://192.168.1.150:3000
All the best.
Comments