

What is Veritas Cluster?
VCS (Veritas cluster server)
Highly available cluster software developed by Symantec for UNIX, Linux, and Windows platforms.
An open systems clustering solution that eliminates planned and unplanned downtime, simplifies server consolidation, and enables efficient management of a wide range of applications in multi-platform environments.
Prerequisites for installation:
Network settings:
- An IP address in the machines' service VLAN
- Two IP addresses in the heartbeat VLAN (the VLAN to which the heartbeat interfaces are connected)
Linux operating system preparation
We make a backup of the GRUB configuration file
[root@vcs01 /]# cp /etc/grub.conf /etc/grub.conf-bckWe edit the grub adding the following lines: crashkernel=auto elevator=deadline (Both nodes)
Example:
kernel /vmlinuz-2.6.32-642.13.1.el6.x86_64 ro root=/dev/mapper/vg_vcs01-lv_root rd_NO_LUKS rd_LVM_LV=vg_vcs01/lv_root  KEYBOARDTYPE=pc KEYTABLE=es rd_NO_MD SYSFONT=latarcyrheb-sun16 crashkernel=auto elevator=deadline  LANG=es_ES.UTF-8 rd_LVM_LV=vg_vcs01/lv_swap rd_NO_DM rhgb quiet

initrd /initramfs-2.6.32-642.13.1.el6.x86_64.img
We activate name resolution only per file (Both nodes)
For this we have to modify the file /etc/nsswitch.conf. In it we must configure hosts and networks as follows
hosts:          files dns

networks:       files dns
We allow direct root access between nodes, generating a trust relationship between both:
We must allow access via SSH by root without a password, to do this we copy the RSA key:
[root@vcs01 ~]# ssh-keygen -t rsa

Generating public/private rsa key pair.

Enter file in which to save the key (/root/.ssh/id_rsa):

Created directory ‘/root/.ssh’.

Enter passphrase (empty for no passphrase):

Enter same passphrase again:

Your identification has been saved in /root/.ssh/id_rsa.

Your public key has been saved in /root/.ssh/id_rsa.pub.

The key fingerprint is:

cf:9e:38:55:ed:3f:b0:a3:18:34:3c:6b:2b:04:fd:99 root@vcs01

The key’s randomart image is:

+–[ RSA 2048]—-+

|                 |

|                 |

|      .      .   |

|     . ..   . .  |

|      . S=o. .   |

|       ..E=  ..  |

|      .  =o   o. |

|       .oo+. o ..|

|        o+o.. . .|

+—————–+
[root@vcs01 ~]# ssh-copy-id -i .ssh/id_rsa.pub root@192.168.1.205

The authenticity of host ‘192.168.1.205 (192.168.1.205)’ can’t be established.

RSA key fingerprint is 07:c1:7d:32:68:37:7d:c4:35:5f:9c:a3:1c:de:fa:13.

Are you sure you want to continue connecting (yes/no)? yes

Warning: Permanently added ‘192.168.1.205’ (RSA) to the list of known hosts.

root@192.168.1.205’s password:

Now try logging into the machine, with «ssh ‘root@192.168.1.205′», and check in:
.ssh/authorized_keys
to make sure we haven’t added extra keys that you weren’t expecting.
We add to the file /etc/hosts the servers. (both servers)
[root@vcs01 ~]# cat /etc/hosts

127.0.0.1   localhost localhost.localdomain localhost4 localhost4.localdomain4

::1         localhost localhost.localdomain localhost6 localhost6.localdomain6
192.168.1.200 vcs01 vcs01.redorbita.com

192.168.1.205 vcs02 vcs02.redorbita.com
Install the necessary packages
[root@vcs01 /]# yum install bc coreutils ed findutils glibc.x86_64 glibc.i686 kmod-oracleasm.x86_64 kmod-rtsx_pci.x86_64 ksh libacl.i686 libacl.x86_64 libgcc.x86_64 libgcc.i686 libstdc++.x86_64 libstdc++.i686 ncurses-libs nss-softokn-freebl.i686 nss-softokn-freebl.x86_64 pam parted pcre policycoreutils xz-libs pam.i686 perl.x86_64We configure the iscsi (Both nodes)
[root@vcs01 /]# yum -y install iscsi-initiator-utilsWe start the service and add it to boot
[root@vcs01 /]#  service iscsi start

[root@vcs01 /]#  chkconfig iscsi on
using the command iscsiadm we use the discovery of iSCSI
[root@vcs01 /]#  iscsiadm -m discovery -t st -p 192.168.1.20

192.168.1.20,1 iqn.2013-07.com.purestorage:flasharray

192.168.1.21:3260,1 iqn.2013-07.com.purestorage:flasharray

192.168.1.22:3260,1 iqn.2013-07.com.purestorage:flasharray

192.168.1.23:3260,1 iqn.2013-07.com.purestorage:flasharray

192.168.1.24:3260,1 iqn.2013-07.com.purestorage:flasharray

192.168.1.25:3260,1 iqn.2013-07.com.purestorage:flasharray

192.168.1.26:3260,1 iqn.2013-07.com.purestorage:flasharray

192.168.1.27:3260,1 iqn.2013-07.com.purestorage:flasharray
We make the connection
[root@vcs01 /]# iscsiadm -m node -L automaticWe rescan
[root@vcs01 /]# iscsiadm -m session –rescanVeritas Cluster Server Installation (On only one node)
We unzip the software
[root@vcs01 ~]# tar xvf VRTS_SF_HA_Solutions_6.1_RHEL.tar.gzWe access the folder
[root@vcs01 ~]# cd dvd1-redhatlinux/rhel6_x86_64/*NOTE: for people who want to install it in CentOS 6 You have to configure the redhat-release file as follows:
[root@vcs01 ~]# cat /etc/redhat-release

Red Hat Enterprise Linux Server release 6.*Santiago
We run the installation script
[root@vcs01 rhel6_x86_64]# ./installerStart the installation wizard and press I to start installing

We select option 4 (Symantec Storage Foundation and High Availability (SFHA)) and accept the license terms.
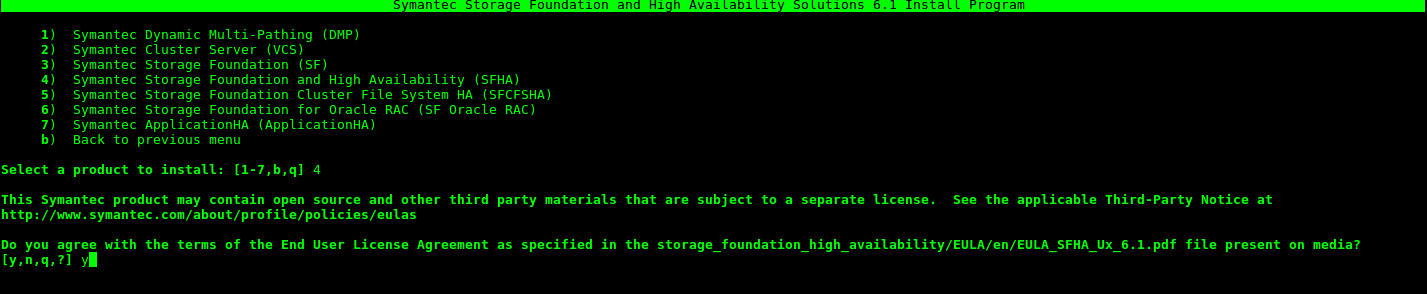
We install all the packages (option 3) and add the different nodes of your cluster separated by a space.

Perform dependency checks (In my case I still had to install pam and perl)
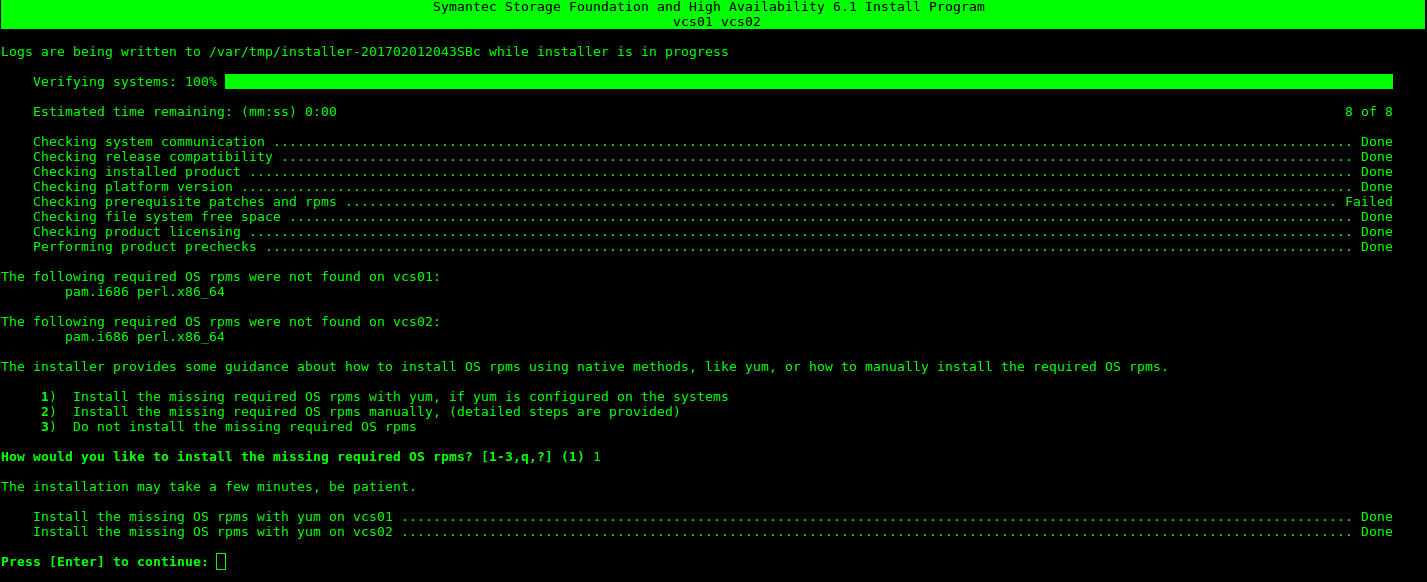
Check the system. 
Shows a list of all the packages it will install.
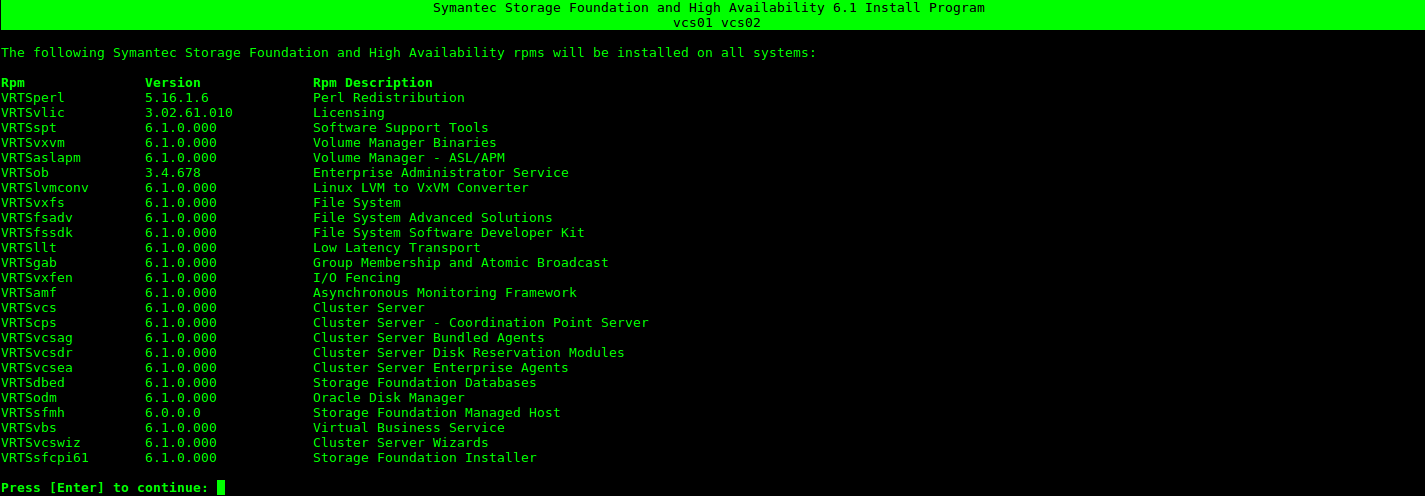
Start installing all the software.

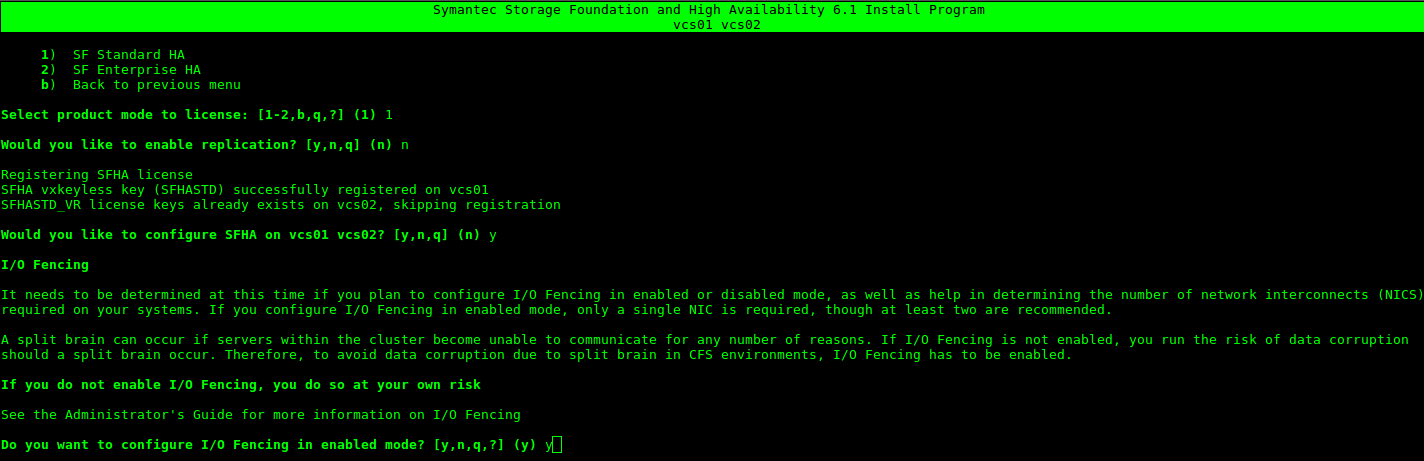
Since this is a laboratory and I do not have a license, I am going to select option 2.

We choose the version we want, in my case SF Standard HA (1), we do not want replication and we add that we do want to start configuring the Cluster.
We select a name for our Cluster

We configure the Hearbeat interface, Option 4. 
We add the default ID that it tells us.
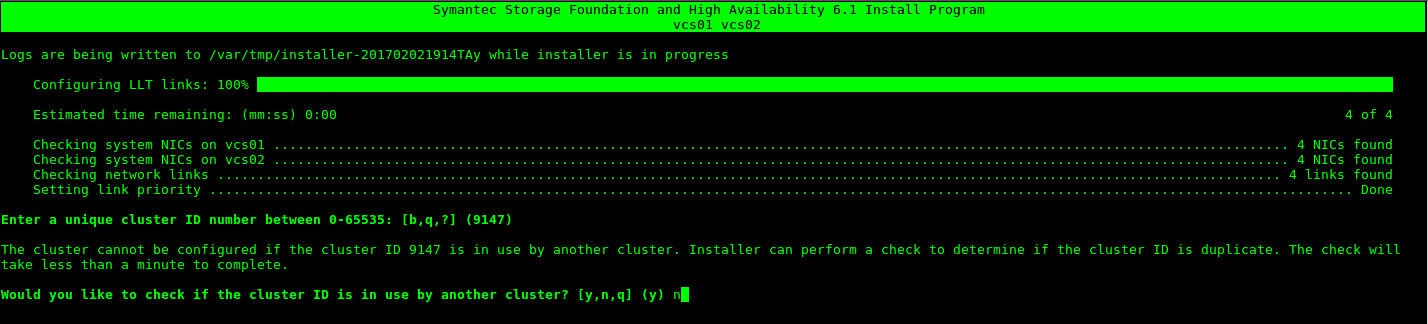
It lists the network cards, if the information is correct AND

We configure the network interface

We accept if the addressing is correct.

It asks us if we want to configure VCS in safe mode, we indicate NO.

We create the user

If the data is correct we accept.

In my case I don't want SMTP notifications, therefore NO

For the SFHA process

It gives us the option to configure the Fence, we are going to exit the configuration wizard and go on to configure the cluster resources using commands.

We see the status of the disks
[root@vcs01 /]#  vxdisk -e list

DEVICE       TYPE           DISK        GROUP        STATUS               OS_NATIVE_NAME   ATTR

aluadisk0_1  auto:none      –            –           online invalid       sdc              –

sda          auto:LVM       –            –           online invalid       sda              –
We initialize the ALUA:
[root@vcs01 /]#  /etc/vx/bin/vxdisksetup -i aluadisk0_1 format=cdsdisk
[root@vcs01 /]# vxdisk -e list

DEVICE       TYPE           DISK        GROUP        STATUS               OS_NATIVE_NAME   ATTR

aluadisk0_1  auto:cdsdisk   –            –           online               sdc              –

sda          auto:LVM       –            –           online invalid       sda
We create the Disk group associated with aluna aluadisk0_1
[root@vcs01 /]# vxdg init vcsvol disk1vcsvol=aluadisk0_1We create the LV and format it
[root@vcs01 /]#  vxassist -g vcsvol make lvnfs 500M
[root@vcs01 /]#  mkfs -t ext4 /dev/vx/dsk/vcsvol/lvnfs
Configure resources:
We create the service:
[root@vcs01 /]# haconf -makerw
[root@vcs01 /]#  hagrp -add Clusthttpd
[root@vcs01 /]#  hagrp -modify Clusthttpd SystemList vcs01 0 vcs02 1
[root@vcs01 /]#  hagrp  -modify Clusthttpd AutoStartList vcs01
We configure the cluster IP:
[root@vcs01 /]#  hares -add Clusthttpd-vip IP Clusthttpd

[root@vcs01 /]#  hares -modify Clusthttpd-vip Device eth0

[root@vcs01 /]#  hares -modify Clusthttpd-vip Address «192.168.1.191»

[root@vcs01 /]#  hares -modify Clusthttpd-vip NetMask «255.255.255.0»

[root@vcs01 /]#  hares -modify Clusthttpd-vip Enabled 1
We create the volume resource.
[root@vcs01 /]# hares -add Clusvol Mount Clusthttpd

[root@vcs01 /]# hares -modify Clusvol  Critical 0

[root@vcs01 /]# hares -modify Clusvol BlockDevice /dev/vx/dsk/vcsvol/lvnfs

[root@vcs01 /]# hares -modify Clusvol MountPoint /data

[root@vcs01 /]# hares -modify Clusvol FSType ext4

[root@vcs01 /]# hares -modify Clusvol  FsckOpt %-y

[root@vcs01 /]# hares -modify Clusvol Enabled 1
Now we need to add the process, in my case I am going to configure an Apache
[root@vcs01 /]# hares -add  httpd Apache  Clusthttpd

[root@vcs01 /]# hares -modify httpd Critical 0

[root@vcs01 /]# hares -modify httpd httpdDir /usr/sbin

[root@vcs01 /]# hares -modify httpd PidFile /var/run/httpd/httpd.pid

[root@vcs01 /]# hares -modify httpd ConfigFile /etc/httpd/conf/httpd.conf

[root@vcs01 /]# hares -modify httpd EnvFile /etc/sysconfig/httpd
We initialize the services
[root@vcs01 ~]# hares -modify httpd  Enabled 1

[root@vcs01 ~]# hares -modify Clusthttpd-vip  Enabled 1

[root@vcs01 ~]# hares -modify Clusvol  Enabled 1
We link the resources
[root@vcs01 /]# hares -link Clusvol Clusthttpd-vip

[root@vcs01 /]# hares -link httpd Clusvol
We save the configuration
[root@vcs01 /]# haconf -dump -makeroWe start the service
[root@vcs01 /]# hagrp -online Clusthttpd -sys vcs01We check that it starts correctly
[root@vcs01 ~]# hastatus -sum
— SYSTEM STATE

— System               State                Frozen
A  vcs01                RUNNING              0

A  vcs02                RUNNING              0
— GROUP STATE

— Group           System               Probed     AutoDisabled    State
B  ClusterService  vcs01                Y          N               ONLINE

B  ClusterService  vcs02                N          N               OFFLINE

B  Clusthttpd      vcs01                Y          N               ONLINE

B  Clusthttpd      vcs02                N          N               OFFLINE
— RESOURCES FAILED

— Group           Type                 Resource             System
D  ClusterService  NIC                  csgnic               vcs02
— RESOURCES NOT PROBED

— Group           Type                 Resource             System
E  ClusterService  IP                   webip                vcs02

E  Clusthttpd      IP                   Clusthttpd-vip       vcs02
We try to balance the two resources to check that it works correctly:
[root@vcs01 /]#  hagrp -switch  ClusterService -to vcs02
[root@vcs01 /]#  hagrp -online Clusthttpd -sys vcs02
In my case I got an error when balancing the resource, which indicated that in the vcs02 I couldn't find the disk: /dev/vx/dsk/vcsvol/lvnfs
To solve this run the following commands on vcs02:
[root@vcs01 /]#  vxdisk clearimport vcsvol
[root@vcs01 /]#  vxdg -C import vcsvol
[root@vcs01 /]#  vxdg -f import vcsvol
Once executed it allows me to balance the resource to the vcs02 node
[root@vcs01 /]# hastatus -sum
— SYSTEM STATE

— System               State                Frozen
A  vcs01                RUNNING              0

A  vcs02                RUNNING              0
— GROUP STATE

— Group           System               Probed     AutoDisabled    State
B  ClusterService  vcs01                Y          N               OFFLINE

B  ClusterService  vcs02                Y          N               ONLINE

B  Clusthttpd      vcs01                Y          N               OFFLINE

B  Clusthttpd      vcs02                Y          N               ONLINE

[root@vcs01 ~]# hastatus -sum
— SYSTEM STATE

— System               State                Frozen
A  vcs01                RUNNING              0

A  vcs02                RUNNING              0
— GROUP STATE

— Group           System               Probed     AutoDisabled    State
B  ClusterService  vcs01                Y          N               OFFLINE

B  ClusterService  vcs02                Y          N               ONLINE

B  Clusthttpd      vcs01                Y          N               OFFLINE

B  Clusthttpd      vcs02                Y          N               ONLINE
All the best.
:wq!
Comments