
What is an HA Cluster?
A high availability cluster is a set of two or more machines which are characterized by maintaining a series of shared services and constantly monitoring each other. Can
What is HAProxy?
HAProxy (what does it mean high availability Proxy) is a solution open source fast and reliable, what is able to handle huge traffic and offers high availability, load balancing and proxy for TCP and applications HTTP based. Similar to Nginx–Balancer, use a model event oriented single process, which consumes a low (and stable) amount of memory, which allows HAProxy process a large number of concurrent requests at the same time, guarantees a good load balancing with persistence intelligent and mitigation DDoS.
We configure the /etc/hosts file on both nodes
172.20.0.10 proxyinv01.redorbita.com proxyinv01
172.20.0.11 proxyinv02.redorbita.com proxyinv02
172.20.0.12 proxyinv-vip.redorbita.com proxyinv-vip
We list the subscriptions
subscription-manager list –availableWe add the subscription
subscription-manager list –available
subscription-manager attach –pool=8a85f981550f53aa01550fbfd43c69aa
subscription-manager repos –enable=rhel-ha-for-rhel-7-server-rpms
We install the necessary packaging:
Since in my case I will use it as a reverse proxy I will also install Apache.
yum install iptables-services haproxy apache pcs fence-agents-allWe enable the rules in the firewall or deactivate it
firewall-cmd –permanent –add-service=high-availability
firewall-cmd –add-service=high-availability
systemctl stop firewalld
ystemctl disable firewalld
systemctl mask firewalld
We activate iptables
systemctl enable iptables
systemctl start iptablesCambiamos la contraseña al usuario del clusterpasswd hacluster
Changing password for user hacluster.
New password:
Retype new password:
passwd: all authentication tokens updated successfully.We start the service.
systemctl start pcsd.service
systemctl enable pcsd.service
Authorize nodes and user, perform on a single node:
pcs cluster auth proxyinv01.redorbita.com proxyinv02.redorbita.com
Username: hacluster
Password:
proxyinv01.redorbita.com: Authorized
proxyinv02.redorbita.com: Authorized
We create the cluster and enable cluster when starting machines
pcs cluster setup –start –name clusproxyinv proxyinv01.redorbita.com proxyinv02.redorbita.comWe activate the two nodes
pcs cluster enable –allWe check the status of the cluster
pcs cluster status
Cluster Status:
Last updated: Thu Jun 2 11:58:37 2016 Last change: Thu Jun 2 11:38:40 2016 by hacluster via crmd on proxyinv01.redorbita.com
Stack: corosync
Current DC: proxyinv01.redorbita.com (version 1.1.13-10.el7_2.2-44eb2dd) – partition with quorum
2 nodes and 0 resources configured
Online: [proxyinv01.redorbita.com proxyinv02.redorbita.com]
PCSD Status:
proxyinv01.redorbita.com: Online
proxyinv02.redorbita.com: Online
We generate the Fence user in vmware, to do this we go to Roles in vcenter
We generate the Fence user in vmware, to do this we go to Roles in vcenter

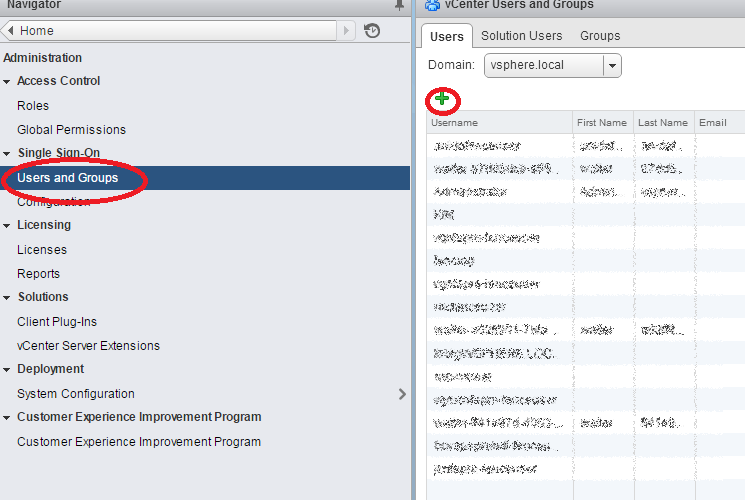
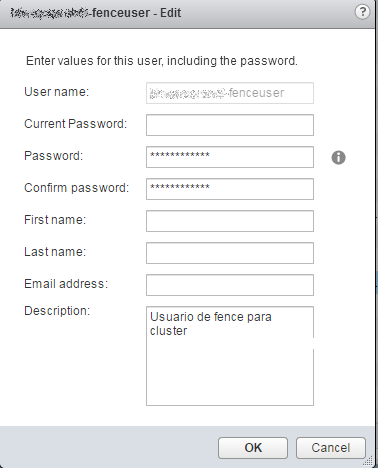
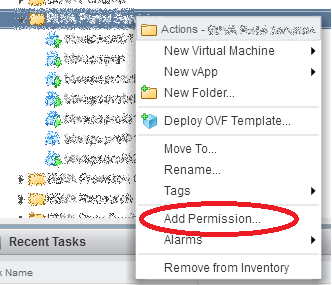
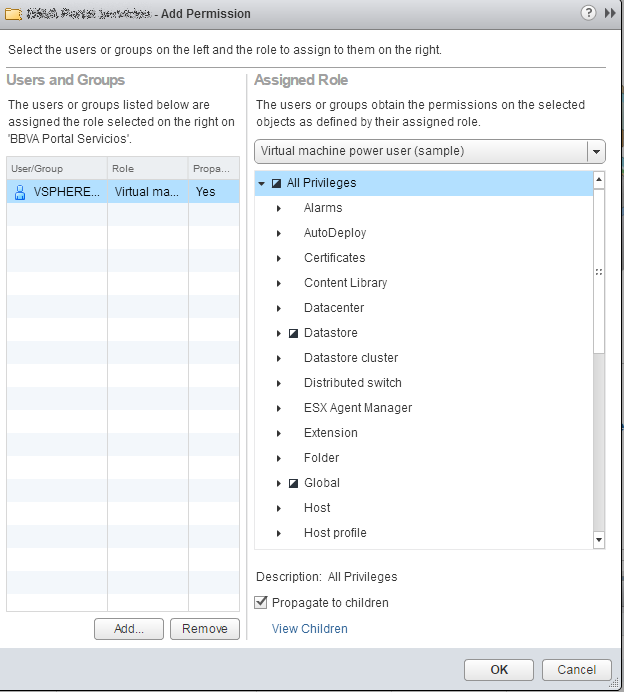
We go to the project folder, right button > Add Permission…
We create the fence resource
pcs stonith create fence fence_vmware_soap pcmk_host_map=»node1:proxyinv01.redorbita.com;node2:proxyinv02.redorbita.com» ipaddr=<ESXi/vCenter IP address> ssl=1 login=fenceuser passwd=fencepassword01.We deactivate the quorum and stonith
pcs property set no-quorum-policy=ignore
pcs property set stonith-enabled=false
We create the resources
pcs resource create proxyinv-vip ocf:heartbeat:IPaddr2 ip=172.20.0.12 cidr_netmask=32 op monitor interval=30s
pcs resource create apache ocf:heartbeat:apache configfile=/etc/httpd/conf/httpd.conf op monitor interval=20s
pcs resource create HAproxy systemd:haproxy op monitor interval=5s
We configure the starting order of resources.
pcs constraint order start proxyinv-vip then apache
pcs constraint order start apache then HAproxy
We create the group and add the resources to this group
pcs resource group add clusproxyinv proxyinv-vip apache HaproxyWe start the resource
pcs resource enable clusproxyinvall the best
:wq!
Comments