
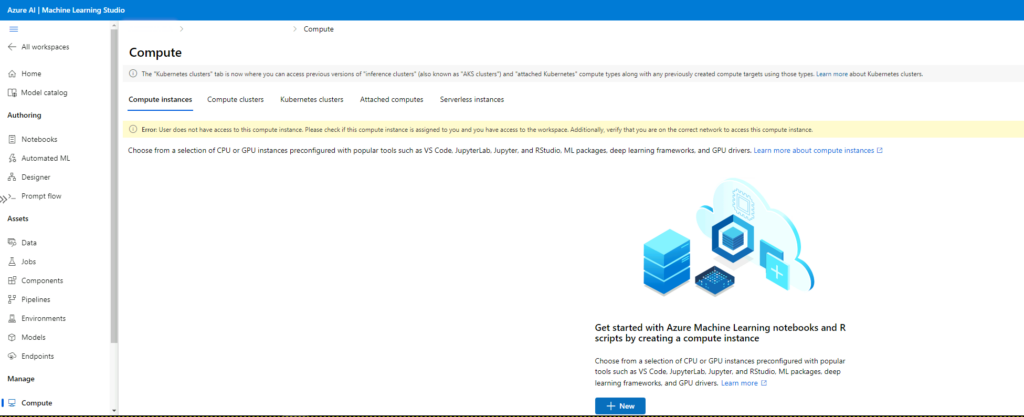
Azure Machine Learning is a Microsoft cloud service designed to simplify and accelerate the development, training, and deployment of large-scale machine learning (ML) models. It offers a cloud-based collaborative environment for data scientists, ML engineers and developers, allowing them to create and manage models with a scalable and secure infrastructure.
One of the key functionalities of Azure Machine Learning is the option to deploy resources Compute. These resources provide the processing power needed to perform intensive ML tasks such as model training, testing, inference, and data processing. Compute allows you to run your experiments efficiently, scaling resource usage depending on the workload.
Specifically, the function of Compute in Azure ML helps us:
- Accelerate development and training of models without the need to manage physical infrastructure.
- Automatically scale resources according to demand, allowing costs to be optimized.
- Provide interactive environments such as JupyterLab, VS Code or RStudio for development, testing and experimentation.
- Run jobs in parallel, which significantly improves the speed and efficiency of model training.
In this article, I will show you how to deploy an instance of Compute in Azure Machine Learning step by step, so you can take advantage of the full potential of this service in your artificial intelligence projects.
1. Prerequisites
Before deploying a resource Compute In Azure Machine Learning, make sure you meet the following requirements:
- Azure account: You must have an active subscription in Azure. You can create a free account at azure.com if you don't have one.
- Azure Machine Learning Workspace: You need a workspace of AML created in your subscription. If you don't have one yet, follow these steps:
- In the Azure portal, search “Machine Learning” in the search bar.
- Click Machine Learning, then select + New workspace and fill in the necessary details.
- Azure CLI o access to the Azure portal: Optionally, you can use the graphical user interface (GUI) in the Azure portal or use the CLI to configure.
2. Create a Compute Instance
Method 1: Using the Azure portal
-
Access the Azure Machine Learning Workspace:
- Go to the Azure portal, navigate to your workspace of Machine Learning.
- In the left panel, select Compute.
-
Select the type of Compute:
- Four tabs will appear at the top: Compute instances, Compute clusters, Inference clusters, and Attached compute.
- Select the tab Compute instances if you need a machine for interactive development and testing.
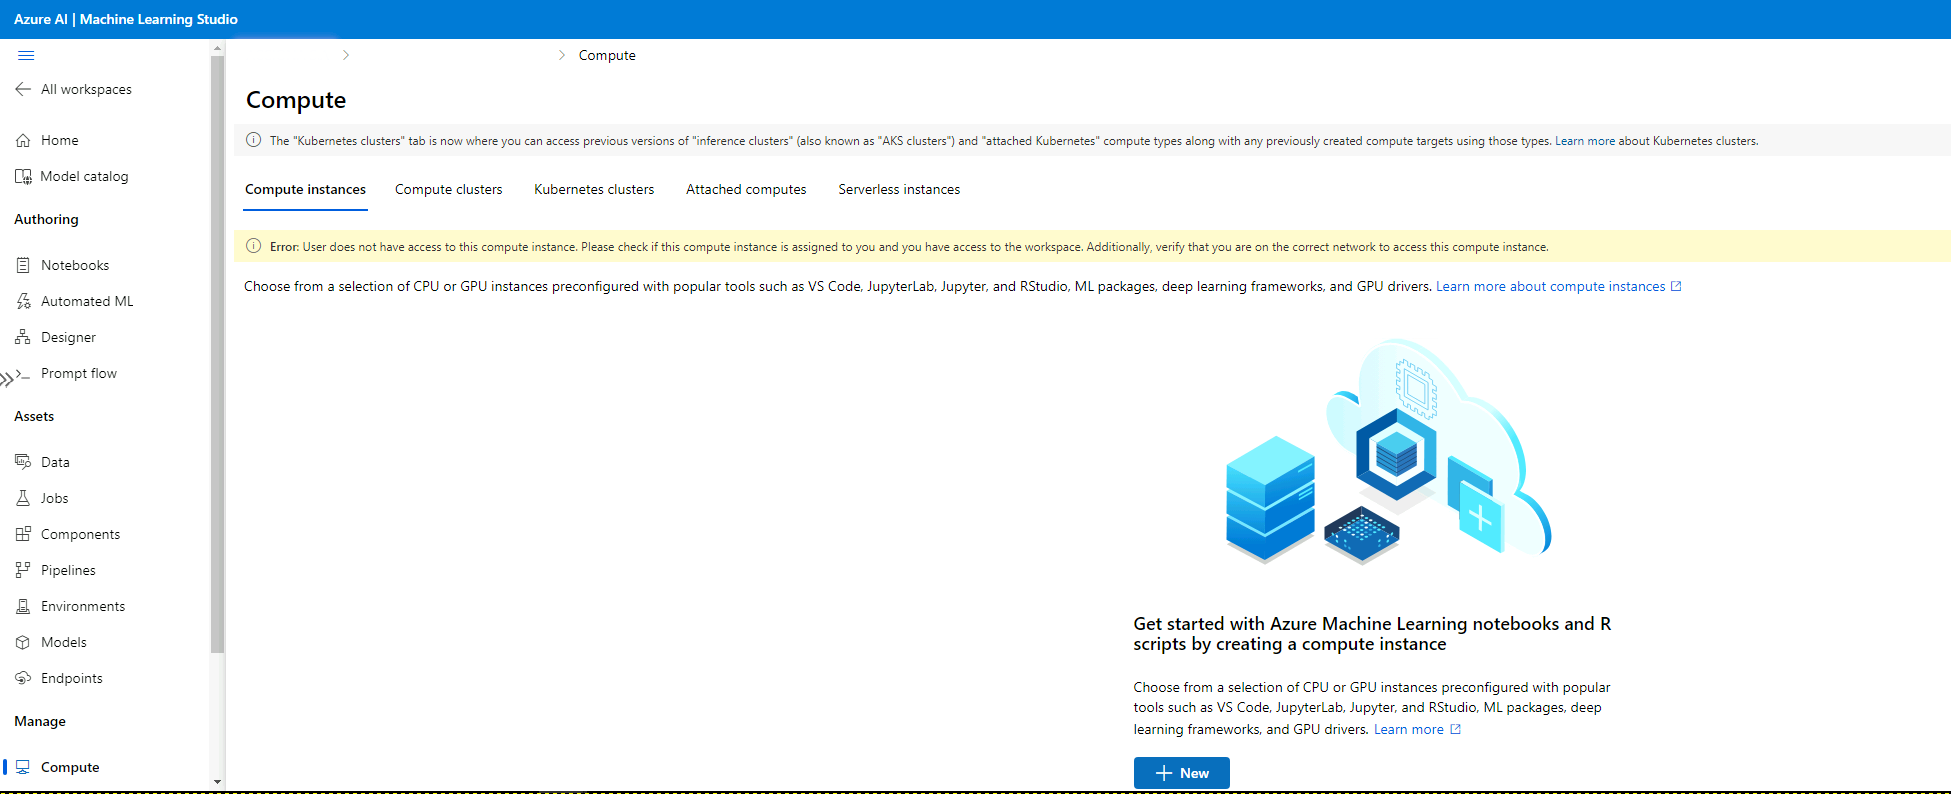
Create a Compute Instance:
- Click + New.
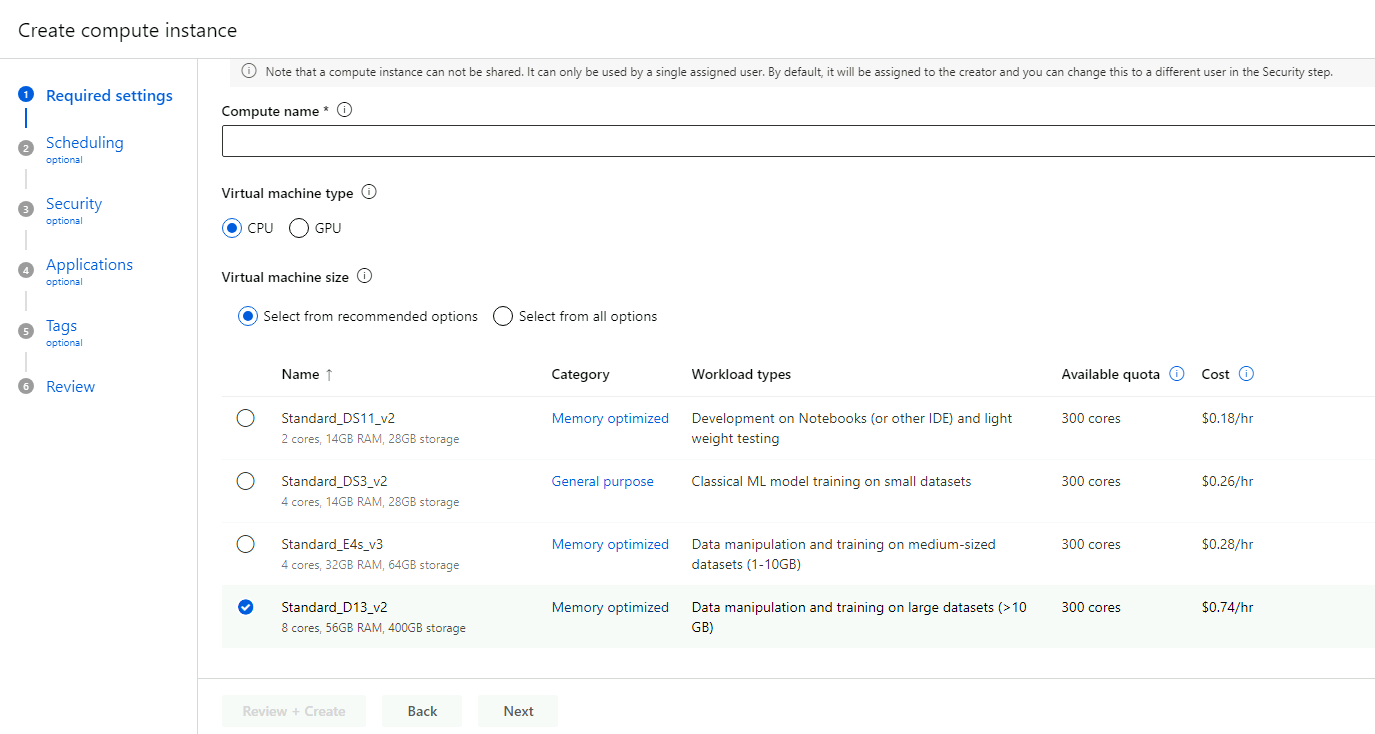
- Fill in the details:
- Name: Choose a unique name for your resource.
- Region: The same region as you workspace of AML.
- Virtual machine type: Select the type of virtual machine you want to use, such as Standard_DS3_v2 either NC6 for GPU.
- VM size: Select the size of the machine according to your needs. If you need GPUs, be sure to choose a GPU compatible size.
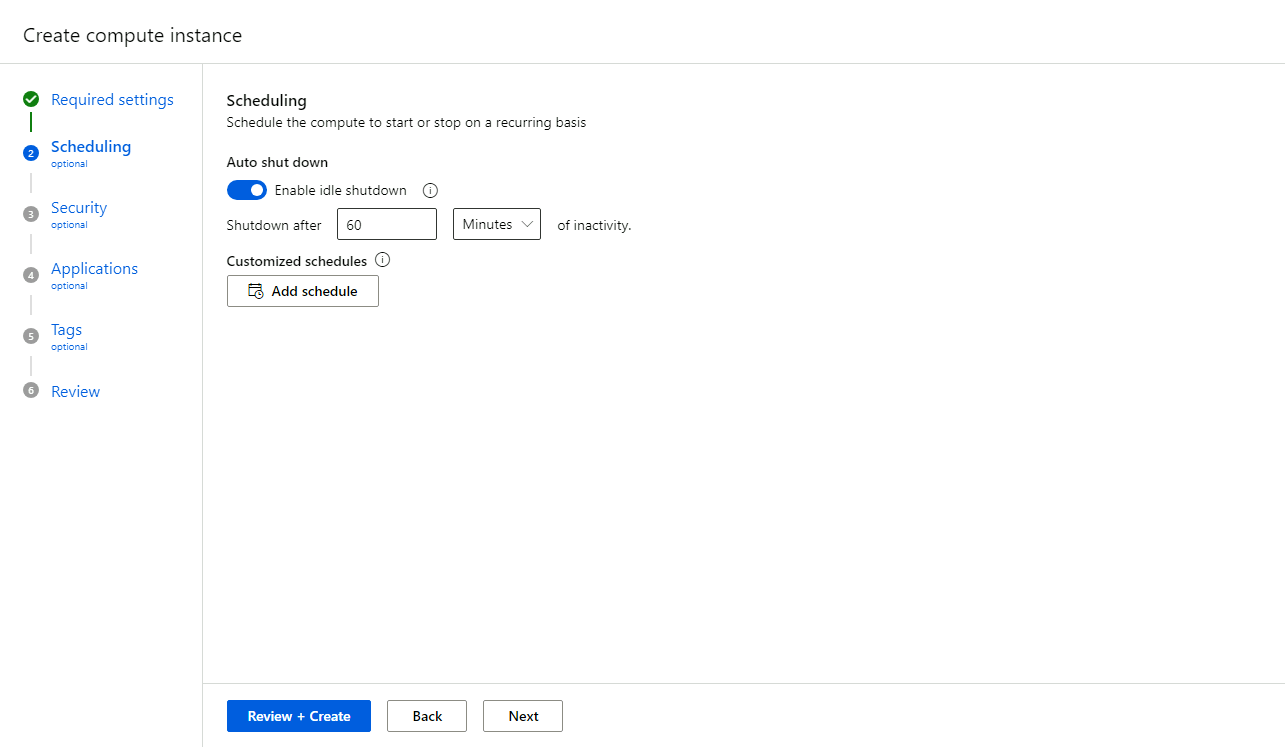
If you want to configure an automatic shutdown, enable the option Auto Shut Down and set the time at which you want the resource to turn off automatically.
In the section Security, you can assign the resource Compute to a specific user, configure SSH access, configure network options, and enable Single Sign-On (SSO) authentication.
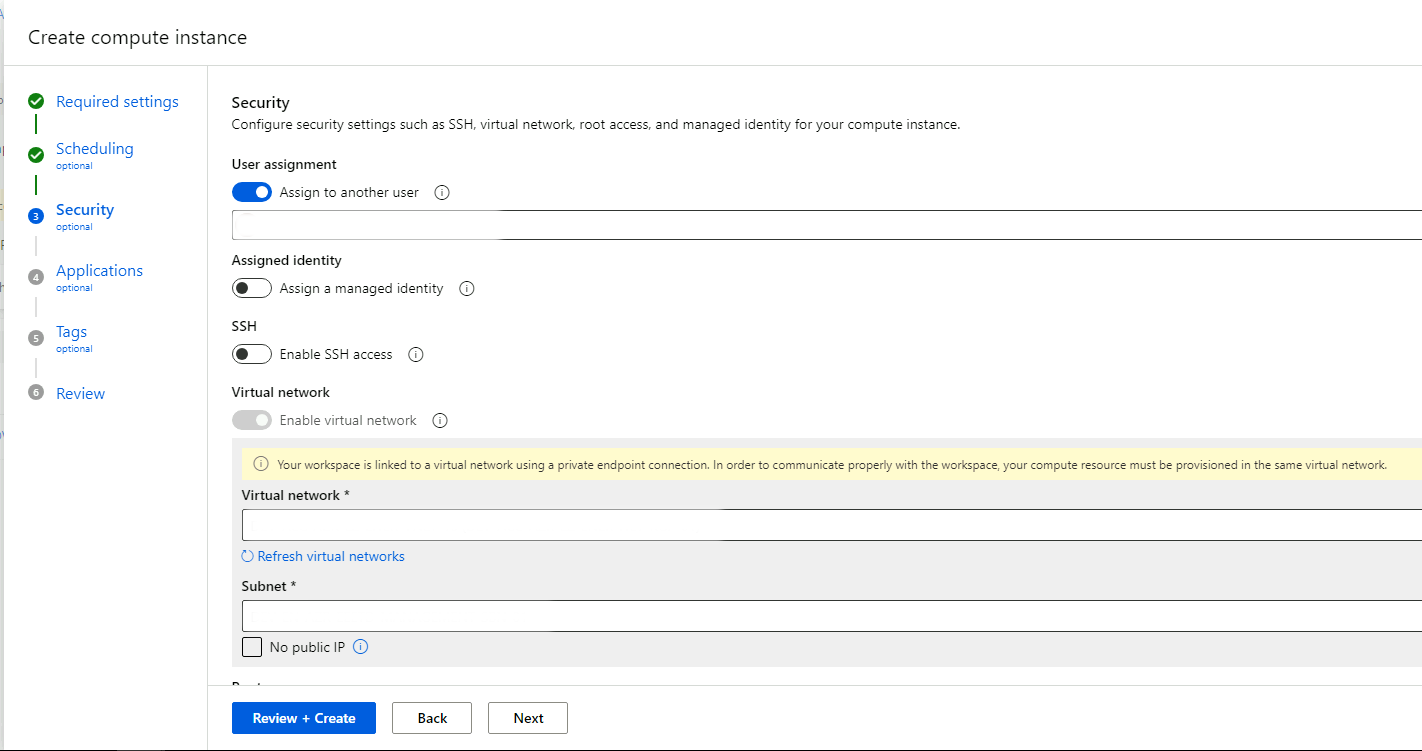
I won't go too deep into the sections Applications and Tags, since its use depends on the specific case. However, an example in Applications could be installing additional tools like JupyterLab, VSCode either RStudio. These applications allow an interactive development environment to run and test your models directly on the instance. Compute. This section is useful for customizing the environment according to the needs of your project.
Configure the VM environment:
- In the advanced options, you can select the operating system and the predefined image. Azure Machine Learning offers images that include tools like Jupyter, VSCode, and RStudio.
Create the resource:
Review the settings and click Create. This process will take a few minutes to complete. Once ready, your compute instance will be available for use.
Method 2: Using Azure CLI
You can create a resource Compute using the following command in the Azure CLI:
# Conéctate a tu suscripción de Azure
az login

# Selecciona la suscripción correcta
az account set --subscription "tu-subscription-id"

# Crea una compute instance
az ml compute create --name my-compute-instance --size Standard_DS3_v2 --workspace-name my-workspace --resource-group my-resource-group --type ComputeInstance
- my-compute-instance: Name of the computing instance.
- Standard_DS3_v2: Type of virtual machine. You can change this value according to your needs.
3. Check Compute
After creating the resource, you can check its status and manage it:
- From the Azure portal, access again Compute inside you workspace.
- Here you will see the list of compute instances you have created. The newly created resource should appear with the status Running (Running).
4. Use Compute in an Experiment
Open Jupyter/VSCode:
- Within the portal, you can directly open Jupyter or VSCode by clicking on the name of the compute instance and selecting Jupyter either VSCode.
Run Machine Learning Scripts:
- With the compute instance configured, you can use it to run notebooks or ML scripts directly from the environment you have selected.
:wq!
Comments