
Season 1 · Part 1. From a Proxmark3 Easy running 2016 firmware to Iceman, with commands explained from scratch, the failures we encountered and final checks of both antennas.
Starting at the beginning: preparing our tool
This is the first installment of RFID & NFC Hacking from scratch. We will learn together, from connecting a tool to a computer to understanding protocols and evaluating complete lab systems. No card-cloning or cryptography knowledge is required to get started.
Today we will not read or modify cards. This installment aims to prepare the Proxmark3: identify the hardware, check how Linux detects it, discover its existing firmware and, after verifying compatibility, install Iceman and check the result.
We will use only our own equipment or explicitly authorized environments. Owning a tool that can interact with a credential does not grant permission to test someone else's systems.
Before buying: not every RFID device will work
The Proxmark3 is an RFID research platform. It works with LF and HF technologies; our series will use 125 kHz tags and 13.56 MHz cards. A USB reader that types a number like a keyboard, an RC522 module or a PN532-based NFC reader is not a Proxmark3 and cannot run this firmware simply because it reads RFID.
There are also different Proxmark3 revisions and derivatives. Compatibility depends on the board, microcontroller, memory, FPGA and project support, not the case color or the listing's marketing name.
Firmware, client and bootloader: three separate components
- Firmware: the program running inside the Proxmark3.
- Client: the program running on our computer that communicates with it.
- Bootloader: startup code involved in loading and updating the firmware. Modifying it requires particular care.
Here, Iceman refers to the RfidResearchGroup/proxmark3 project. Its documentation recommends keeping client and firmware synchronized. Buying a preflashed unit does not mean that any client downloaded later will be compatible.
Which models to consider
This table summarizes the official compilation-parameter documentation, consulted on September 10, 2026. It does not replace identifying the actual unit in front of us.
| Hardware | Status | What to check before flashing |
|---|---|---|
| Proxmark3 RDV4 / RDV4.01 | Supported platform, PM3RDV4 target | Revision and accessories; do not transfer its configuration to an Easy. |
| Proxmark3 Easy and compatible generic boards | PM3GENERIC target | Actual hardware and flash size; the project recommends at least 512 KB of ARM flash for non-RDV4 devices. |
| Older 256 KB Easy | May require a reduced build | The full firmware may not fit; features and image size need checking. Not the recommended purchase for comfortably following this series. |
| PM3 Evo | Documentation warns about different LED and button pins | Do not assume Easy or RDV4 behavior. |
| Proxmark Pro | Listed as unsupported in that documentation | Do not mistake the name for a supported Proxmark3. |
| Other RFID/NFC readers or copiers | Not interchangeable with this platform | Do not try to install Proxmark3 images on them. |
512 KB of microcontroller flash is not the same as the external SPI memory on some boards. Simply asking a seller for "more memory" can cause confusion.
The device we use in this lab
For this series we use a 512 KB Proxmark3 Easy, purchased from AliExpress. It is an inexpensive alternative to the RDV4, with LF and HF antennas and a USB connection to the computer.
Our unit contains an AT91SAM7S512 Rev A with 512 KB of flash and 64 KB of SRAM, confirmed through the Proxmark3 client. We use the PM3GENERIC compilation target to prepare Iceman. Later we will show how to query these details on your own device before choosing firmware.
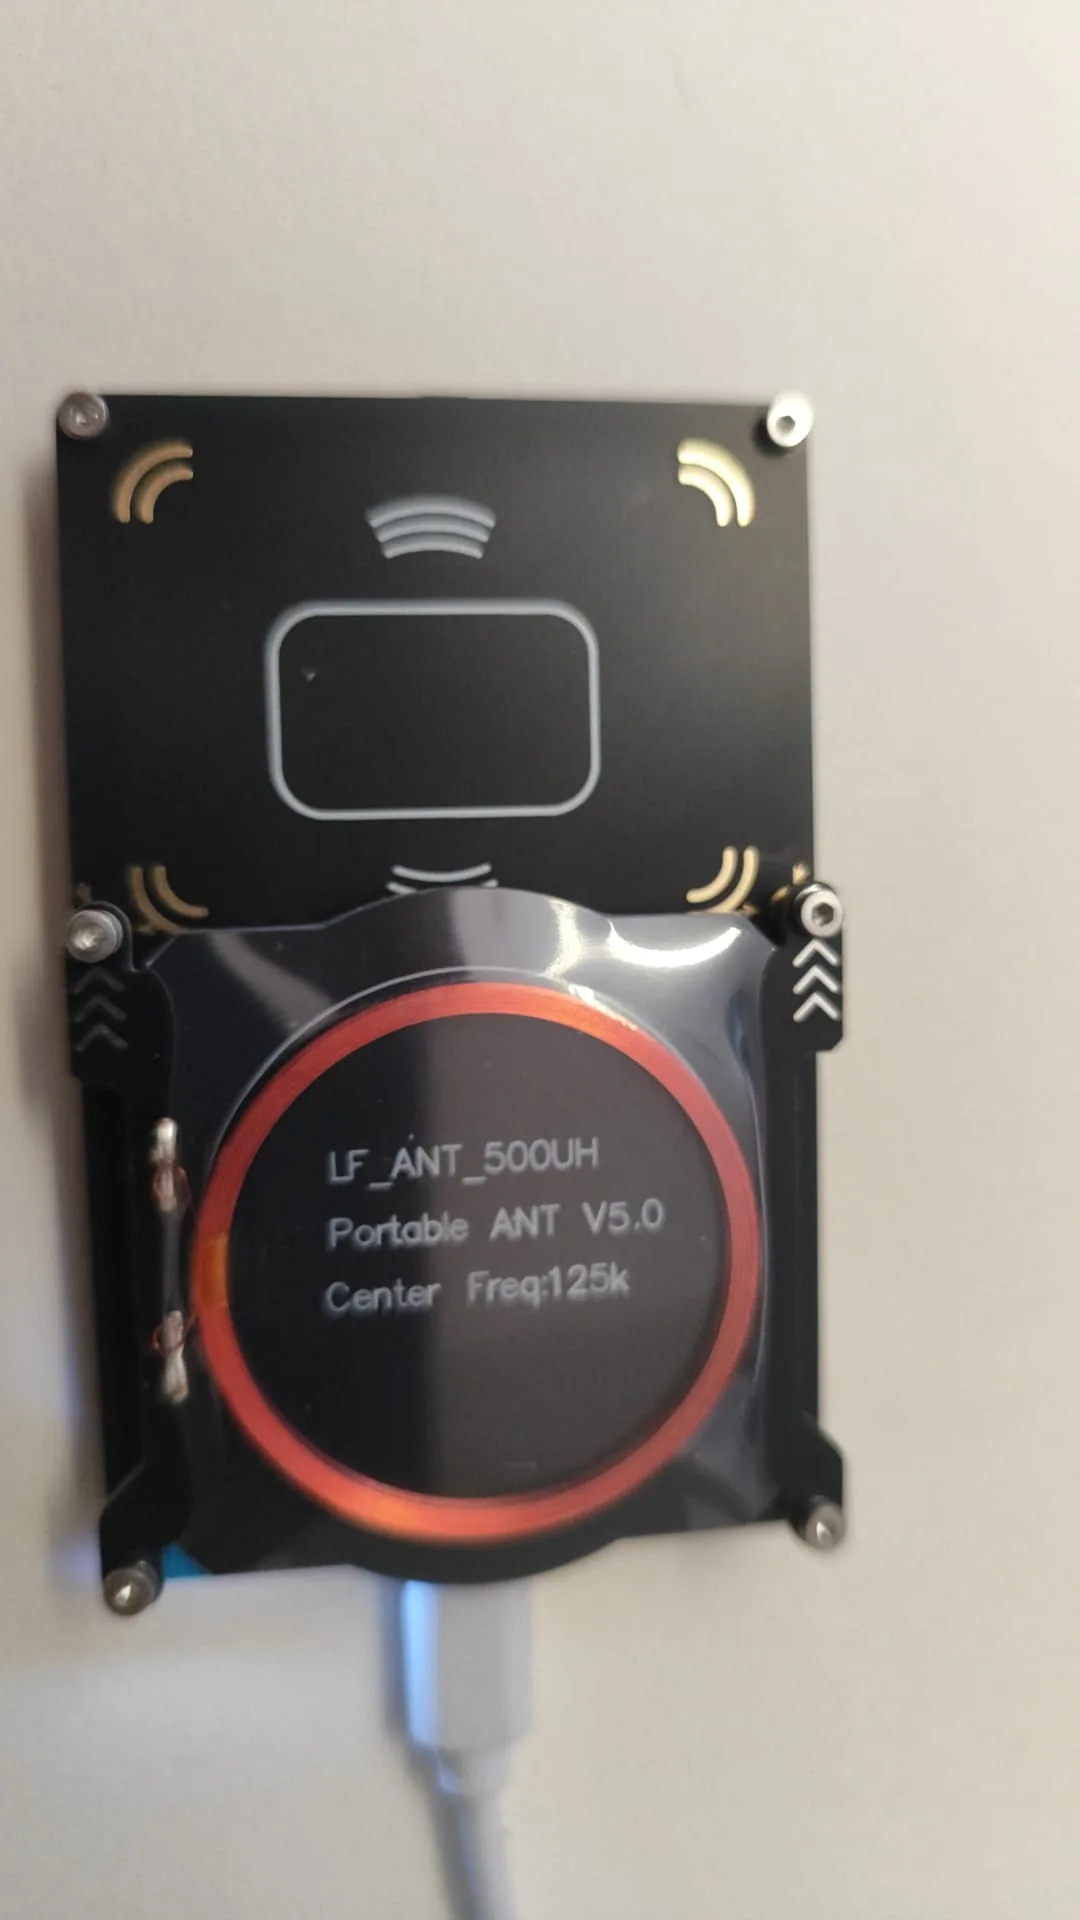
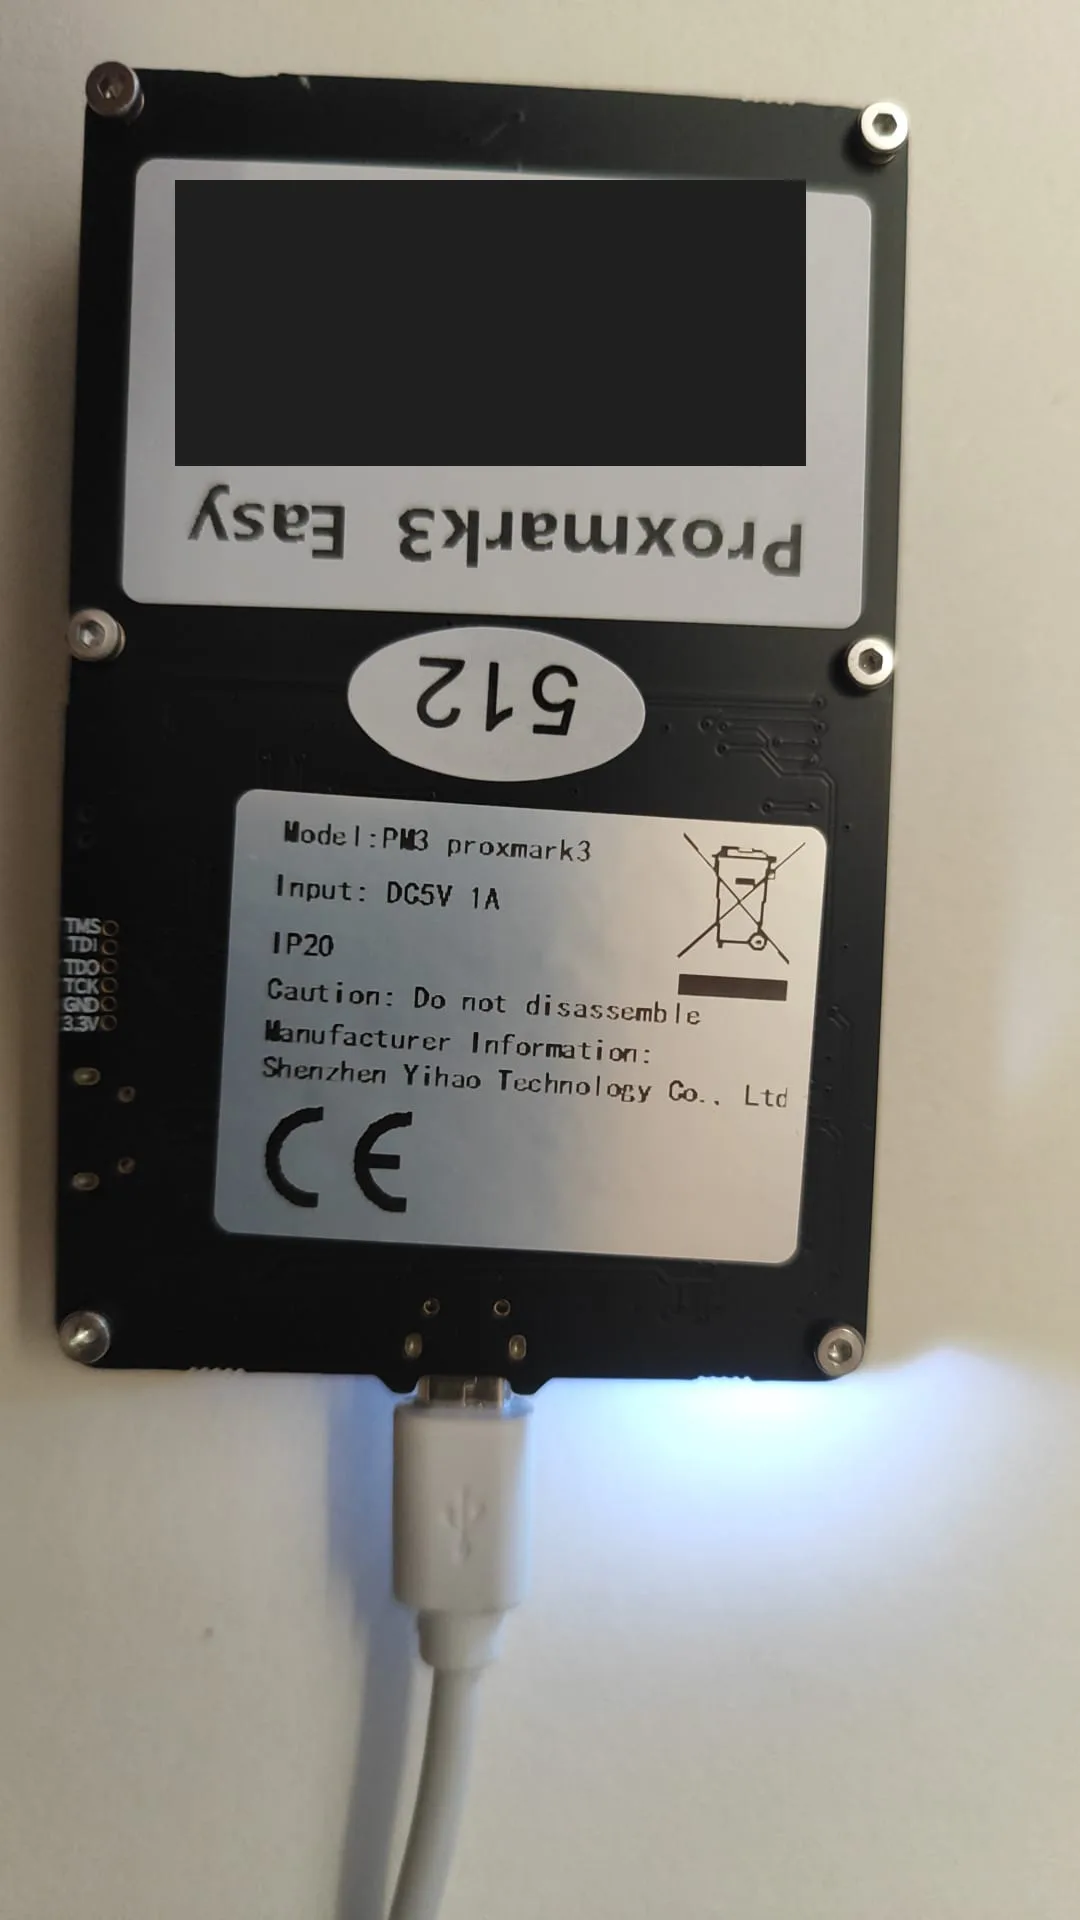
The device arrived with firmware from 2016. That is our starting point: check its operation and prepare the Iceman upgrade, documenting each step and the problems we encounter.
Purchasing alternatives with documentation and support
- KSEC Proxmark3 Easy: its listing advertises 512 KB of ARM flash and preinstalled, tested Iceman bootloader and firmware. It is an option for avoiding the initial migration from unknown factory firmware. A compatible client still needs to be prepared.
- Lab401 Proxmark3 RDV4.01: an RDV4-platform alternative with modular antennas and expansion options. The listing links the RRG project for compilation and flashing. Confirm the shipped firmware version and recommended client with the shop before buying; we did not verify an explicit promise of a particular preinstalled Iceman version in the listing we consulted.
The most expensive option is not necessary for learning the basics. A compatible 512 KB Easy can be sufficient for the first labs; an RDV4 adds hardware capabilities that flashing an Easy cannot provide. Store terms and shipped versions may change.
Step 1. Connect the Proxmark3 without modifying anything
We need the device, its antennas and a USB data cable. Lit LEDs demonstrate power, not communication with the computer.
On the unit used in this lab, the small power button also needs to be operated to switch it on. Do not assume connecting the cable is sufficient: make sure the device is switched on before looking for it with lsusb. During our tests we left it switched off, which caused part of the "device not detected" investigation.
This applies to our Easy variant, not every Proxmark3. Do not confuse powering on with holding the user button while connecting to enter the bootloader, which we explain during the upgrade. Do not press buttons or disconnect the cable while firmware is being written.
Our first connection used a front-panel USB port. Since there were doubts about that port, we started by checking whether the system enumerated the device. For firmware updates we will use a reliable connection: if the front panel is questionable, try a rear motherboard port and a known-good cable.
In a Linux terminal, run:
lsusblsusb lists USB devices known to the system. This is the actual Proxmark3 line extracted from our full output:
Bus 003 Device 032: ID 2d2d:504d proxmark.org Proxmark3The observed USB identifier is 2d2d:504d. Bus and device numbers may change after reconnecting. This line confirms USB communication, but does not by itself identify the board revision, flash capacity or installed firmware.
If no new device appears, check the cable, port and physical connection before installing firmware. Flashing cannot fix a power or cable problem.
Step 2. Locate the communication port
To locate the port without guessing its name, we list the links Linux has created for identified serial devices:
ls -l /dev/serial/by-id/The -l option displays a detailed listing, including the destination of symbolic links. Our check returned:
total 0
lrwxrwxrwx 1 root root 13 sep 10 12:23 usb-proxmark.org_504d-if00 -> ../../ttyACM0
The entry usb-proxmark.org_504d-if00 corresponds to our Proxmark3. The arrow -> ../../ttyACM0 means the link points to /dev/ttyACM0: the two .. components go up from /dev/serial/by-id/ to /dev/. Combining the directory we listed with the entry name gives the full path:
/dev/serial/by-id/usb-proxmark.org_504d-if00We inspected its properties with:
udevadm info --query=property --name=/dev/serial/by-id/usb-proxmark.org_504d-if00udevadm queries information Linux maintains about the device. Here are selected actual response lines:
DEVNAME=/dev/ttyACM0
ID_VENDOR_ID=2d2d
ID_MODEL_ID=504d
ID_USB_DRIVER=cdc_acm
For this connection, the port is /dev/ttyACM0, using the cdc_acm driver. The client will use that port to communicate with the Proxmark3. The number can differ on another computer or after reconnection. If the identifier-based link is absent on your system, locate the interface that was actually created rather than blindly copying our path.
Creating the port does not yet prove that our user can open it or that a client can exchange commands with the firmware. Those are separate checks.
Step 3. Look for connection errors without mistaking permissions for failures
We searched recent events with:
journalctl -k --since "10 minutes ago" --no-pager --grep='(?i)usb|cdc_acm|ttyACM|proxmark' -n 70This queries kernel messages from the last ten minutes, filtered for USB and serial-port terms. Our session returned:
Hint: You are currently not seeing messages from other users and the system.
      Users in groups 'adm', 'systemd-journal' can see all messages.
      Pass -q to turn off this notice.
-- No entries --
This does not prove there are no USB errors. The warning means we lacked sufficient log access. USB detection works, but this query cannot rule out recent disconnections.
We repeated the query with authorized administrative privileges:
sudo journalctl -k --since '2 hours ago' --no-pager --grep='(?i)3-14|ttyACM|cdc_acm|proxmark' -n 60The 3-14 filter matches our initial connection, not a universal path. Actual excerpts, with the hostname removed and arranged chronologically:
11:38:16 usb 3-14: device descriptor read/64, error -110
11:38:17 cdc_acm 3-14:1.0: ttyACM0: USB ACM device
11:38:33 usb 3-14: USB disconnect, device number 29
11:38:53 usb 3-14: device descriptor read/64, error -110
11:38:53 cdc_acm 3-14:1.0: ttyACM0: USB ACM device
During these tests we deliberately disconnected and reconnected the cable. The USB disconnect entries correspond to those actions, not evidence of spontaneous disconnections. -110 is a timeout during USB identification; in this context it does not by itself prove a fault. We moved to a rear USB port and queried the log again:
sudo journalctl -k --since '5 minutes ago' --no-pager --grep='(?i)usb|ttyACM|cdc_acm' -n 45Actual excerpt without the hostname:
12:21:18 usb 3-14: USB disconnect, device number 32
12:21:33 usb 3-8: device descriptor read/64, error -71
12:21:49 usb 3-8: new full-speed USB device number 46 using xhci_hcd
12:21:50 cdc_acm 3-8:1.0: ttyACM0: USB ACM device
-71 indicates a USB protocol error observed during connection. The device subsequently enumerated and answered queries. To assess stability we need to observe it without handling the cable, separately from our port and cable changes.
A subsequent check did confirm reconnection with the replacement cable. Actual excerpt without the hostname:
12:23:27 usb 3-8: USB disconnect, device number 46
12:23:29 usb 3-8: new full-speed USB device number 47 using xhci_hcd
12:23:44 usb 3-8: device descriptor read/64, error -110
12:23:45 cdc_acm 3-8:1.0: ttyACM0: USB ACM device
This log also corresponds to a manual reconnection. These events alone do not demonstrate persistent device instability. Nor can we assert that unplugging explains every timeout. Step 8 covers the check without handling the cable, separately from these connection changes.
Step 4. Check Linux, permissions and potential interference
Diagnostic dependencies
On Debian, Ubuntu and Kali, fuser comes from psmisc and mmcli comes from modemmanager. Check whether the commands are available with:
command -v fuser
command -v mmcli
If fuser is missing, install its package:
sudo apt-get update
sudo apt-get install --no-install-recommends psmisc
mmcli queries ModemManager. If you need that tool, install it with:
sudo apt-get install --no-install-recommends modemmanagerModemManager is not a Proxmark3 dependency. Installing this package also adds the service we are checking and may activate it. If it is not installed and you do not need it for a modem, do not add it solely for this lab: skip mmcli -L and the steps to stop/restore that service. Both packages were already installed on our PC; these installation commands are provided for readers who lack them.
Checks
Our actual environment is Debian GNU/Linux 13 (trixie), 13.6. The session belongs to dialout. We checked permissions and processes potentially holding the port:
id
stat -Lc '%n %a %U %G' /dev/serial/by-id/usb-proxmark.org_504d-if00
fuser -v /dev/ttyACM0
systemctl is-active ModemManager
mmcli -L
The port has 660 permissions, owned by root, group dialout. fuser showed no processes, ModemManager returned active and mmcli -L returned No modems were found. No permission or group changes were needed.
ModemManager can probe serial ports and interfere with Proxmark3. For our queries we stopped it temporarily and restored it afterwards, without uninstalling, disabling or permanently configuring it. On another machine first check whether a modem is needed for connectivity. Before any future flashing we will prevent interference throughout the operation; a single observation that the port is free is insufficient.
Step 5. Prepare and compile Iceman without flashing
Neither a Proxmark3 client nor an ARM compiler was in PATH. GCC, Make, Git and pkg-config were available. Following RRG's Linux documentation, we simulated dependency installation before installing the missing packages:
sudo apt-get --simulate install --no-install-recommends git ca-certificates build-essential pkg-config libreadline-dev gcc-arm-none-eabi libnewlib-dev qt6-base-dev libbz2-dev liblz4-dev zlib1g-dev libbluetooth-dev libpython3-dev libssl-dev libgd-dev
sudo apt-get install -y --no-install-recommends libreadline-dev gcc-arm-none-eabi libnewlib-dev qt6-base-dev liblz4-dev libbluetooth-dev libgd-dev
The second command reflects our machine: the other packages were already installed. A clean installation needs the full list. This added 27 packages without upgrading or removing existing packages. The simulation warned about pre-existing duplicate APT sources; we did not edit repositories, perform a general upgrade or run autoremove.
Download the official source with Git
We will use Git, without needing GitHub CLI (gh), a GitHub account or a token. If Git is not installed:
sudo apt-get install --no-install-recommends git ca-certificates
git --version
The official repository is https://github.com/RfidResearchGroup/proxmark3. A repository contains the project's source code and change history; cloning downloads a copy to our computer.
These steps reproduce the download using Git and store the code in our home directory instead of the lab's temporary location:
mkdir -p "$HOME/rfid-lab"
cd "$HOME/rfid-lab"
git clone https://github.com/RfidResearchGroup/proxmark3.git proxmark3
cd proxmark3
mkdir -pcreates the working directory if it does not exist.$HOMErepresents your home directory.cdchanges the directory we are working in.git clonedownloads the repository from the full URL and creates theproxmark3subdirectory. It does not install programs or flash the device.- The final
cdtakes us into the downloaded source:$HOME/rfid-lab/proxmark3.
If Git reports that proxmark3 already exists and is not empty, do not delete it: first check whether it already contains your project copy.
The revision used in our lab was 0884083530e2bab92499c4ae5db040eff5d99c97. To use that same code rather than a version that may have changed since publication, select that commit and check the result:
git checkout --detach 0884083530e2bab92499c4ae5db040eff5d99c97
git log -1 --format='%H %cs %s'
A commit identifies a particular code version. A detached HEAD notice is normal here: we are working on that version rather than following a branch's changes. git log -1 shows the latest selected commit; %H prints its full identifier, %cs its date and %s its description. Check that the identifier matches before compiling.
Create the configuration file
We will create a file named Makefile.platform inside the project directory. Its path will be $HOME/rfid-lab/proxmark3/Makefile.platform. It does not belong inside client or any other subdirectory.
First enter the directory and check where you are:
cd "$HOME/rfid-lab/proxmark3"
pwd
pwd displays the current directory's path. It should end in /rfid-lab/proxmark3. If cd reports that the directory does not exist, return to the download step; do not continue by creating the file somewhere else.
We will use the vi editor. Check whether it is available:
command -v viIf no path is printed, you can install it on Debian with:
sudo apt-get install --no-install-recommends vim-tinyOpen the file from the project directory, without sudo:
vi Makefile.platformIf the file does not exist, vi opens a new one. If it already contains a previous configuration, review it before making changes: do not add duplicate PLATFORM or PLATFORM_SIZE lines.
To create the new file:
- Press
ito enter insert mode. You can now type. - Enter these two lines exactly, preserving capitalization. They are file contents, not commands to run in the terminal:
PLATFORM=PM3GENERIC
PLATFORM_SIZE=512- Press
Escto leave insert mode. - Type
:wqand pressEnter. This saves the file and closes the editor. To quit without saving instead, pressEsc, type:q!and pressEnter.
Back in the terminal, check what you saved:
cat Makefile.platformIt should display the two lines above. PLATFORM=PM3GENERIC selects the generic platform used by our Easy; PLATFORM_SIZE=512 configures the image size limit for 512 KB of flash.
At that point this was the candidate configuration based on the labels and listing; the legacy client later confirmed capacity. Writing 512 in this file configures the build; it does not detect the chip.
Compile from the project directory
While still in $HOME/rfid-lab/proxmark3, run:
make -j4This uses four parallel jobs without running the client as root or installing it globally. Actual excerpts:
Version info:      Iceman/master/0884083
Platform name:     Proxmark3 generic target
PLATFORM:          PM3GENERIC
PLATFORM_FPGA:     xc2s30
PLATFORM_SIZE:     512
Firmware size: 415417 bytes (405kb) = 79% of 512kb
Compilation succeeded with ARM GCC 14.2.1 and a client using Qt6 6.8.2. Client, bootloader, fullimage and recovery image were generated locally. The generated recovery image is not a backup of the device's original firmware. At this stage none had been written to the Proxmark3.
Step 6. First attempt: the modern client cannot understand factory firmware
From the RRG project directory (cd "$HOME/rfid-lab/proxmark3"), with ModemManager temporarily stopped, we ran:
timeout 35s ./client/proxmark3 /dev/ttyACM0 -c 'hw version'The timeout was used only for this non-writing query, not to interrupt flashing. Actual result:
[+] Using UART port /dev/ttyACM0
unknown command:: 0x61334d50[!!] ERROR: cannot communicate with the Proxmark3
The device enumerates and responds but does not recognize the modern client's exchange. We did not treat this as proof of broken hardware or use --force. We restored ModemManager and tried the legacy upstream client to query the existing firmware.
Step 7. Legacy client: identify before updating
For this diagnosis we used the legacy repository https://github.com/Proxmark/proxmark3, separate from RRG/Iceman. Download it into another directory to avoid mixing the two clients. The Git sequence is:
cd "$HOME/rfid-lab"
git clone https://github.com/Proxmark/proxmark3.git proxmark3-legacy
cd proxmark3-legacy
git checkout --detach 118eca80df79f9bb6604f896faafeb2fd425893e
git log -1 --format='%H %cs %s'
The destination is now $HOME/rfid-lab/proxmark3-legacy. We select revision 118eca80df79f9bb6604f896faafeb2fd425893e, used in this diagnosis. From that directory we attempted compilation:
make -j4 clientIt failed with Package 'libpcsclite' ... not found and fatal error: winscard.h: No existe el fichero o el directorio. We installed the legacy client's missing dependency and retried:
sudo apt-get install -y --no-install-recommends libpcsclite-dev
make -j4 client
Compilation finished with warnings in the older code. We used this client only for version diagnostics, not other protocol experiments or flashing its images.
In a subshell that restores ModemManager afterwards, the query procedure was:
(
  sudo systemctl stop ModemManager || exit 1
  trap 'sudo systemctl start ModemManager' EXIT
  timeout 35s ./client/proxmark3 /dev/ttyACM0 -c 'hw version'
)
This example restores the service because it was initially active on our PC. Actual response excerpt, omitting the firmware modifier's email address:
bootrom: /-suspect 2016-11-09 00:59:56
os: /-suspect 2016-11-14 03:06:26
HF FPGA image built on 2015/03/09 at 08:41:42
uC: AT91SAM7S512 Rev A
Embedded Processor: ARM7TDMI
Nonvolatile Program Memory Size: 512K bytes. Used: 0 bytes ( 0%). Free: 524288 bytes (100%).
Internal SRAM Size: 64K bytes
We now have software identification of 512 KB flash and 64 KB SRAM. Rev A is the microcontroller revision, not the whole board's revision. The dates and /-suspect are what this firmware reports, not a verifiable commit identifier. Nor should Used: 0 be interpreted as empty flash: the device is running firmware and that calculation is unreliable in this legacy combination.
After the query we verified that ModemManager was active again. No permanent service or serial-permission changes were made.
Step 8. Checks before writing
Without touching the cable, we repeated three legacy hw version queries, leaving ten seconds between them. All three answered; querying kernel logs for that interval returned -- No entries --. This does not guarantee freedom from future problems, but no new errors were observed during that test.
To reproduce this check, from $HOME/rfid-lab/proxmark3-legacy, with ModemManager stopped as described earlier, run this query three times, waiting ten seconds between executions:
./client/proxmark3 /dev/ttyACM0 -c 'hw version'Then inspect that interval with sudo journalctl -k --since '2 minutes ago' --no-pager. Stop before writing if new errors appear without touching the cable. Do not confuse earlier events with this test's results.
Return to the RRG project, containing the new client and images:
cd "$HOME/rfid-lab/proxmark3"
pwd
sha256sum bootrom/obj/bootrom.elf armsrc/obj/fullimage.elf
sha256sum calculates a fingerprint for each file, useful for recording exactly which image was used. It does not certify compatibility or replace a maintainer's signature. Our images had these hashes; another build may differ due to timestamps or tools:
4137ad4cc4a01c9d452103d22a90a9396d7d39c5eb92087d5fef6acfa80fc29a  bootrom/obj/bootrom.elf
feb45e86e1c02066af443ef576e736a0599ba2b6609d3c9e80dcaa7d6d946b83  armsrc/obj/fullimage.elf
We do not have a restorable factory-firmware backup. Before proceeding we reviewed the official compilation and flashing guide: for this old migration we update the bootloader first, then the main firmware, in separate operations. Having 512 KB flash does not guarantee that the old bootloader supports writing above 256 KB.
Do not disconnect the cable, press the button, close the terminal or suspend the PC during writing. Interrupting a bootloader update may require JTAG recovery. The following commands apply to our identified Easy and the images built for it, not any RFID reader.
Because ModemManager was active, we stopped it before the entire operation:
sudo systemctl stop ModemManager
systemctl is-active ModemManager
The second command should show inactive. If the service does not exist, you do not need to install it. Close any other client using the Proxmark too. Keep the service stopped until completion or a safe recovery pause.
Step 9. Update only the bootloader
From $HOME/rfid-lab/proxmark3, using the port checked earlier:
./client/proxmark3 /dev/ttyACM0 --flash --unlock-bootloader --image bootrom/obj/bootrom.elf./client/proxmark3is the freshly compiled client, not the legacy one./dev/ttyACM0is our connection's port; check yours before executing.--flashselects firmware-writing mode.--unlock-bootloaderpermits writing the startup region: needed here, not in the next step.--imageselects the file to write. Here we provide onlybootrom.elf.
The client automatically restarted the device to enter the bootloader. Actual output excerpts:
Entering bootloader...
Note: Your bootloader does not understand the new CMD_BL_VERSION command
Bootloader does not support CMD_CHIP_TYPE, assuming AT91 platform
Note: Your bootloader does not understand the new CHIP_INFO command
Your bootloader is outdated, but this operation will update it
Available memory on this board: UNKNOWN
Permitted flash range: 0x00100000-0x00140000
Writing segments for file: bootrom/obj/bootrom.elf
0x00100000..0x001001ff [0x200 / 1 blocks]
0x00100200..0x0010129f [0x10a0 / 9 blocks]
All done
These warnings mean the old bootloader does not understand certain modern queries. The legacy client had identified our AT91SAM7S512; UNKNOWN here does not invalidate that result. The flasher restricted the range to the first 256 KB and the small boot image fitted within it. We did not use --force.
All done confirmed that the flasher finished this write. It did not yet mean the device was operational with new firmware: the main image and subsequent verification were still missing.
Step 10. Complete the main image
With the bootloader write finished and the device switched on, check the port before proceeding:
lsusb -d 9ac4:4b8f
ls -l /dev/serial/by-id/
On our machine we obtained:
Bus 003 Device 080: ID 9ac4:4b8f J. Westhues ProxMark-3 RFID Instrument
usb-proxmark.org_proxmark3_iceman-if00 -> ../../ttyACM0
J. Westhues comes from the USB identifier database, not a physical device change. The identifier-based link has changed compared with factory firmware, although the port remains /dev/ttyACM0.
If the port does not appear, do not start flashing yet. Check power-on and the connection. If manual entry into the Iceman bootloader is needed, disconnect only when no write is running, hold the user button while connecting and release it once inside. Do not press it again during writing.
With the port available, ModemManager still stopped and the fullimage.elf fingerprint checked, run from the RRG directory:
./client/proxmark3 /dev/ttyACM0 --flash --image armsrc/obj/fullimage.elfThis time there is no --unlock-bootloader: only the main application is written. Actual output summary, without the progress animation:
Available memory on this board: 512K bytes
Permitted flash range: 0x00102000-0x00180000
Writing segments for file: armsrc/obj/fullimage.elf
0x00102000..0x001636b8 [0x616b9 / 780 blocks]
All done
The new bootloader recognizes all 512 KB. The permitted region begins at 0x00102000, after the bootloader. Writing 780 blocks completed and the device automatically enumerated again; no manual unplugging was needed before verification.
Step 11. Verify versions and communication
From the same directory, run each check separately:
./client/proxmark3 /dev/ttyACM0 -c 'hw version'
./client/proxmark3 /dev/ttyACM0 -c 'hw status'
In our lab we sent both together using -c 'hw version; hw status'; they are separated here for readability. Actual excerpts:
Communicating with PM3 over USB-CDC
Firmware.................. PM3 GENERIC
Bootrom.... Iceman/master/0884083-suspect 2026-09-10 12:16:58 ed8df9283
OS......... Iceman/master/0884083-suspect 2026-09-10 12:17:15 ed8df9283
Embedded flash memory 512K bytes ( 78% used )
Transfer Speed PM3 -> Client... 627744 bytes/s
The client also reported Iceman/master/0884083-suspect and ed8df9283. Compilation times differ between components, but revision and build identifier match. We retain the reported -suspect suffix rather than presenting this local build as a certified release. Unlike earlier attempts, we have working communication with the new firmware and a completed data transfer.
Step 12. Check LF and HF antennas
Remove cards from the antennas and keep the device away from metal surfaces. From the same directory, run:
./client/proxmark3 /dev/ttyACM0 -c 'hw tune'hw tune measures antennas; it does not automatically adjust them. Our session without a GUI window prefixed the command with QT_QPA_PLATFORM=offscreen; a normal desktop does not need that variable. Actual results:
125,00 kHz ........... 28,23 V
134,83 kHz ........... 17,25 V
121,21 kHz optimal.... 30,09 V
LF antenna............ ok
13.56 MHz............. 23,39 V
HF antenna ( ok )
Both antennas received an ok assessment. Values depend on antenna and surroundings: yours need not exactly match ours, nor do these measurements establish support for every card. This plugin does not support propagateSizeHints() warnings came from Qt's windowless mode and did not prevent measurements from completing.
Finally we restored ModemManager, which had initially been active:
sudo systemctl start ModemManager
systemctl is-active ModemManager
It returned active. Future sessions must again prevent it from probing the Proxmark, through a controlled temporary stop or verified device-specific rules following RRG documentation. We did not uninstall it or change global permissions.
Lab outcome
| Check | Result |
|---|---|
| Client, bootloader and firmware | Iceman 0884083, matching source build. |
| Platform | PM3 GENERIC, AT91SAM7S512, 512 KB flash. |
| Communication | USB-CDC and completed transfer test. |
| LF antenna | ok, 28.23 V at 125 kHz. |
| HF antenna | ok, 23.39 V at 13.56 MHz. |
| Scope | This installment ends with antenna verification; card readings will be covered separately. |
The Proxmark3 is now operational with Iceman: versions, communication and both antennas have been checked. These checks do not replace prolonged testing or a full flash readback.
Sources and continuity
- RRG/Iceman source and documentation.
- Platforms, compilation options and 256 KB limitations.
- Compilation and flashing.
- AliExpress, KSEC and Lab401 product pages linked in the purchasing section. Commercial claims are attributed to the seller, not presented as our own tests.
The lab is ready. In the next installment we will explain RFID/NFC fundamentals and the differences between LF and HF before working with our cards. Further installments will be linked here as they are published.
Comments