

In this article we are going to try to install (and I say try because it is my first server on FreeBSD) a web server, using apache22.
First of all, we are going to change the IP addressing, we are going to give it a static address.
To configure a static ip we have to modify the file:
# ee /etc/rc.confand we add at the end:
ifconfig_em0=»inet 192.168.1.105 netmask 255.255.255.0″

defaultrouter=»192.168.1.1″
To save: ESC : Leave editor : Save change
Restart network services to update the changes.
# /etc/netstartWe verify that the changes have been made:
# ifconfig em0*Note: If we have uncommented: ifconfig_em0″DHCP» We discuss it.
We install Apache.
We access the ports, configure and install.
# cd /usr/port/www/apache22
# make install clean
One of the main advantages of using ports to install software is the ability to adjust installation options. For example, it is possible to activate mod_ldap inside your Apache 2.2 during installation by using the variable WITH_LDAP of make(1):
cd /usr/ports/www/apache22

## make WITH_LDAP=»YES» install clean
A Menu appearsOptions of gettext” *Situate yourself in “OK" and press enter.
In my case. It gave me a dependency error in perl and I had to install it.
# cd /usr/ports/lang/perl15.19/
#make install clean
Although for my taste... it takes a... little... to download and compile the packages...
be patient...
Once the installation is finished, we are going to edit the file: /etc/rc.conf so that when you start the PC it starts apache
We access the file
#ee /etc/rc.confand we add at the end:
apache22_enable=”YES”To save: ESC : Leave editor : Save change
We configure httpd.conf
#ee /usr/local/etc/apache22/httpd.confWe check that it is uncommented:
ServerRoot «/usr/local»

DocumentRoot «/usr/local/www/data»
we start Apache
/usr/local/etc/rc.d/apache22 startWe open a browser and access our web server. If everything has gone well, the index should appear.

In case this is not the case, and you get an error. access again httpd.conf
# ee /usr/local/etc/apache22/httpd.confFind the line and comment on it. :
#LoadModule unique_id_module libexec/apache22/mod_unique_id.soInstall and Configure PHP
# cd /usr/ports/lang/php5We configure PHP
We select the packages we want to install.
# make configure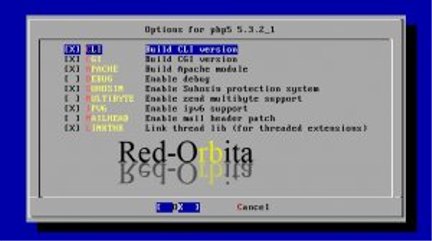
we install
# make install cleanWe configure httpd.conf
# ee /usr/local/etc/apache22/httpd.confwe add:
AddType application/x-httpd-php .php

AddType application/x-httpd-php-source .phps
We go to the line: DirectoryIndex
and we add:
DirectoryIndex index.htm index.html index.phpIn the loaded Apache modules it must already exist. If not, something has gone wrong... haha
LoadModule php5_module libexec/apache22/libphp5.soWe modify: loader.conf
# ee /boot/loader.confand we add:
accf_http_load=»YES»We restart the service
We also install:
/usr/ports/lang/php5-extensions

/usr/ports/databases/php5-mysql

/usr/ports/www/php5-session

/usr/ports/graphics/php5-gd
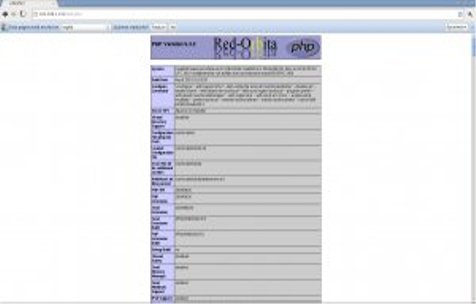
We check if we really have a php service, for this we are going to create a file called: test.php
# ee /usr/local/www/apache22/data/test.phpIn the file we put the following code:
<?php phpinfo(); ?>To save: ESC : Leave editor : Save change
We open a browser and access the saved file: http://192.168.1.121/test.php
If everything has gone well, it will show us a screen like this:
Install MySQL-Server
We are going to install mysql5.1-server, because although I do a search and it is: mysql60-server I don't know...because it won't let me access the folder...
We access the folder:
cd /usr/port/databases/mysql51-serverWe install
make install cleanWe generate the permissions tables for MySQL:
# /usr/local/bin/mysql_install_dbWe change the owner and group of the data directory:
# chown -R mysql:mysql /var/db/mysql/And once this is finished, we edit the rc.conf file to make mysql automatically
# ee /etc/rc.confWe add:
mysql_enable=»YES»To save: ESC : Leave editor : Save change
We set the root password.
# /usr/local/bin/mysqladmin -u root password tupasswordInstall phpmyadmin
We access the directory.
cd /usr/port/databases/phpmyadminWe install
# make install cleanWe configure phpmyadmin
first let's edit the file httpd.conf
# ee /usr/local/etc/apache22/httpd.confAt the end of the file we add:
Alias /phpmyadmin /usr/local/www/phpMyAdmin
<Directory “/usr/local/www/phpMyAdmin”>
Order allow,deny
Allow from all
</Directory>
Now we are going to configure the file: config.ini.php
# ee /usr/local/www/phpMyAdmin/config.inc.phpinside this file we add the following:
>$cfg[‘Servers’][$i][‘user’]	= ‘root’;

$cfg[‘Servers’][$i][‘password’]	= ‘tu password’;
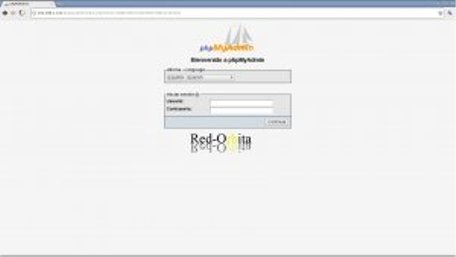
We restart and if everything went well, a window like this should appear:
In the next chapter…. hahaha, we will implement Cacti
Regards, rokitoh
Sources:
Comments