

Before starting to set up our RAS, if you do not have basic concepts about Active Directory and networks, you may be interested in these links:
Install a primary domain controller
Install an additional domain controller
Scenario description:
This scenario will have a Primary Domain Controller (CDP), Additional Domain Controller (ADC), DFS Server that we already installed in previous tutorials, Under Windows 2003 Server and two RAS servers that we will also use another Windows 2003 Server Enterprise but that is not promoted (So it is SAM) and we have to enable 3 network cards, we will also have a Windows XP client.
Configuring RAS1 Network Cards
Windows IP Configuration (RAS)
Ethernet Adapter Local Area Connection
Sufujo conexión específica DNS:

Dirección IP. . . . . . . . . . . . . . . : 6.0.0.1

Máscara de subred . . . . . . . . .  : 255.0.0.0

Puerta de enlace predet.. .  . . . . :
Ethernet Adapter Local Area Connection 2:
Sufujo conexión específica DNS:

Dirección IP. . . . . . . . . . . . . . . : 7.0.0.1

Máscara de subred . . . . . . . . .  : 255.0.0.0

Puerta de enlace predet.. . . . . .  :
Ethernet Adapter Local Area Connection 2:
Sufujo conexión específica DNS:

Dirección IP. . . . . . . . . . . . . . . : 8.0.0.1

Máscara de subred . . . . . . . . . . : 255.0.0.0

Puerta de enlace predet.. . . . . . . . :
We configure the Client and CDP interfaces
Windows IP Configuration (Client)
Ethernet Adapter Local Area Connection
Sufujo conexión específica DNS:

Dirección IP. . . . . . . . . . . . . . . : 6.0.0.2

Máscara de subred . . . . . . . . .  : 255.0.0.0

Puerta de enlace predet.. .  . . . . : 6.0.0.1

DNS1. . . . . . . . . . . . . . . . . . . . : 8.0.0.2

DNS2. . . . . . . . . . . . . . . . . . . . : 9.0.0.2
Configuring CDP Network Cards
Windows IP Configuration (CDP)
Ethernet Adapter Local Area Connection
Sufujo conexión específica DNS:

Dirección IP. . . . . . . . . . . . . . . : 8.0.0.2

Máscara de subred . . . . . . . . .  : 255.0.0.0

Puerta de enlace predet.. .  . . . . : 8.0.0.1

DNS1. . . . . . . . . . . . . . . . . . . . : 8.0.0.2

DNS2. . . . . . . . . . . . . . . . . . . . : 9.0.0.2
Now we go to our RAS1
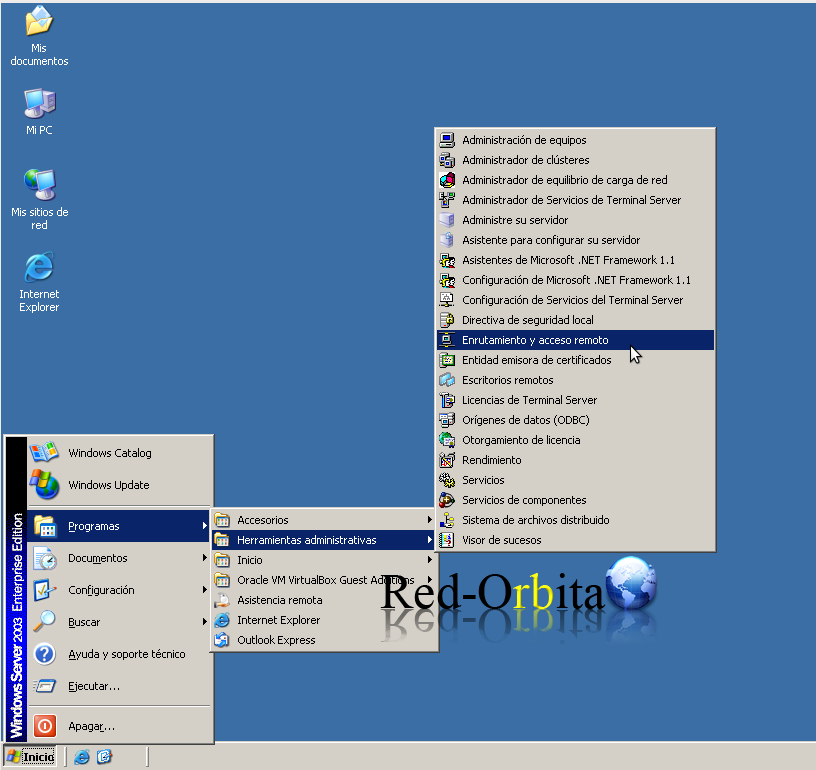
Home > Programs > Administrative Tools >Routing and Remote Access
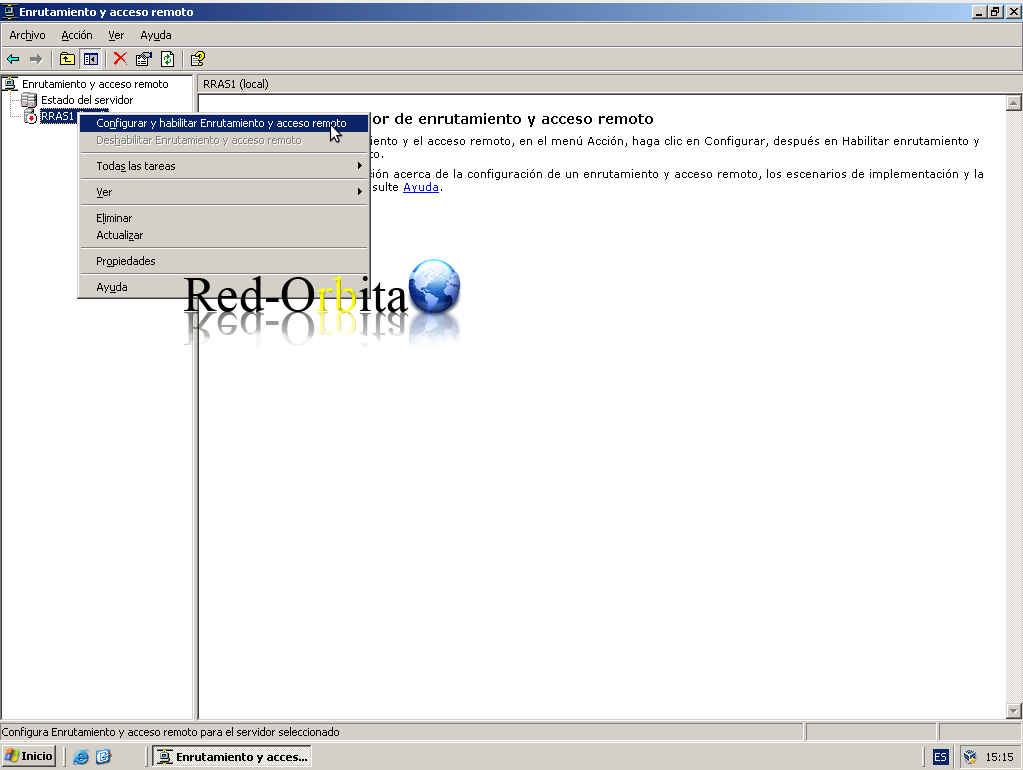
Right click on RAS > Configure and enable Routing and Remote Access
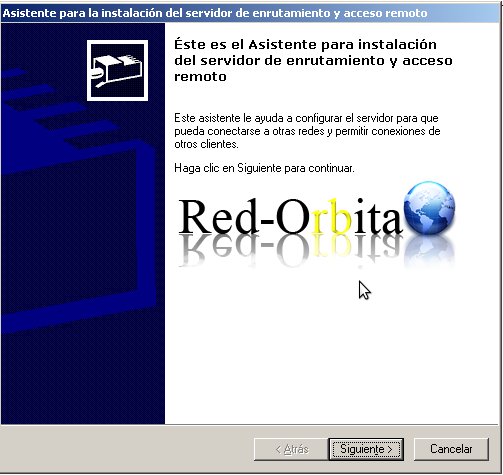
The setup wizard starts, next!
We select the option Custom settings
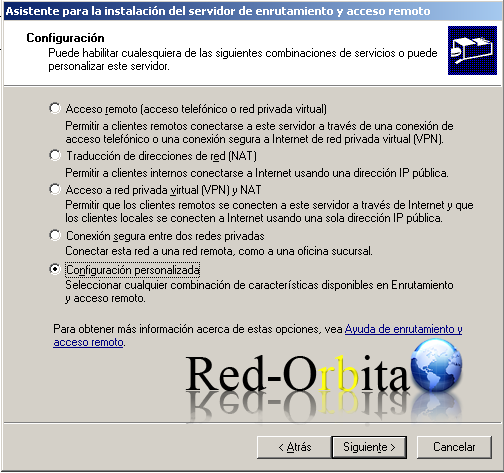
LAN routing, following
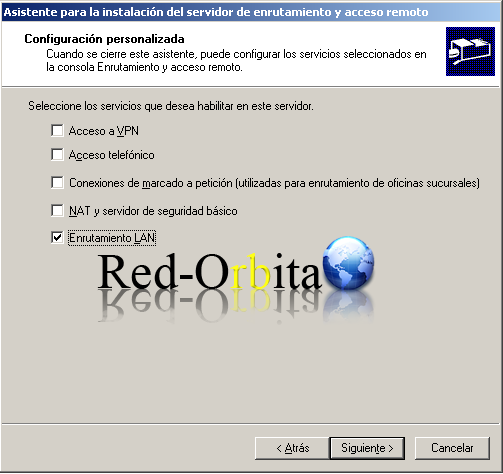
We finish the configuration wizard.
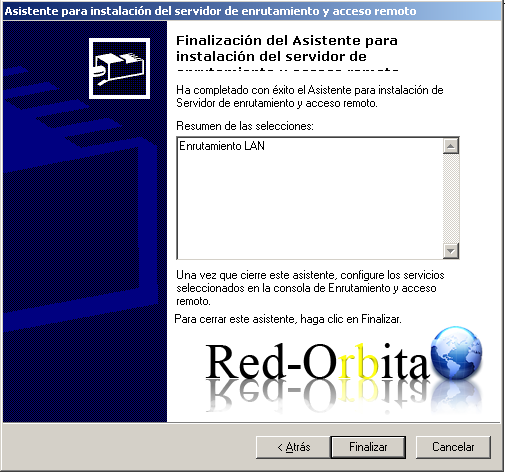
We start the service.
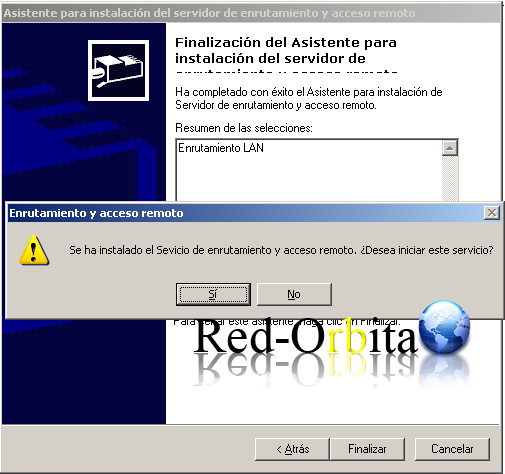
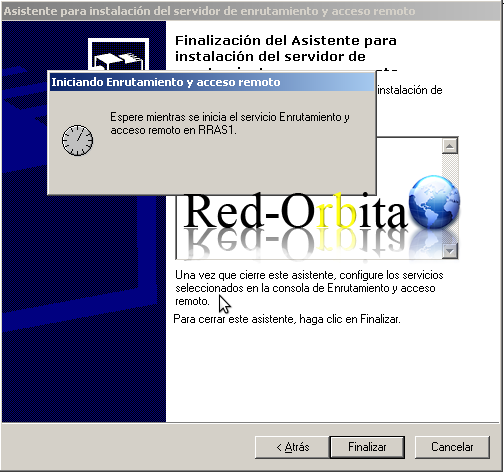
We wait for it to start…
Now we position ourselves in Static Routes > Right Button > New Static Route…
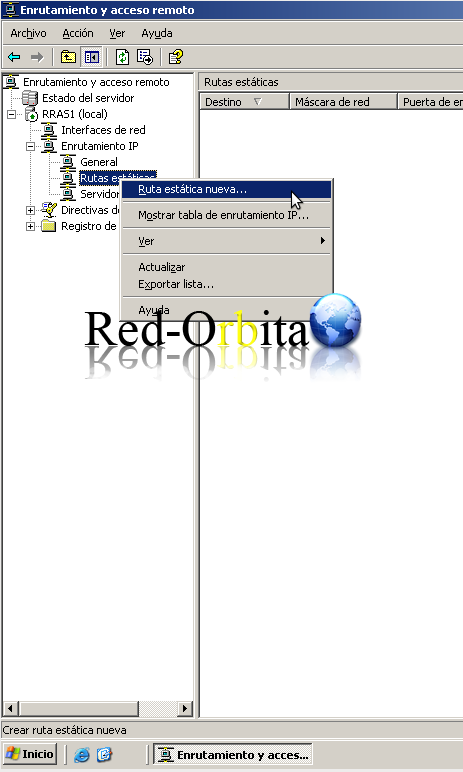
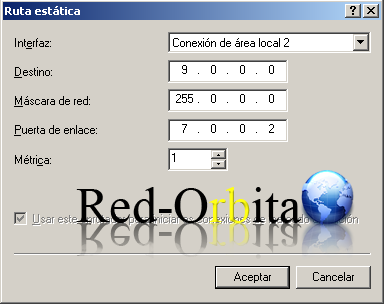
Here we select: Local2 area connection (which if we remember was network 7.0.0.0)
In the destination we put the network in which our CDA is located, in this case 9.0.0.0
The network mask.
and the gateway, which is the other mouth of the RAS2 router. 7.0.0.2
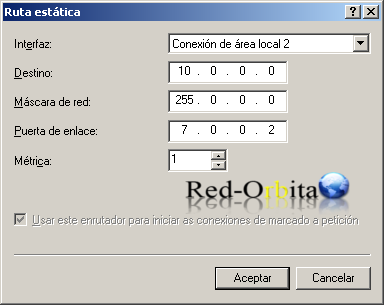
We do the same with the 10.0.0.0 network
Now we are going to add the NAT, to do this, right click on Basic Firewall or NAT > New Interface
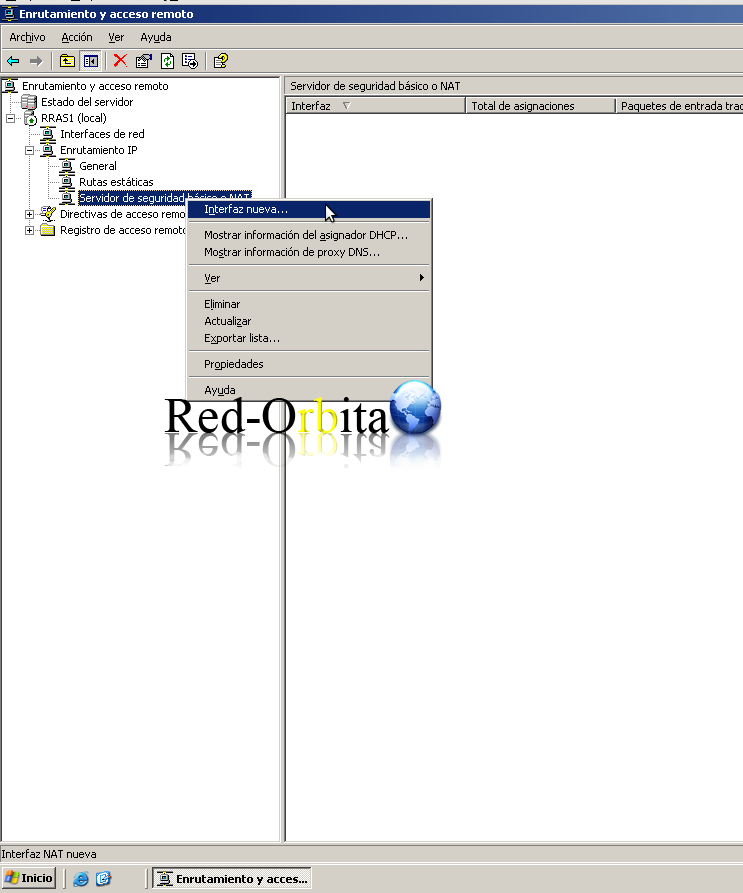
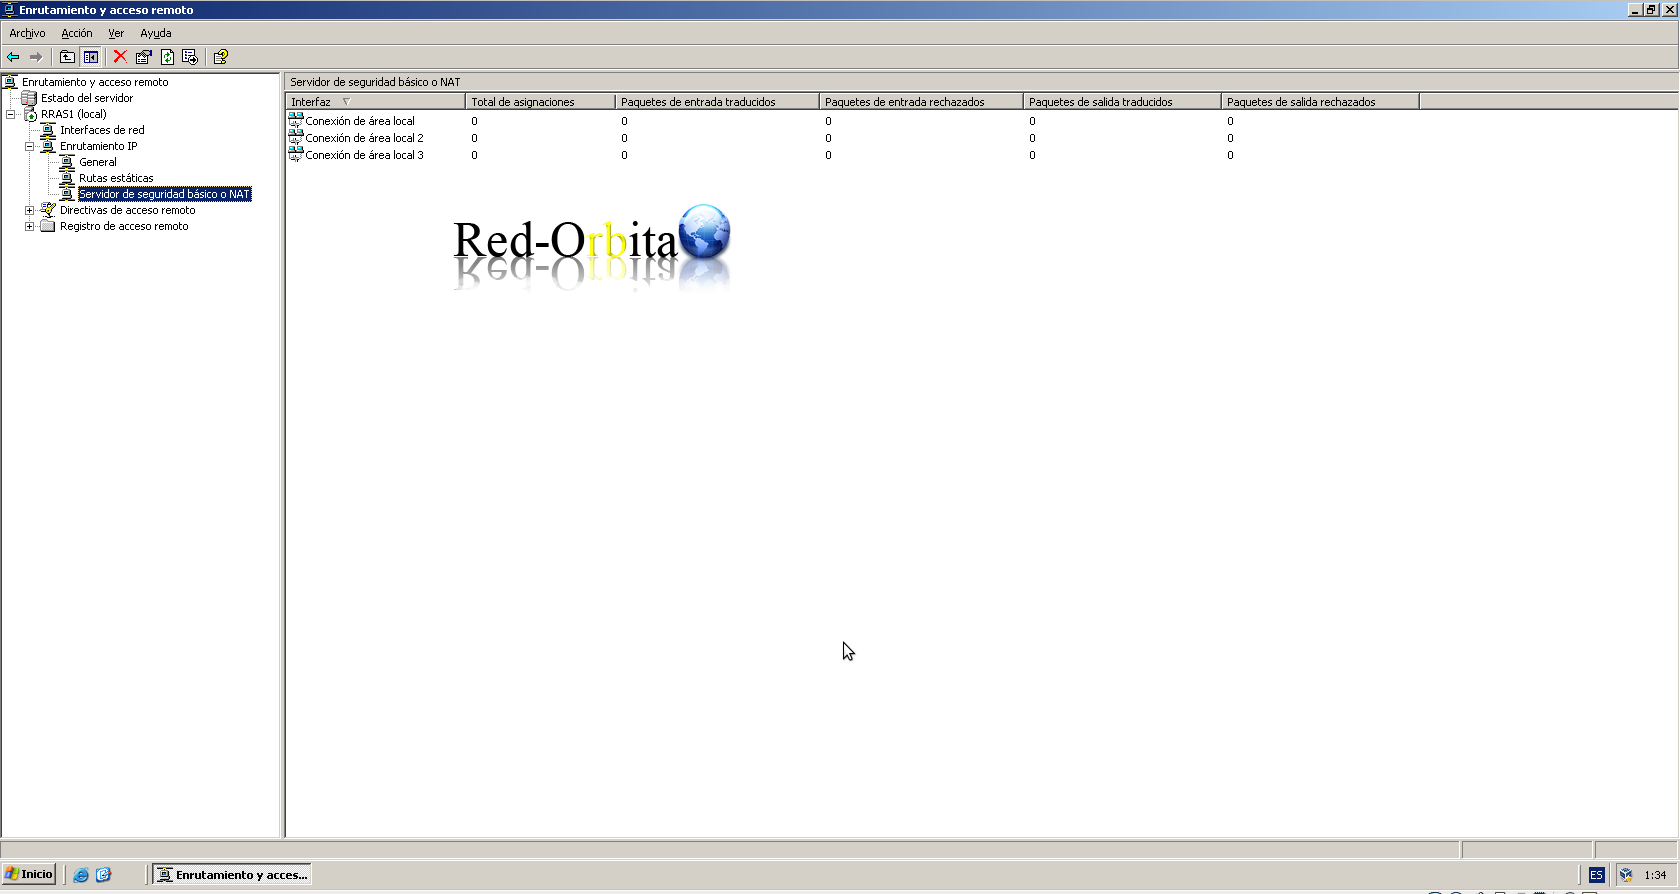
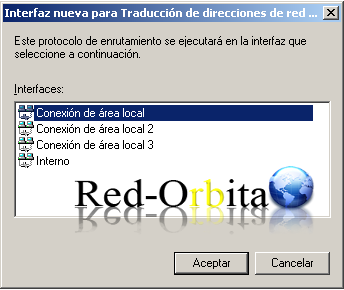
And once there we add the 3 interfaces enabling Nat, as follows:
We select the Interface that we want to add and click to accept.
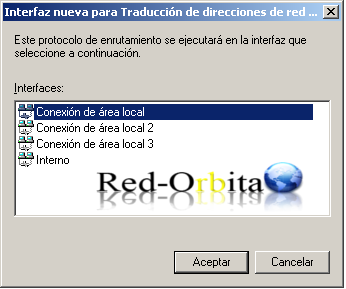
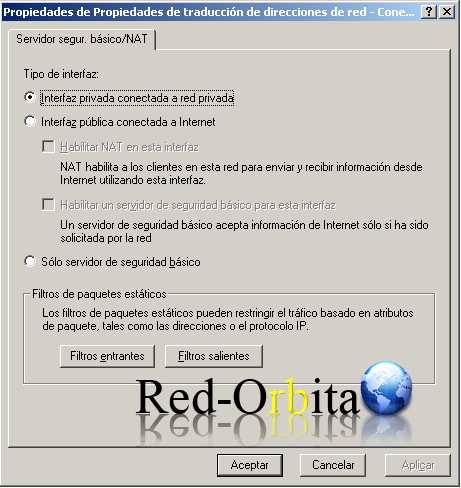
Below it shows us the properties of the interface. We select the option: Private interface connected to private network
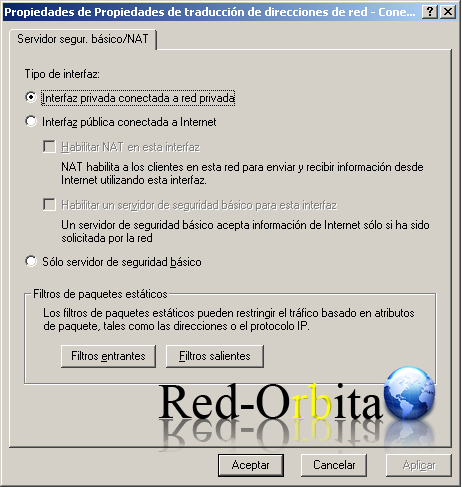
Arias the same procedure with the other 2, it has to look something like this:
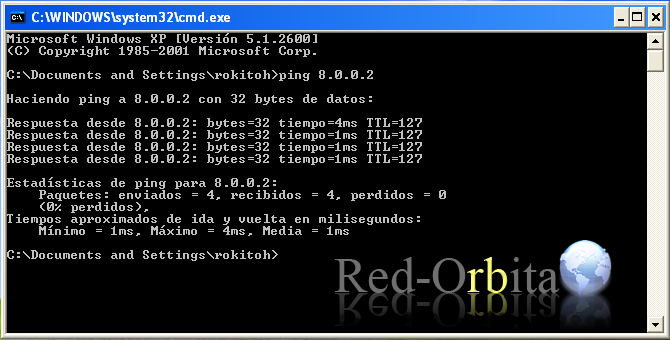
Before going to configure RAS2, we are going to verify that we have a connection between the different RAS1 devices, that is, Client and CDP.
To do this we perform a ping
The RAS2 configuration is exactly the same.
Configuring RAS2 Network Cards
Windows IP Configuration (RAS2)
Ethernet Adapter Local Area Connection
Sufujo conexión específica DNS:

Dirección IP. . . . . . . . . . . . . . . : 7.0.0.2

Máscara de subred . . . . . . . . .  : 255.0.0.0

Puerta de enlace predet.. .  . . . . :
Ethernet Adapter Local Area Connection 2:
Sufujo conexión específica DNS:

Dirección IP. . . . . . . . . . . . . . . : 9.0.0.1

Máscara de subred . . . . . . . . .  : 255.0.0.0

Puerta de enlace predet.. . . . . .  :
Ethernet Adapter Local Area Connection 2:
Sufujo conexión específica DNS:

Dirección IP. . . . . . . . . . . . . . . : 10.0.0.2

Máscara de subred . . . . . . . . .  : 255.0.0.0

Puerta de enlace predet.. . . . . .  : 10.0.0.1
Configuring CDA Network Cards
Windows IP Configuration (CDA)
Ethernet Adapter Local Area Connection
Sufujo conexión específica DNS:

Dirección IP. . . . . . . . . . . . . . . : 9.0.0.2

Máscara de subred . . . . . . . . .  : 255.0.0.0

Puerta de enlace predet.. .  . . . . : 9.0.0.1

DNS. . . . . . . . . . . . . . . . . . . . . : 8.0.0.2

DNS2. . . . . . . . . . . . . . . . . . . .:  9.0.0.2
Configuring DFS Network Cards
Windows IP Configuration (DFS)
Ethernet Adapter Local Area Connection
Sufujo conexión específica DNS:

Dirección IP. . . . . . . . . . . . . . . : 10.0.0.2

Máscara de subred . . . . . . . . .  : 255.0.0.0

Puerta de enlace predet.. .  . . . . : 10.0.0.1

DNS. . . . . . . . . . . . . . . . . . . . . : 8.0.0.2

DNS2. . . . . . . . . . . . . . . . . . . .:  9.0.0.2
We are going to:
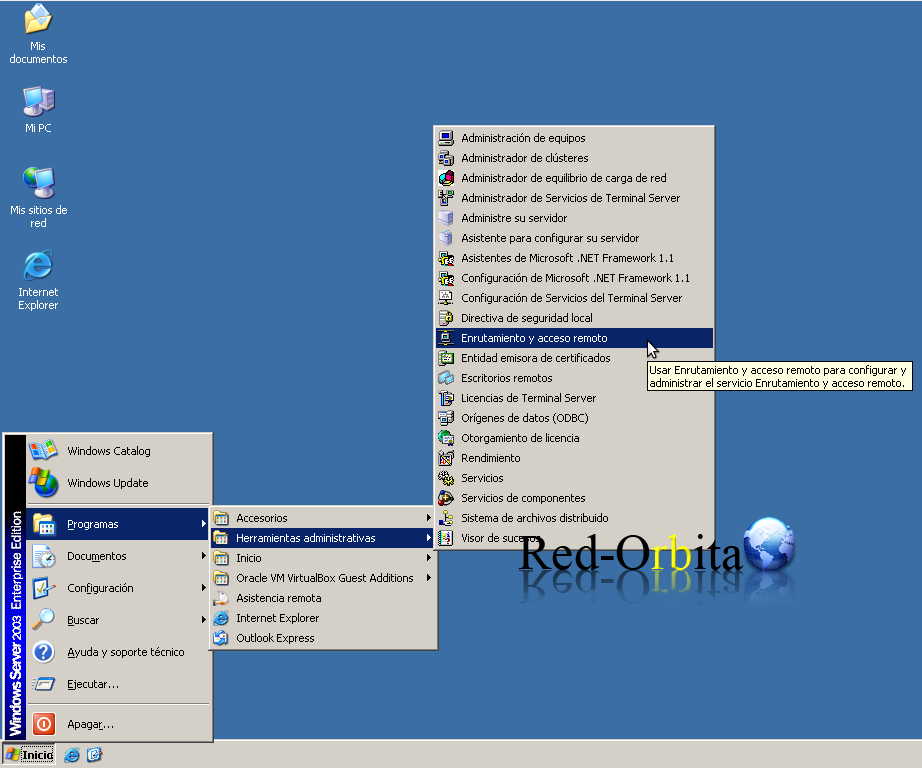
Home > Programs > Administrative Tools >Routing and Remote Access
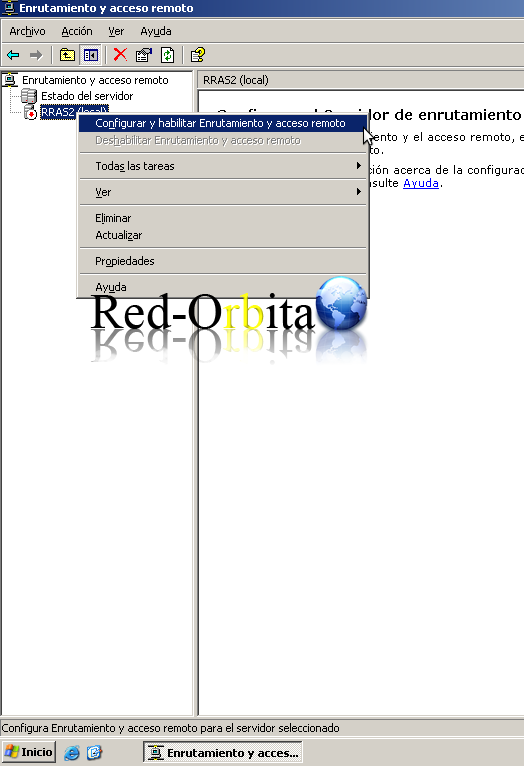
Right click on RAS > Configure and enable Routing and Remote Access
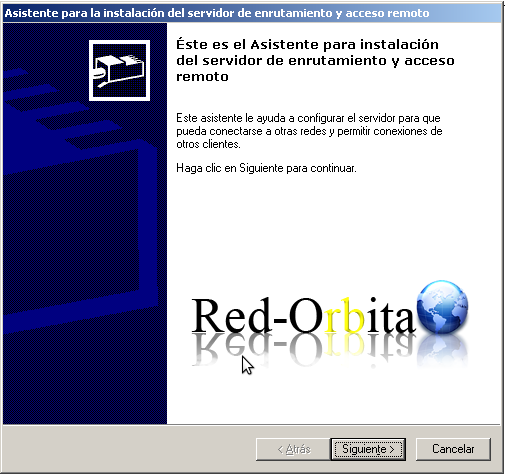
The setup wizard starts, next!
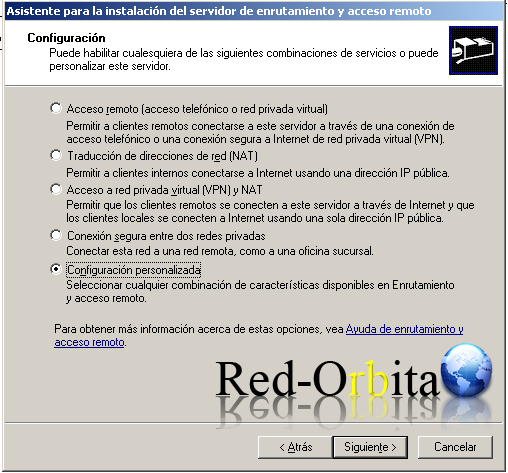
We select the option Custom settings
LAN routing, following
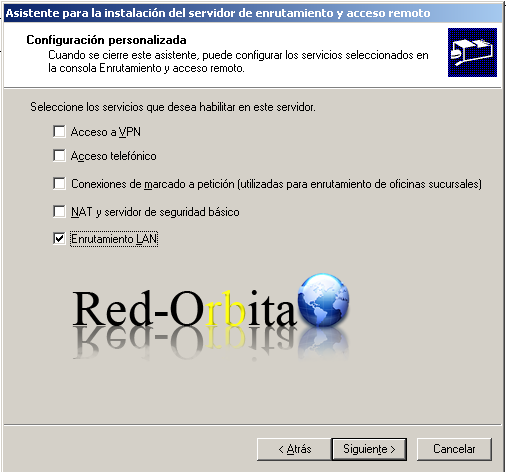
We finish the configuration wizard.
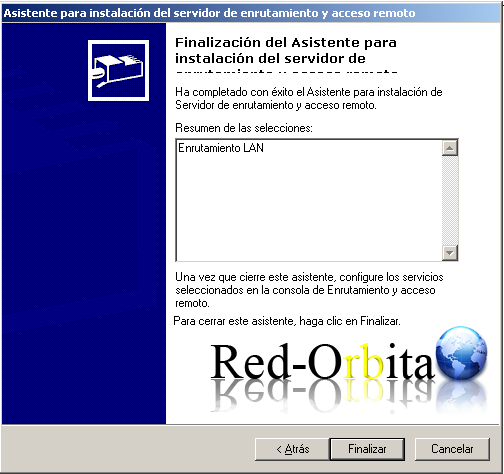
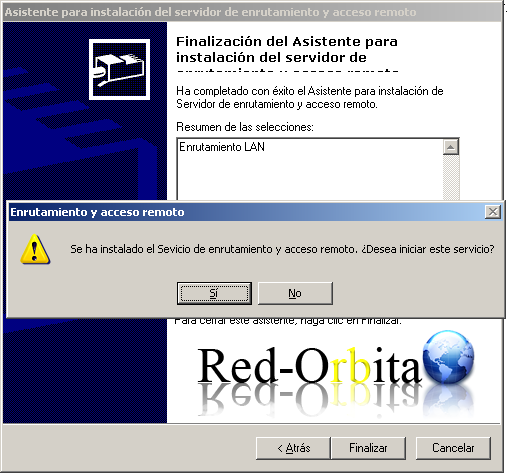
We start the service.
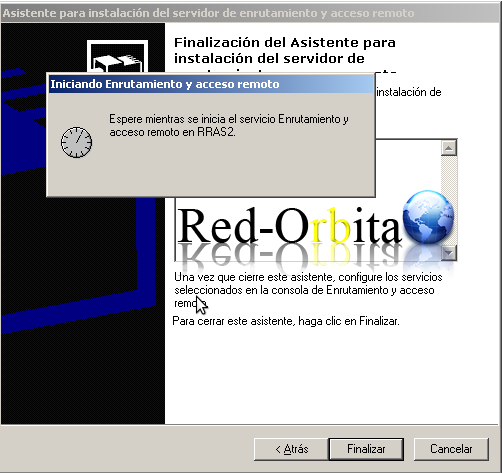
We wait for it to start…
Now we position ourselves in Static Routes > Right Button > New Static Route…
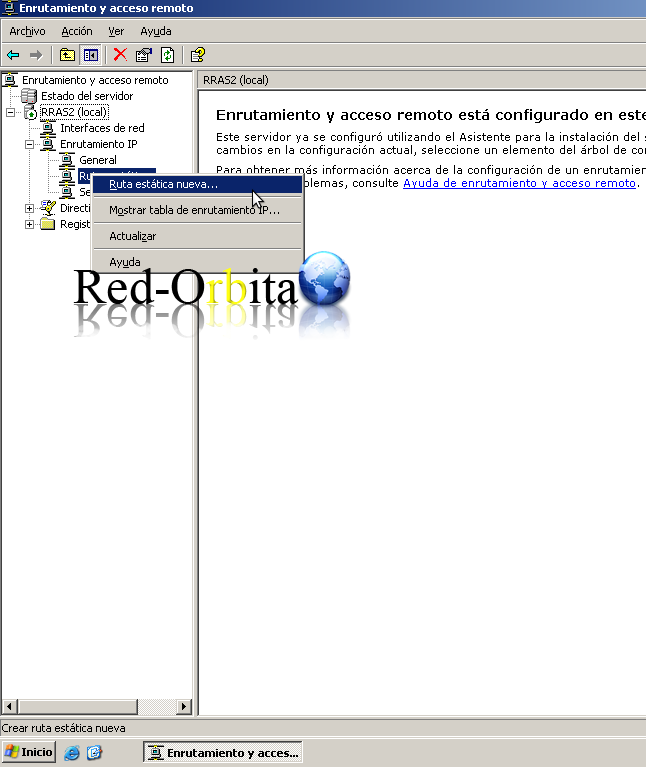
And here we do exactly the same as in RAS1, we create a route to the hosts that are in the RAS1 network. But in this case we are going to use: Local area connection 2
Now we leave through the 7.0.0.1 gateway, which is the mouth of RAS1
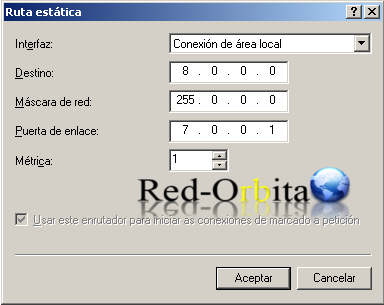
And the same with network 6.0.0.0
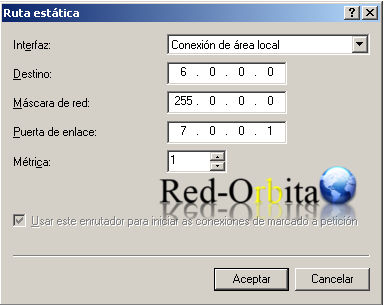
Now we are going to add the NAT, to do this, right click on Basic Firewall or NAT > New Interface
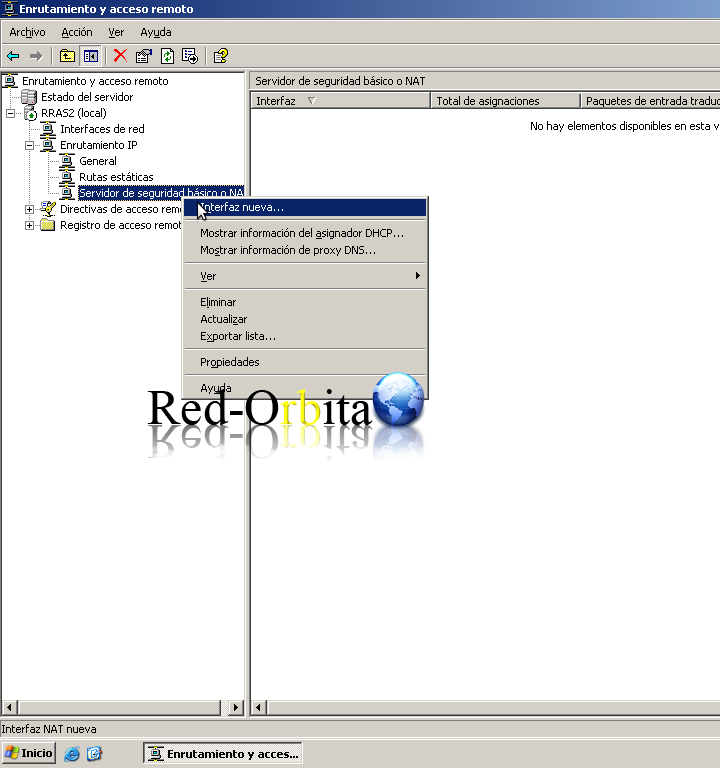
And once there we add the 3 interfaces enabling Nat, as follows:
We select the Interface that we want to add and click to accept.
Below it shows us the properties of the interface. We select the option: Private interface connected to private network
Arias the same procedure with the other 2, it has to look something like this:
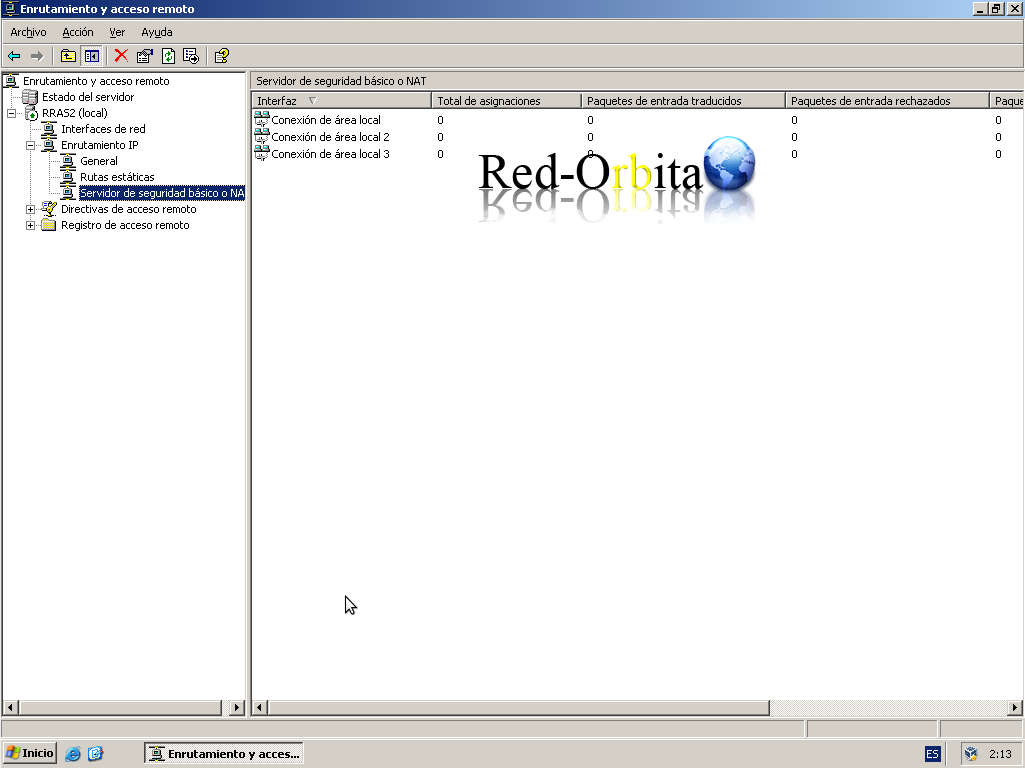
AND READY!!!! We're done, now we just have to check... performing PING from the different hosts to see if we have communication between them. We can also check CDP and CDA replicate perfectly by creating a new user or computer.
At the moment we have not provided an outlet to the internet. We already configured our scenario by adding more elements. If you want to try going to the Internet, you can put our CDP (8.0.0.2) so that it goes to the Internet.
Greetings, rokitoh!
Comments