
Previously we saw how iInstall an ESXI server Now we will see the system configuration.
We press F2 to access and a screen will appear to identify ourselves.
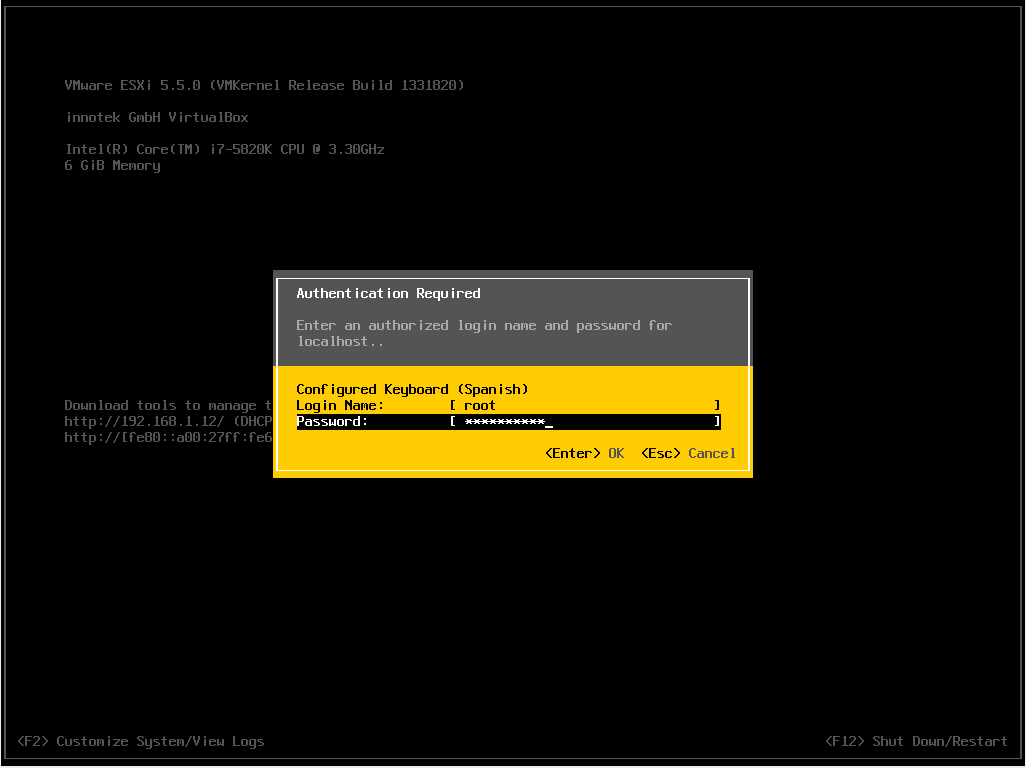
As we can see, ESXI has a very intuitive panel where you can configure different things, password, network card, keyboard, enable a shell to access esxi via ssh and view server information and logs.
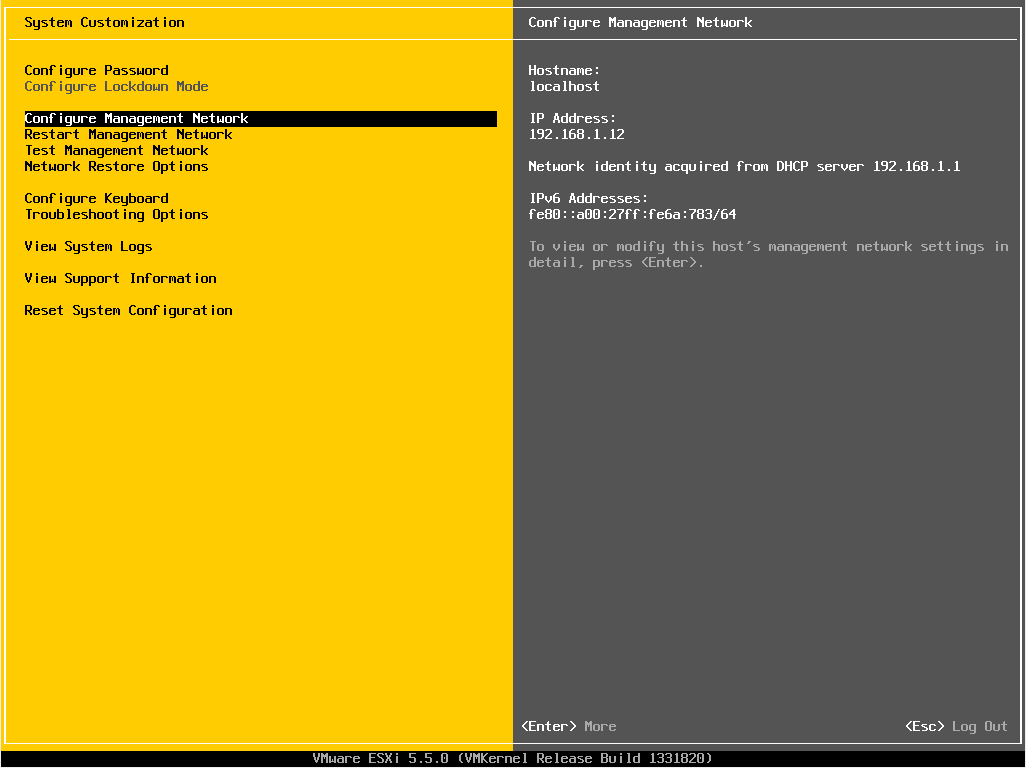
Now we go to the “Configure Management network” option
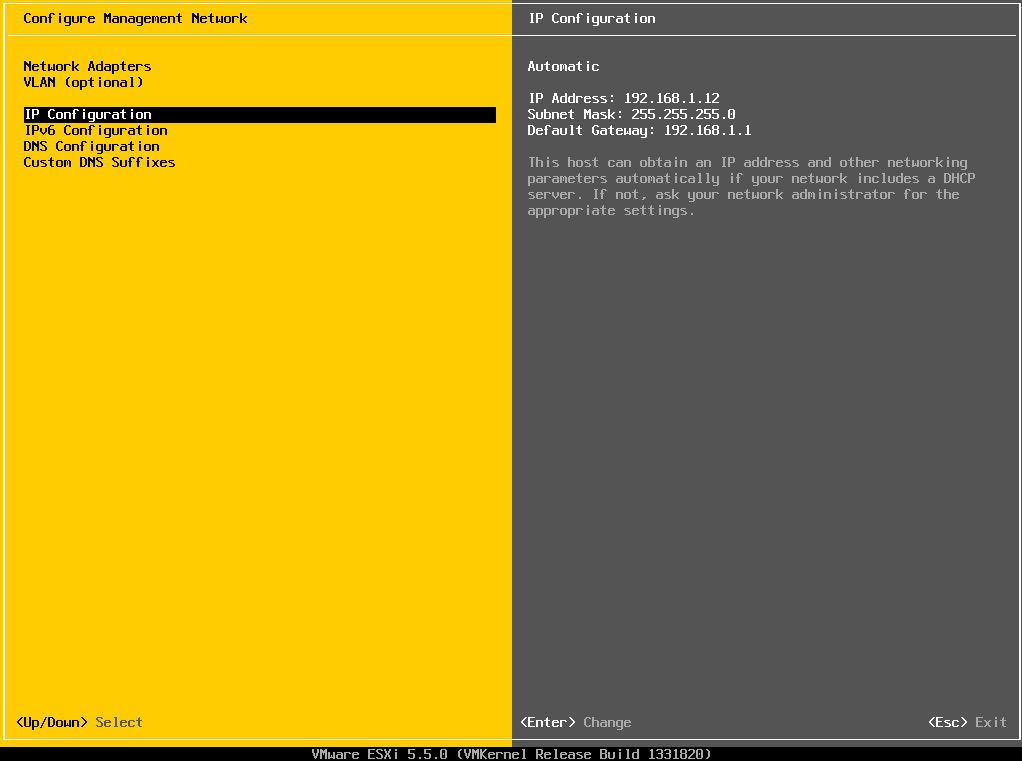
Who we can configure the network card, vlan, dns. We go to “IP Configuration” to configure a static IP.
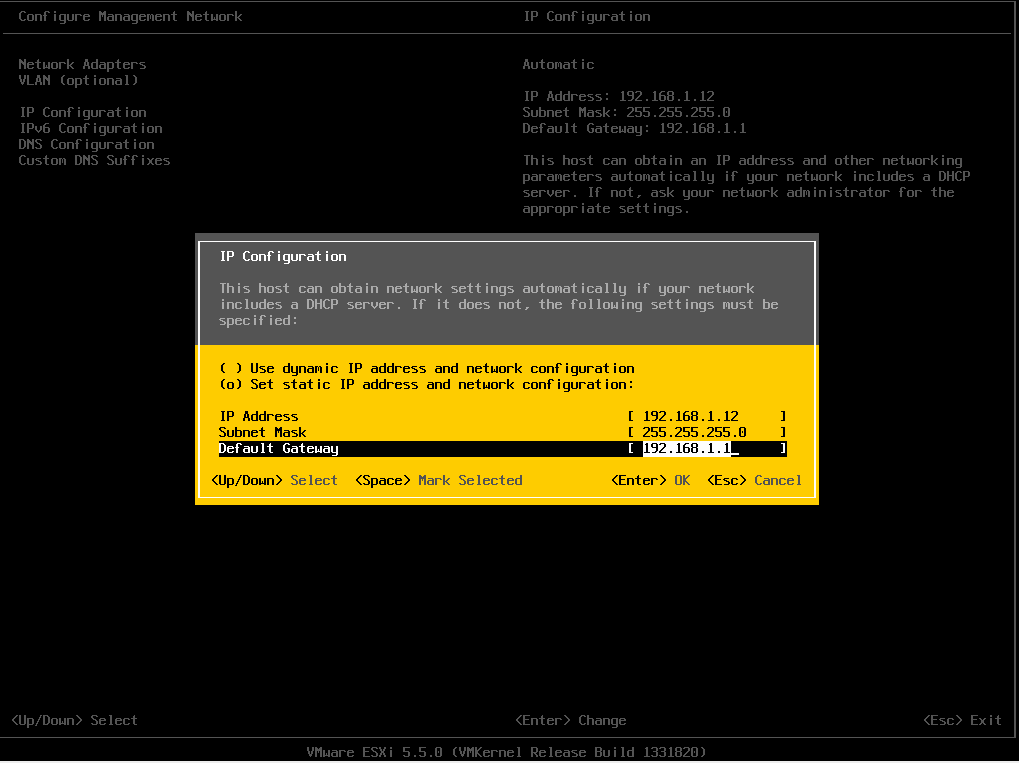
 Seleccionamos la opción «Set static ip address and network configuration» y le asignamos la dirección, mascara y gateway de nuestra red.
 Once our IP is configured, we go to the DNS Configuration option.
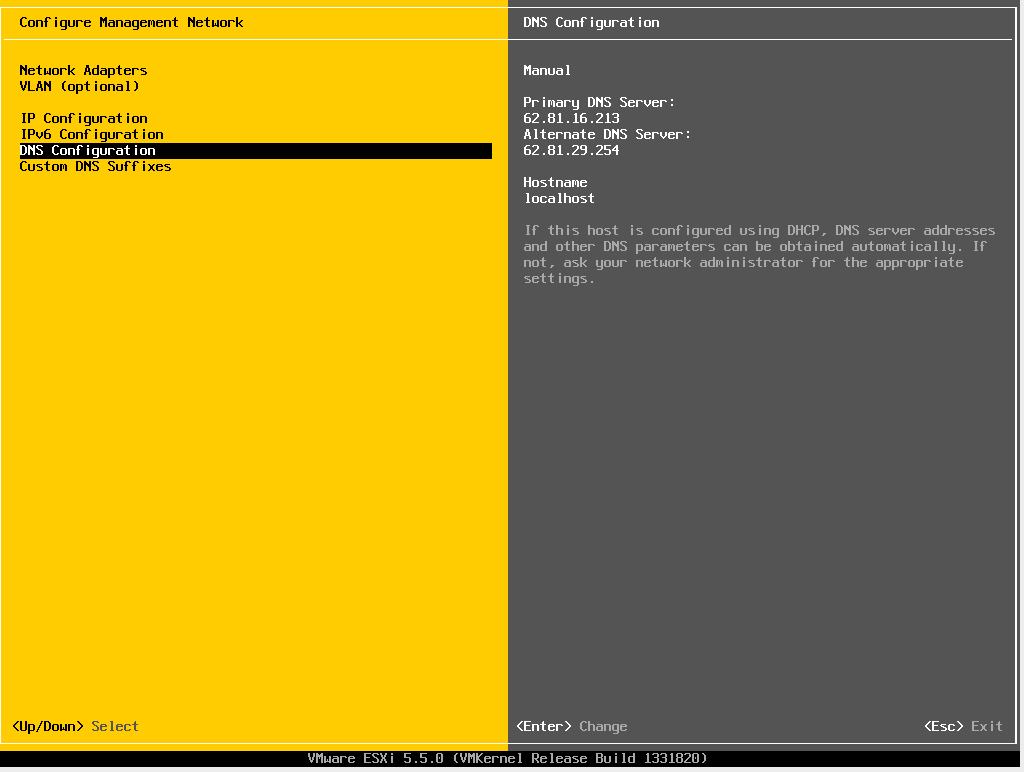
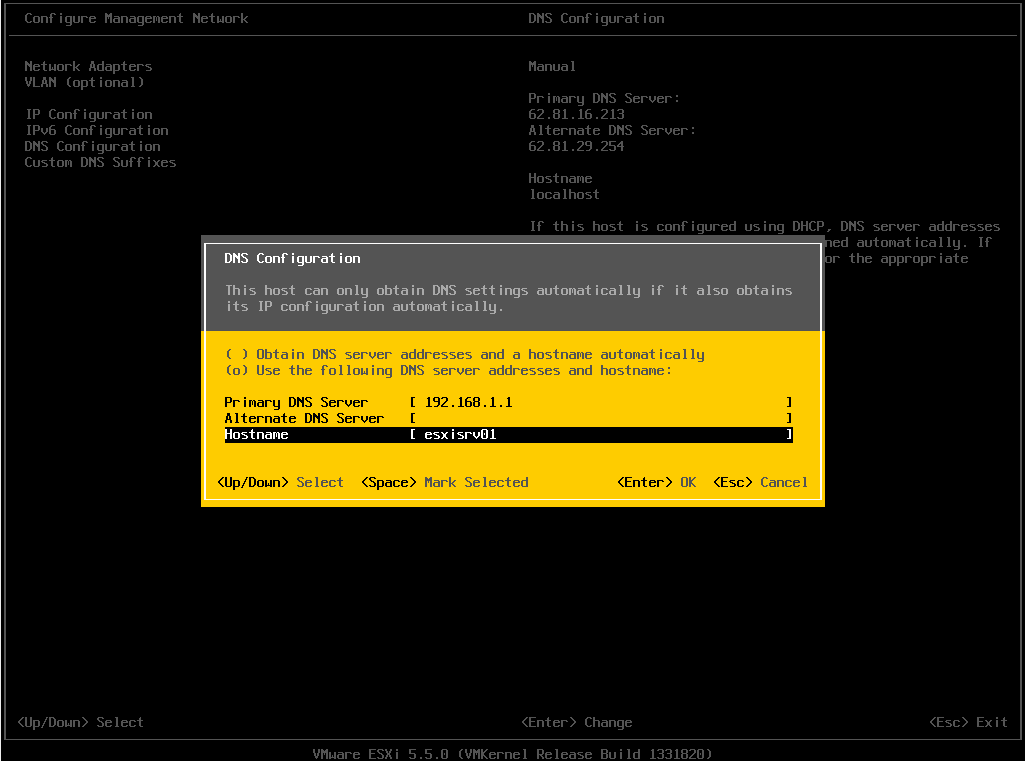
We add the IP of our DNS server and the name of our esxi server.
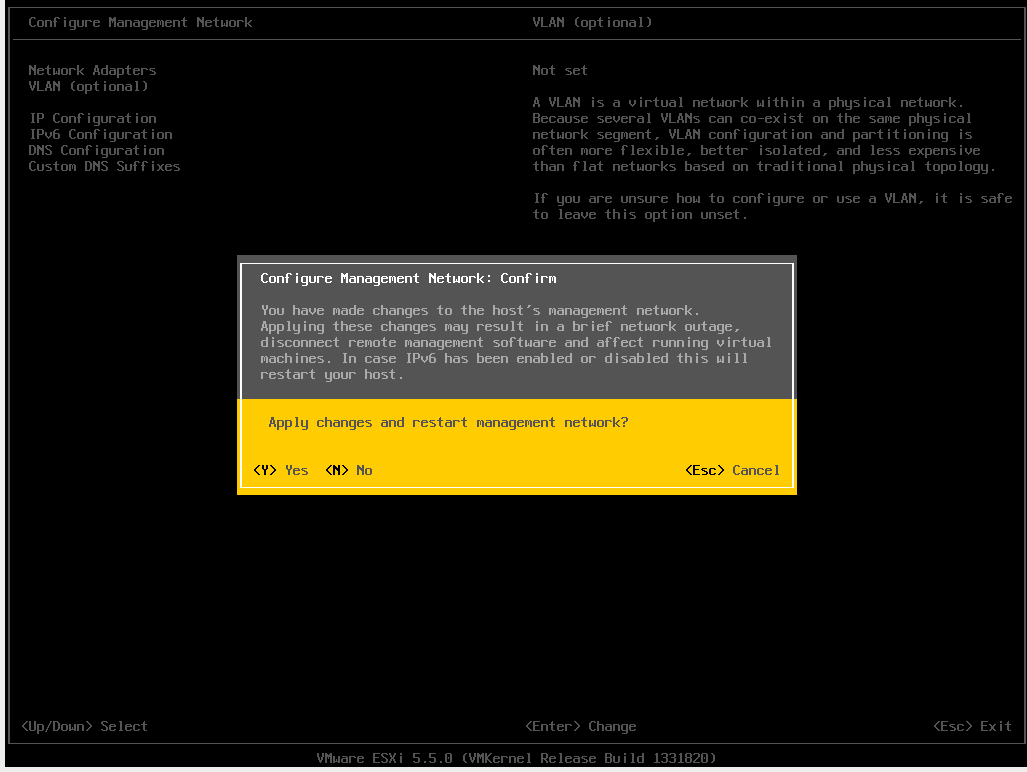
We accept the changes and the restart
 If we are not going to work with IPv6, it is recommended to disable it.
We return to the main menu and check that our keyboard has the keyboard configured correctly.
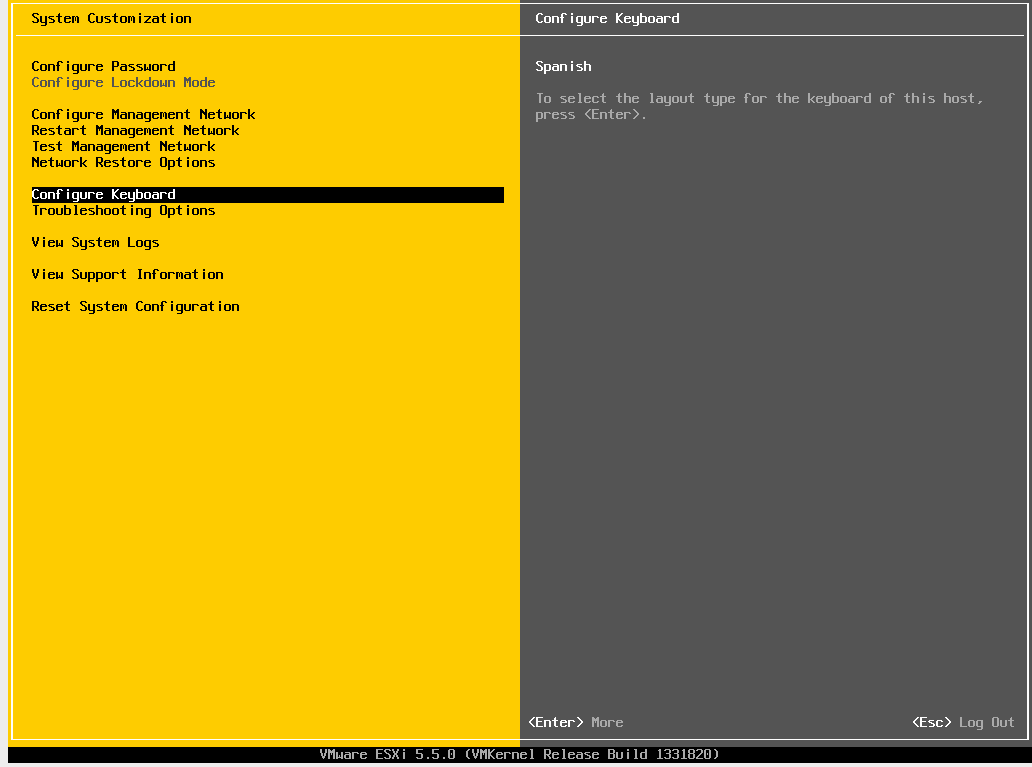
We now go to the Thoubleshooting options option
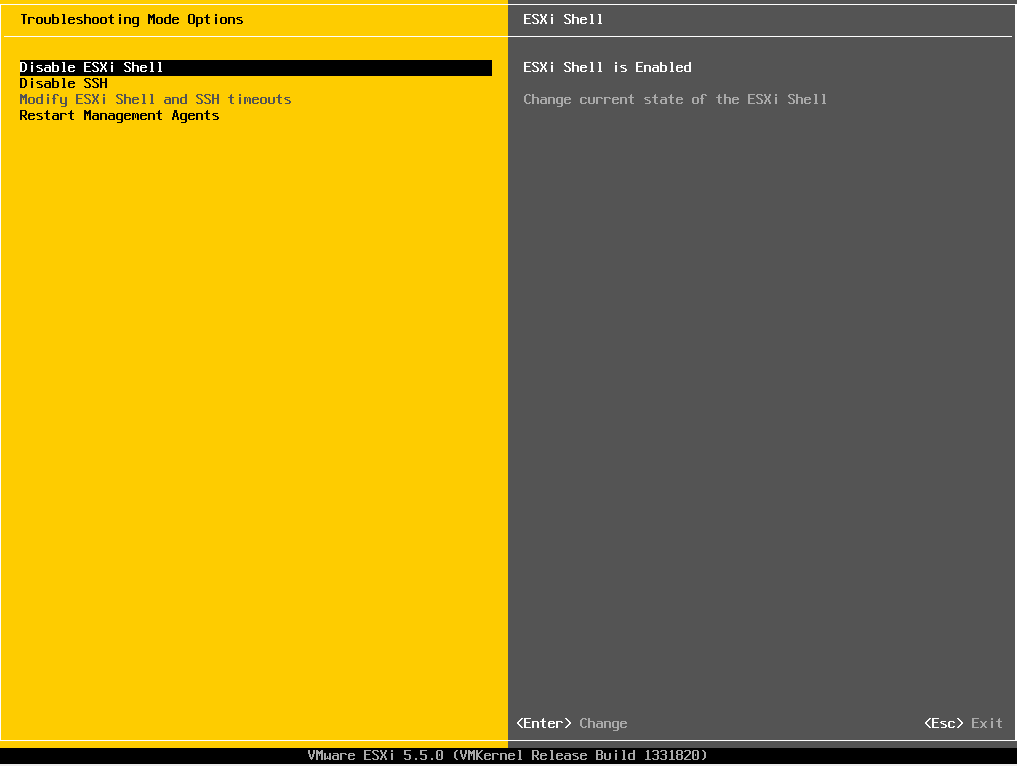
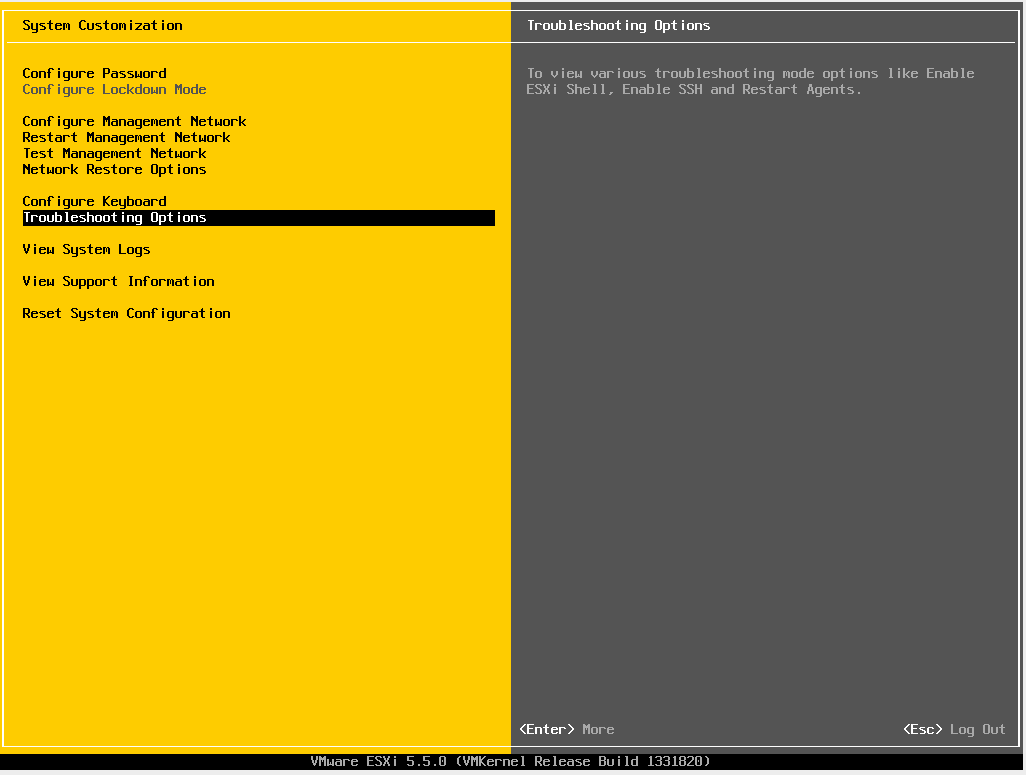 Within this menu we activate the Shell and SSH, to do this we only have to move the cursor to the option and press ENTER.
 Greetings, rokitoh!
Comments