
What is an HA Cluster?
A high availability cluster is a set of two or more machines which are characterized by maintaining a series of shared services and constantly monitoring each other. Can
Install ISCSI
yum -y install iscsi-initiator-utils device-mapper-multipathWe add the multipathd configuration
cat /etc/multipath.conf
defaults {
user_friendly_names yes
path_grouping_policy multibus
path_checker readsector0
failback immediate
}
We restart the multipathd and add it to the beginning
service multipathd start
Redirecting to /bin/systemctl start multipathd.service
chkconfig multipathd on
Note: Forwarding request to ‘systemctl enable multipathd.service’.
We carry out the discovery
iscsiadm -m discovery -t st -p 192.168.20.1

192.168.20.1:3260,1 iqn.2010-06.com.purestorage:flasharray

192.168.24.1:3260,1 iqn.2010-06.com.purestorage:flasharray

192.168.20.2:3260,1 iqn.2010-06.com.purestorage:flasharray

192.168.24.2:3260,1 iqn.2010-06.com.purestorage:flasharray

192.168.24.3:3260,1 iqn.2010-06.com.purestorage:flasharray

192.168.20.3:3260,1 iqn.2010-06.com.purestorage:flasharray

192.168.24.4:3260,1 iqn.2010-06.com.purestorage:flasharray

192.168.20.4:3260,1 iqn.2010-06.com.purestorage:flasharray
We make the connection
iscsiadm -m node -L automaticWe rescan
iscsiadm -m session –rescanWe restart the iscsi service
service iscsi restartWe check the session
iscsiadm -m sesiónWe check the multipath
multipath -ll

mpatha (3624a93708731da97f48571620001105a) dm-6 PURE ,FlashArray

size=232G features=’0′ hwhandler=’0′ wp=rw

`-+- policy=’service-time 0′ prio=1 status=active

|- 3:0:0:10 sdb 8:16 active ready running

|- 4:0:0:10 sdc 8:32 active ready running

|- 5:0:0:10 sdd 8:48 active ready running

|- 6:0:0:10 sde 8:64 active ready running

|- 7:0:0:10 sdf 8:80 active ready running

|- 10:0:0:10 sdh 8:112 active ready running

|- 8:0:0:10 sdg 8:96 active ready running

`- 9:0:0:10 sdi 8:128 active ready running
We create the volume
pvcreate /dev/mapper/mpatha

vgcreate vg_mysql /dev/mapper/mpatha

lvcreate -l+100%FREE -n lv_mysql vg_mysql
We format the volume
mkfs.xfs /dev/mapper/vg_mysql-lv_mysqlWe add the disk to /etc/fstab
/dev/mapper/vg_mysql-lv_mysql /mysql xfs defaults 0 0We configure the /etc/hosts file
192.167.1.235 redorbitaclus02.redorbita.com redorbitaclus02

192.167.1.234 redorbitaclus01.redorbita.com redorbitaclus01
We add the subscription
subscription-manager list –available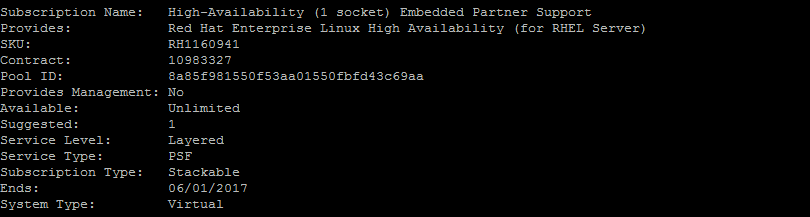
subscription-manager attach –pool=8a85f981550f53aa01550fbfd43c69aa

subscription-manager repos –enable=rhel-ha-for-rhel-7-server-rpms
We install the necessary packaging:
yum install pcs fence-agents-allWe enable the rules in the firewall or deactivate it
firewall-cmd –permanent –add-service=high-availability

firewall-cmd –add-service=high-availability
systemctl stop firewalld

systemctl disable firewalld
We change the password to the cluster user
passwd hacluster

Changing password for user hacluster.

New password:

Retype new password:

passwd: all authentication tokens updated successfully.
We start the service.
systemctl start pcsd.service

systemctl enable pcsd.service

Created symlink from /etc/systemd/system/multi-user.target.wants/pcsd.service to /usr/lib/systemd/system/pcsd.service.
Authorize nodes and user, perform on a single node:
pcs cluster auth  redorbitaclus01  redorbitaclus02

Username: hacluster

Password:

redorbitaclus02: Authorized

redorbitaclus01: Authorized
We create the cluster and enable cluster when starting machines
pcs cluster setup –start –name redorbitaclus redorbitaclus01 redorbitaclus02

Shutting down pacemaker/corosync services…

Redirecting to /bin/systemctl stop  pacemaker.service

Redirecting to /bin/systemctl stop  corosync.service

Killing any remaining services…

Removing all cluster configuration files…

redorbitaclus01: Succeeded

redorbitaclus02: Succeeded

Starting cluster on nodes: redorbitaclus01, redorbitaclus02…

redorbitaclus01: Starting Cluster…

redorbitaclus02: Starting Cluster…

Synchronizing pcsd certificates on nodes redorbitaclus01, redorbitaclus02…

redorbitaclus02: Success

redorbitaclus01: Success
Restaring pcsd on the nodes in order to reload the certificates…

redorbitaclus02: Success

redorbitaclus01: Success
pcs cluster enable –all

redorbitaclus01: Cluster Enabled

redorbitaclus02: Cluster Enabled
We check the status of the cluster
pcs cluster status

Cluster Status:

Last updated: Thu Jun  2 11:58:37 2016         Last change: Thu Jun  2 11:38:40 2016 by hacluster via crmd on redorbitaclus01

Stack: corosync

Current DC: redorbitaclus01 (version 1.1.13-10.el7_2.2-44eb2dd) – partition with quorum

2 nodes and 0 resources configured

Online: [ redorbitaclus01 redorbitaclus02 ]
PCSD Status:

redorbitaclus01: Online

redorbitaclus02: Online
We install the service which we are going to cluster, in our case mysql.
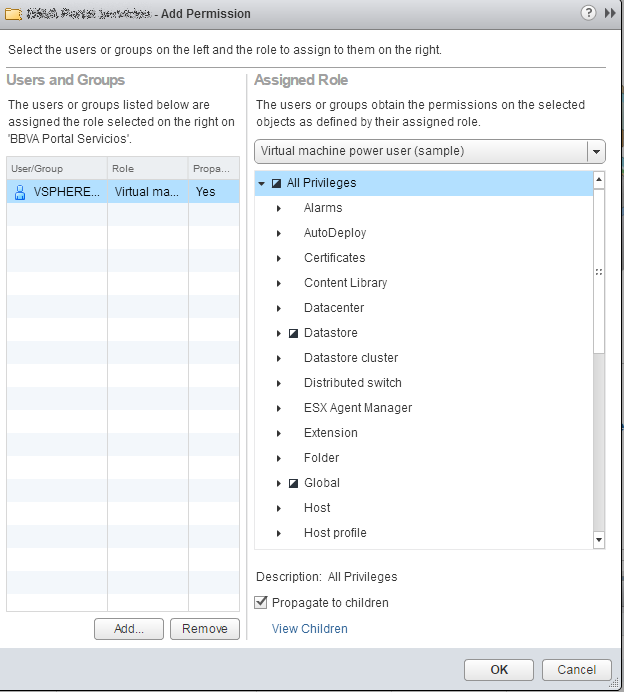
yum install MariaDB-server MariaDB-clientWe generate the Fence user in vmware, to do this we go to Roles in vcenter

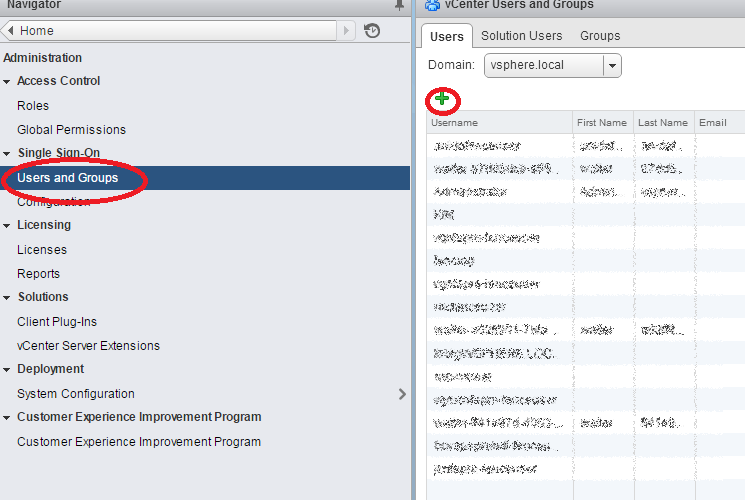
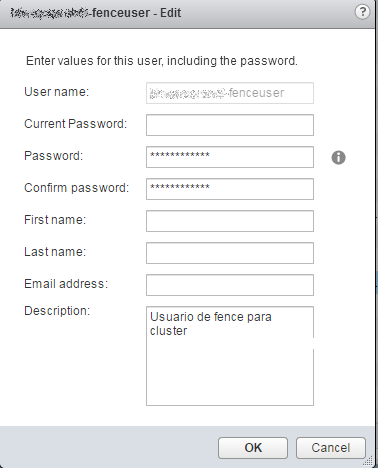
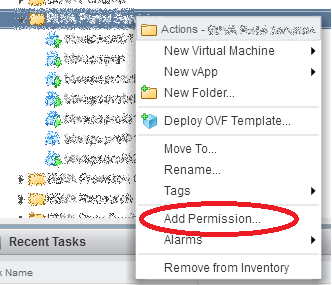
We go to the project folder, right button > Add Permission…
We access through the web through Port 2224
We log in with the hacluster user

We added the cluster to be managed by web.
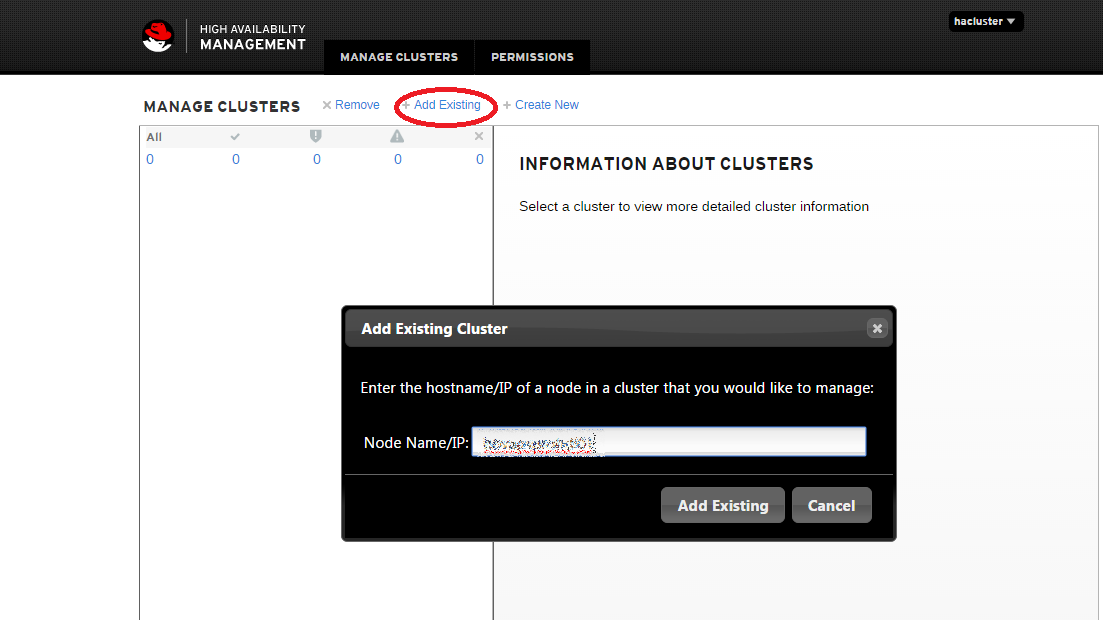
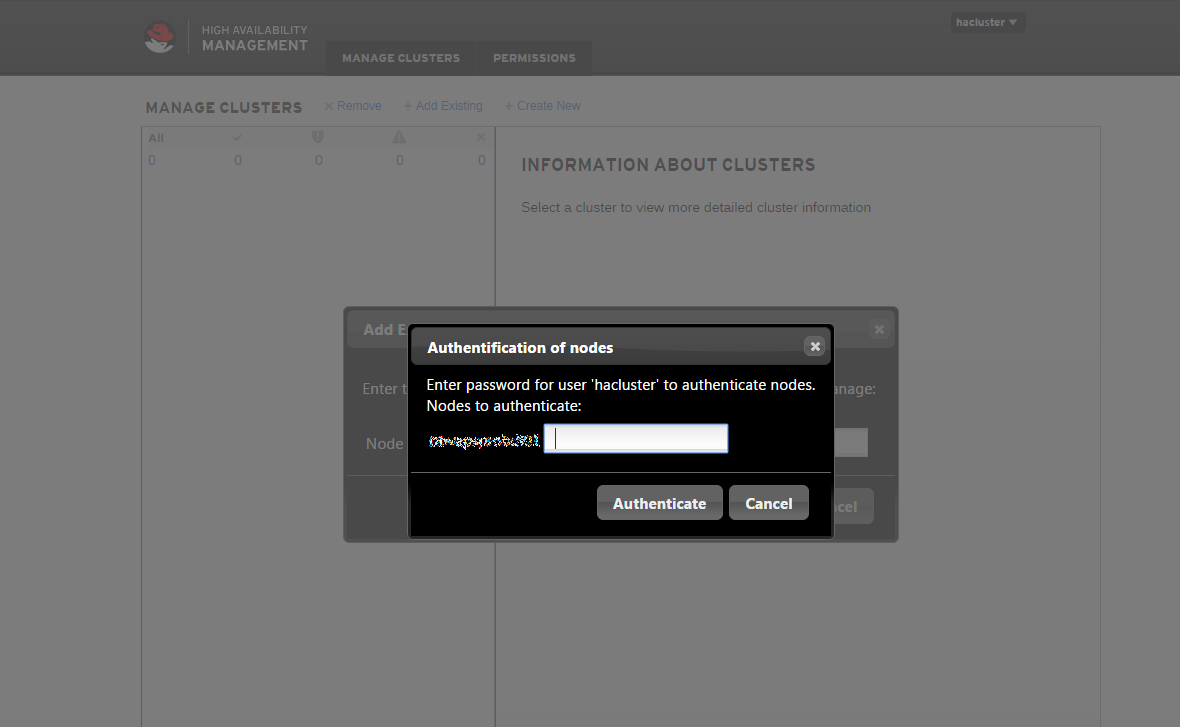
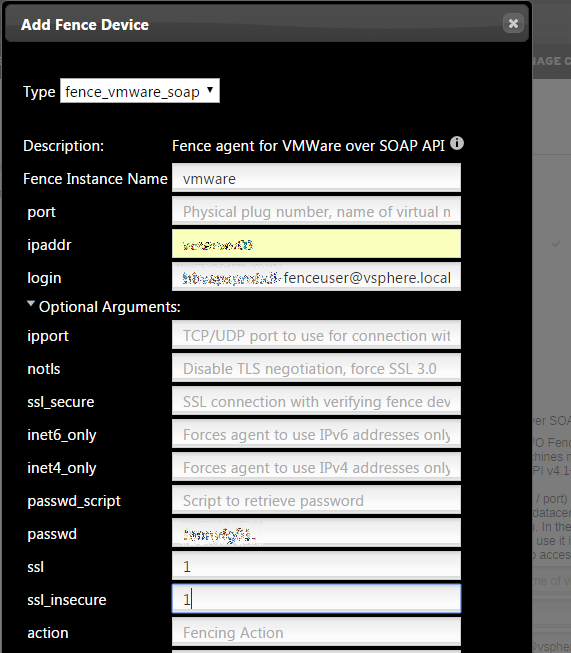
Next we are going to configure the Fence, to do this we click on Fence devices > Add
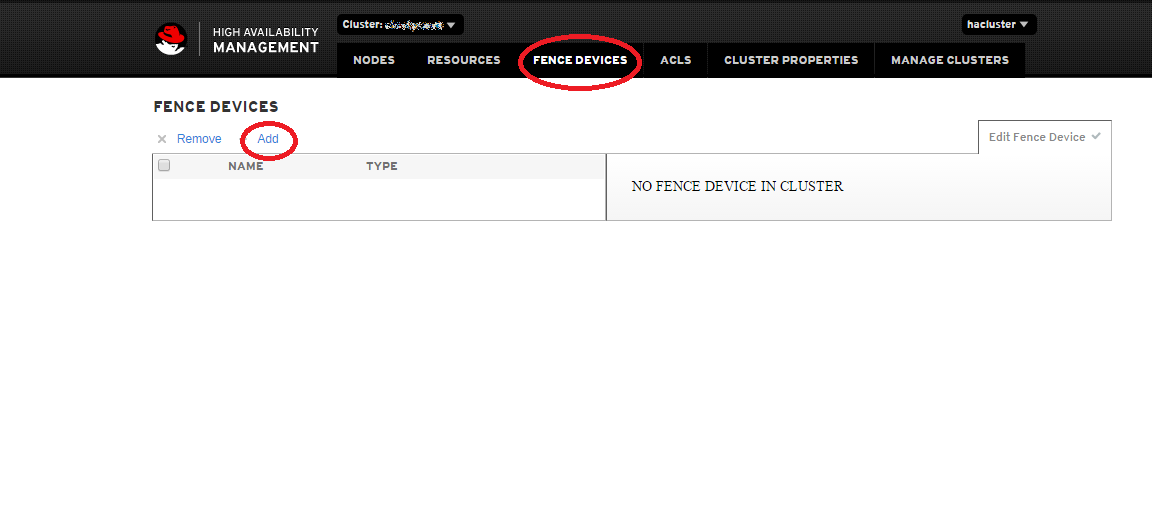
We add the IP or name of the DNS server in ipaddr, the user that we previously created and the corresponding password.
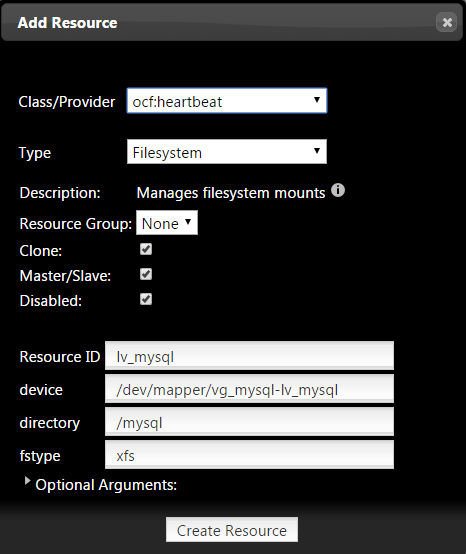
Next we are going to create a resource Recurces > Add

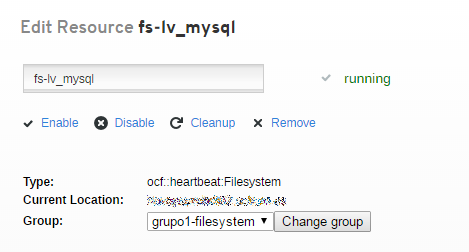
We configure a resource which performs the mounting of the file system.
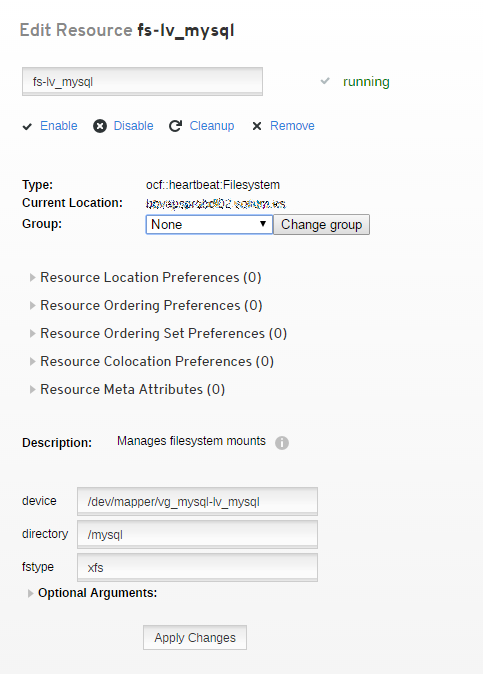
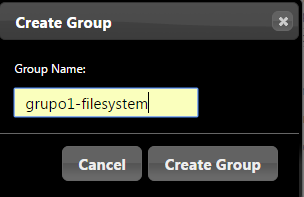
Now we create a group and associate it with the resource created previously.

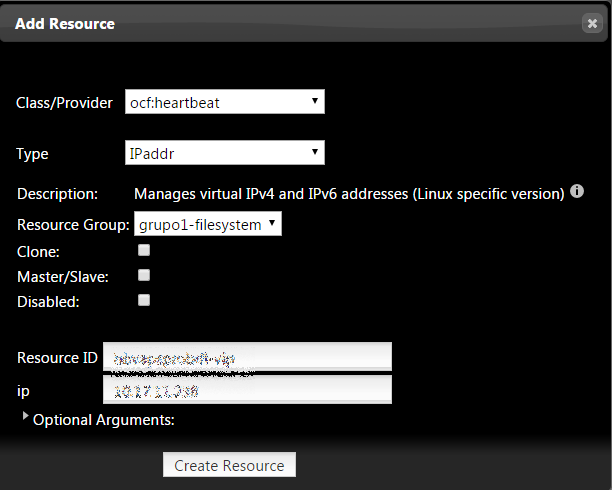
We create another resource for the cluster IP
We create the resource for the mysql service
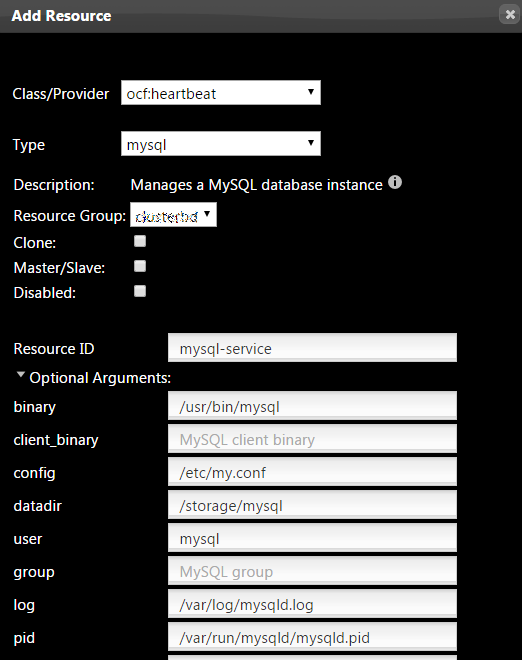
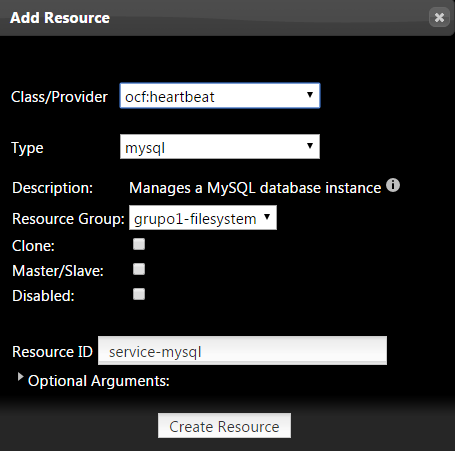
Finally we configure /etc/my.cnf of our MariaDB-Server
cat /etc/my.cnf
For advice on how to change settings please see

# http://dev.mysql.com/doc/refman/5.7/en/server-configuration-defaults.html
[mysqld]

sql_mode=»STRICT_TRANS_TABLES,ERROR_FOR_DIVISION_BY_ZERO,NO_AUTO_CREATE_USER,NO_ENGINE_SUBSTITUTION»

#

# Remove leading # and set to the amount of RAM for the most important data

# cache in MySQL. Start at 70% of total RAM for dedicated server, else 10%.

innodb_buffer_pool_size = 5G

#

# Remove leading # to turn on a very important data integrity option: logging

# changes to the binary log between backups.

# log_bin

#

# Remove leading # to set options mainly useful for reporting servers.

# The server defaults are faster for transactions and fast SELECTs.

# Adjust sizes as needed, experiment to find the optimal values.

join_buffer_size = 64M

# sort_buffer_size = 2M

read_rnd_buffer_size = 16M

bulk_insert_buffer_size = 64M

#datadir=/var/lib/mysql

innodb_thread_concurrency = 10

innodb_buffer_pool_instances=6

#thread_concurrency = 12

innodb_autoextend_increment = 512

innodb_log_file_size = 1G

read_buffer_size = 2M

datadir=/mysql

socket=/var/lib/mysql/mysql.sock
#skip_grant_tables
# Disabling symbolic-links is recommended to prevent assorted security risks

symbolic-links=0
log-error=/var/log/mysqld.log

pid-file=/var/run/mysqld/mysqld.pid
validate_password_policy=LOW
user = mysql

port = 3306

basedir = /usr

tmpdir = /tmp

language = /usr/share/mysql/english

symbolic-links  =0

max_allowed_packet = 512M

innodb_file_per_table =1

lower_case_table_names = 1

skip-name-resolve=1
# Query Cache #

query_cache_type = 0

query_cache_limit = 32M

query_cache_size = 64M
# For MyISAM #

key_buffer_size = 32M

myisam_sort_buffer_size = 128M

myisam_max_sort_file_size = 10G

#myisam_max_extra_sort_file_size = 10G

myisam_repair_threads = 1
# LOGGING #

log_queries_not_using_indexes = 1

slow_query_log = 1

slow_query_log_file = /var/lib/mysql/mysqld-slow-query.log

log_queries_not_using_indexes = 0
# Caches #

tmp_table_size = 256M

max_heap_table_size = 256M

max_connections = 500

thread_cache_size = 50

open_files_limit  = 5000

table_definition_cache = 4096

table_open_cache = 1024
We start the cluster
crm_resource start redorbitaclusWe check the status of the cluster
pcs cluster status
Cluster Status:

Last updated: Mon Jun 6 15:59:46 2016 Last change: Mon Jun 6 13:36:01 2016 by

hacluster via cibadmin on redorbitaclus01.redorbita.com

Stack: corosync

Current DC: redorbitaclus01.redorbita.com (version 1.1.13-10.el7_2.2- 44eb2dd) – partition with

quorum

2 nodes and 3 resources configured

Online: [ redorbitaclus01.redorbita.com ]

OFFLINE: [ redorbitaclus02.redorbita.com ]

PCSD Status:

redorbitaclus01.redorbita.com: Online

redorbitaclus02.redorbita.com: Online
All the best.
Comments