
In this entry we will see how to configure the Zentyal VPN mail module, as well as allow access to our accounts from the external network.
What is a VPN?
A virtual private network (RPV), in English: Virtual Private Network (VPN), is a technology computer network which allows a safe extension of the local area network (LAN) over a public or uncontrolled network such as Internet. It allows the computer on the network to send and receive data over shared or public networks as if it were a private network with all the functionality, security, and management policies of a private network.1 This is done by establishing a virtual point-to-point connection by using dedicated connections, encryption, or a combination of both methods.
Common examples are the possibility of connecting two or more branches of a company using the Internet as a link, allowing members of the technical support team to connect from their home to the computer center, or allowing a user to access their home computer from a remote location, such as a hotel. All this using the infrastructure of Internet.
VPN connection over the Internet is technically a union wide area network (WAN) between the sites but to the user it seems as if it were a private link—hence the designation "virtual private network."2
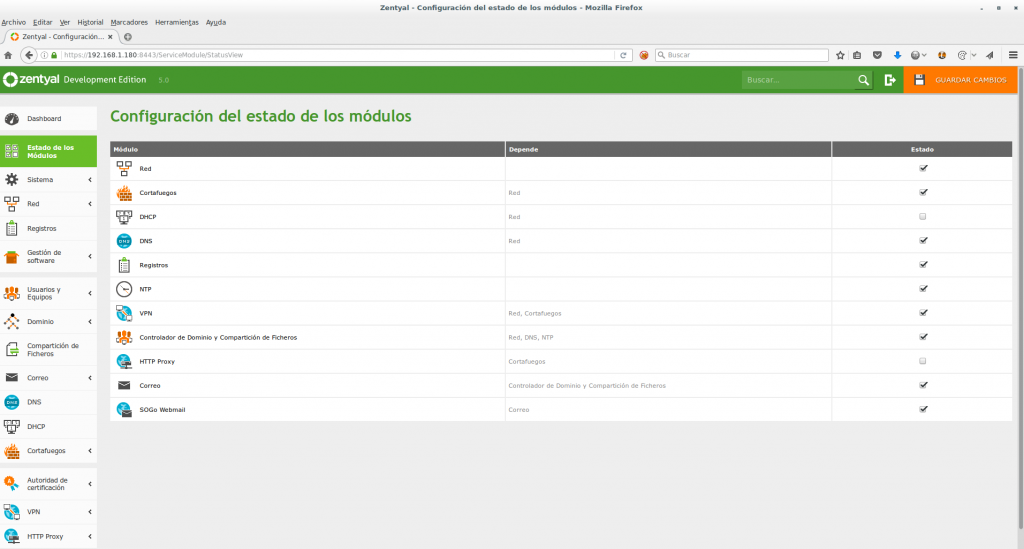
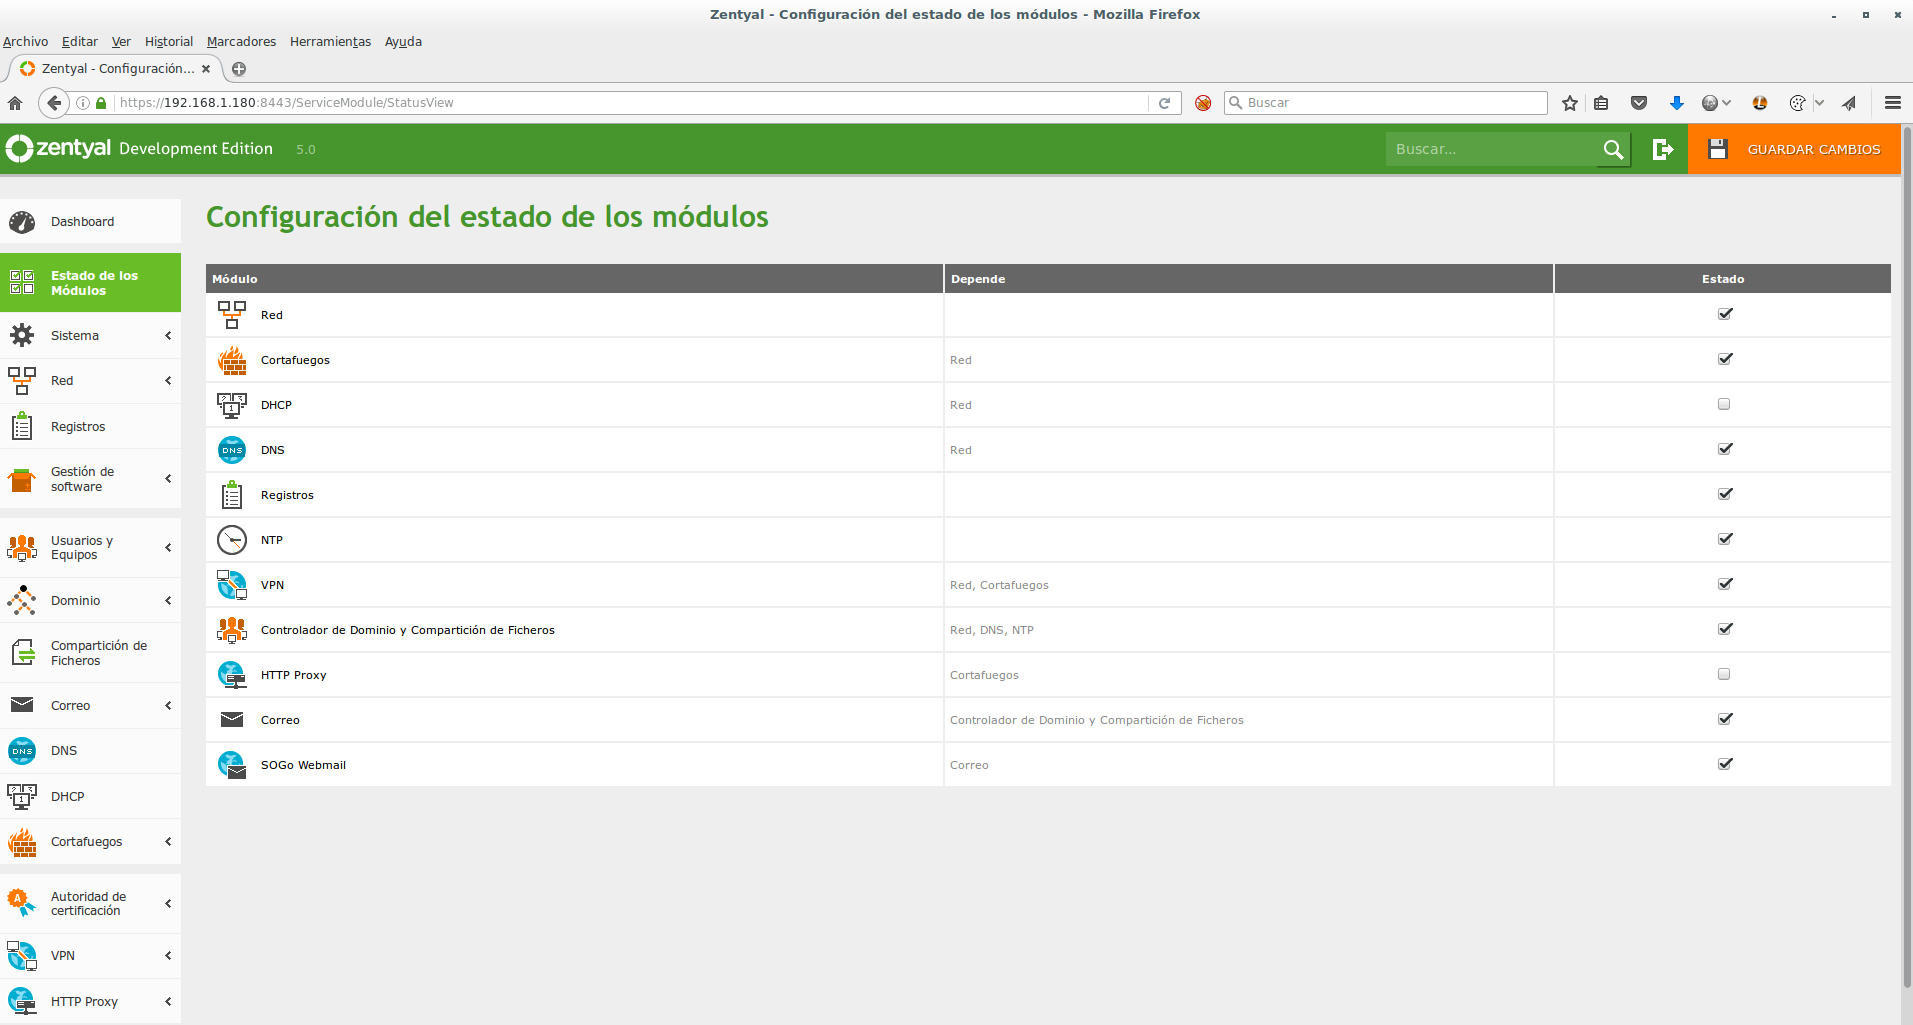
Before starting the configuration we must activate the module, to do this we will: Module status, we activate VPN and we give SAVE CHANGES
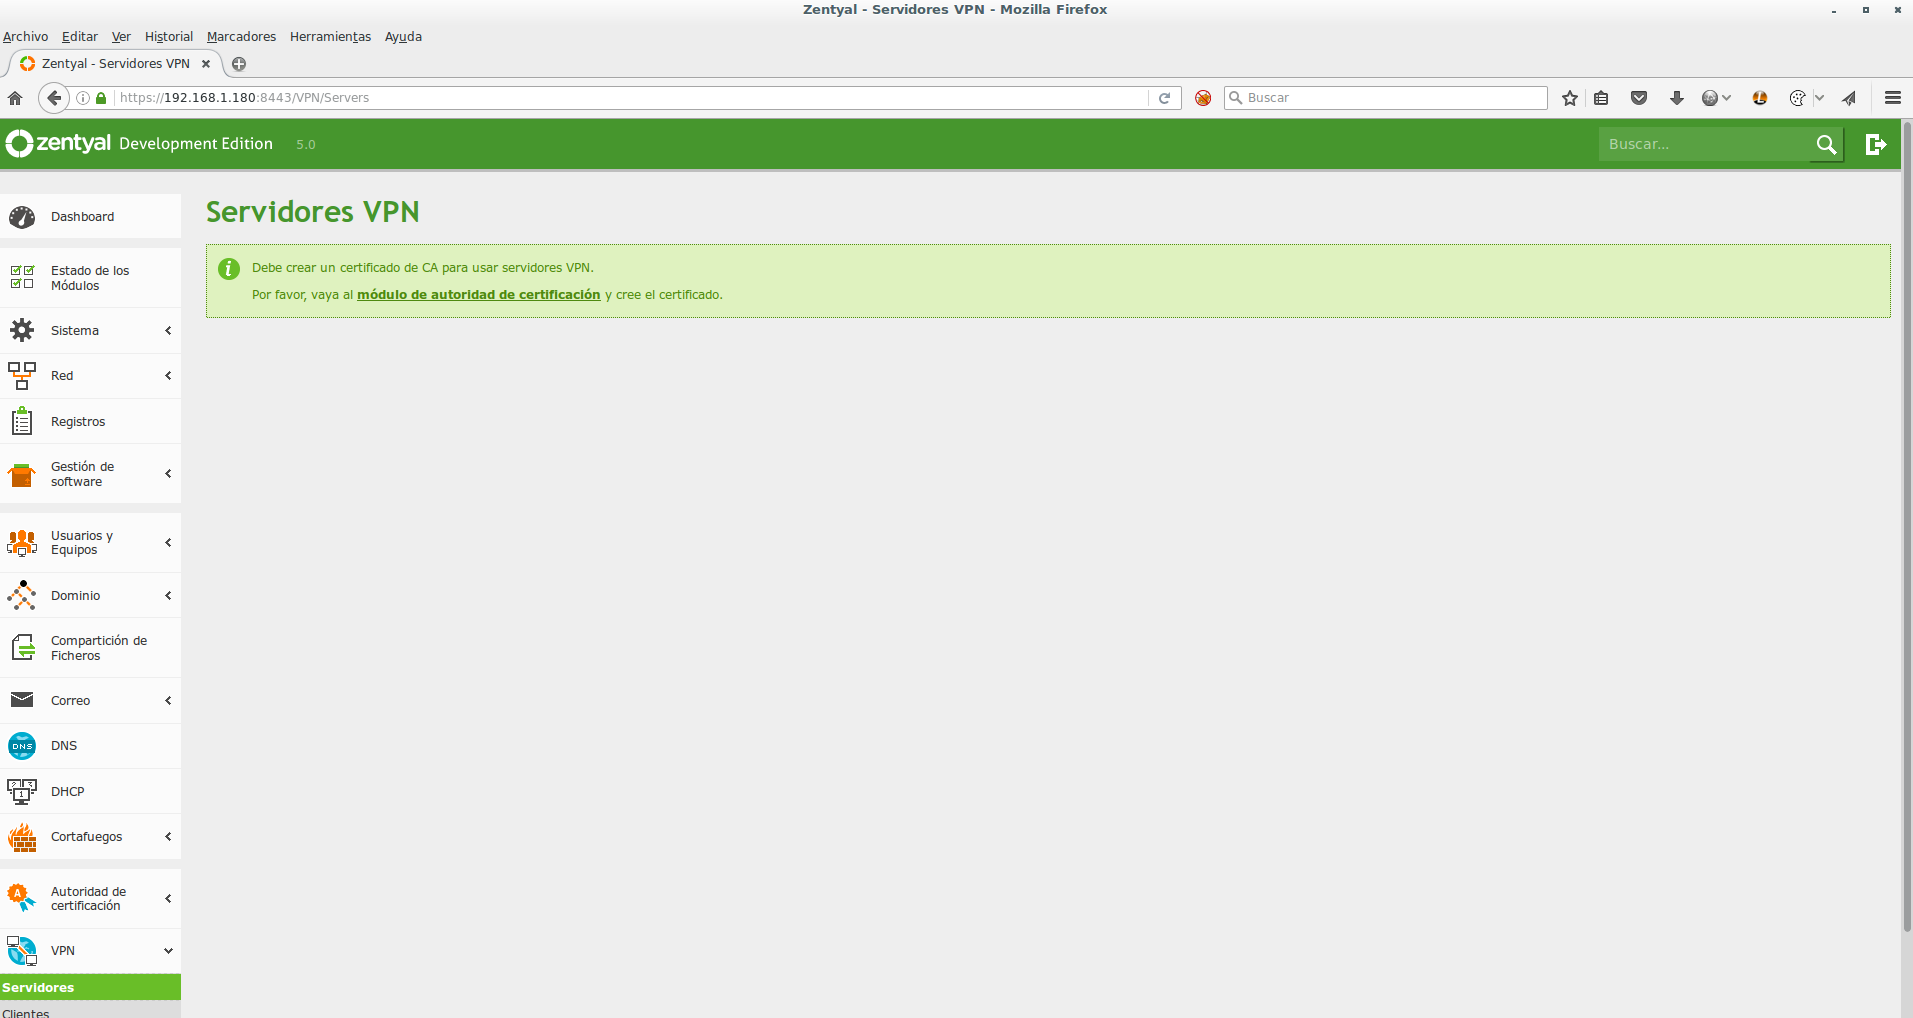
Once the module is activated we are going to begin the configuration VPN > Server and we press on: certificate authority module
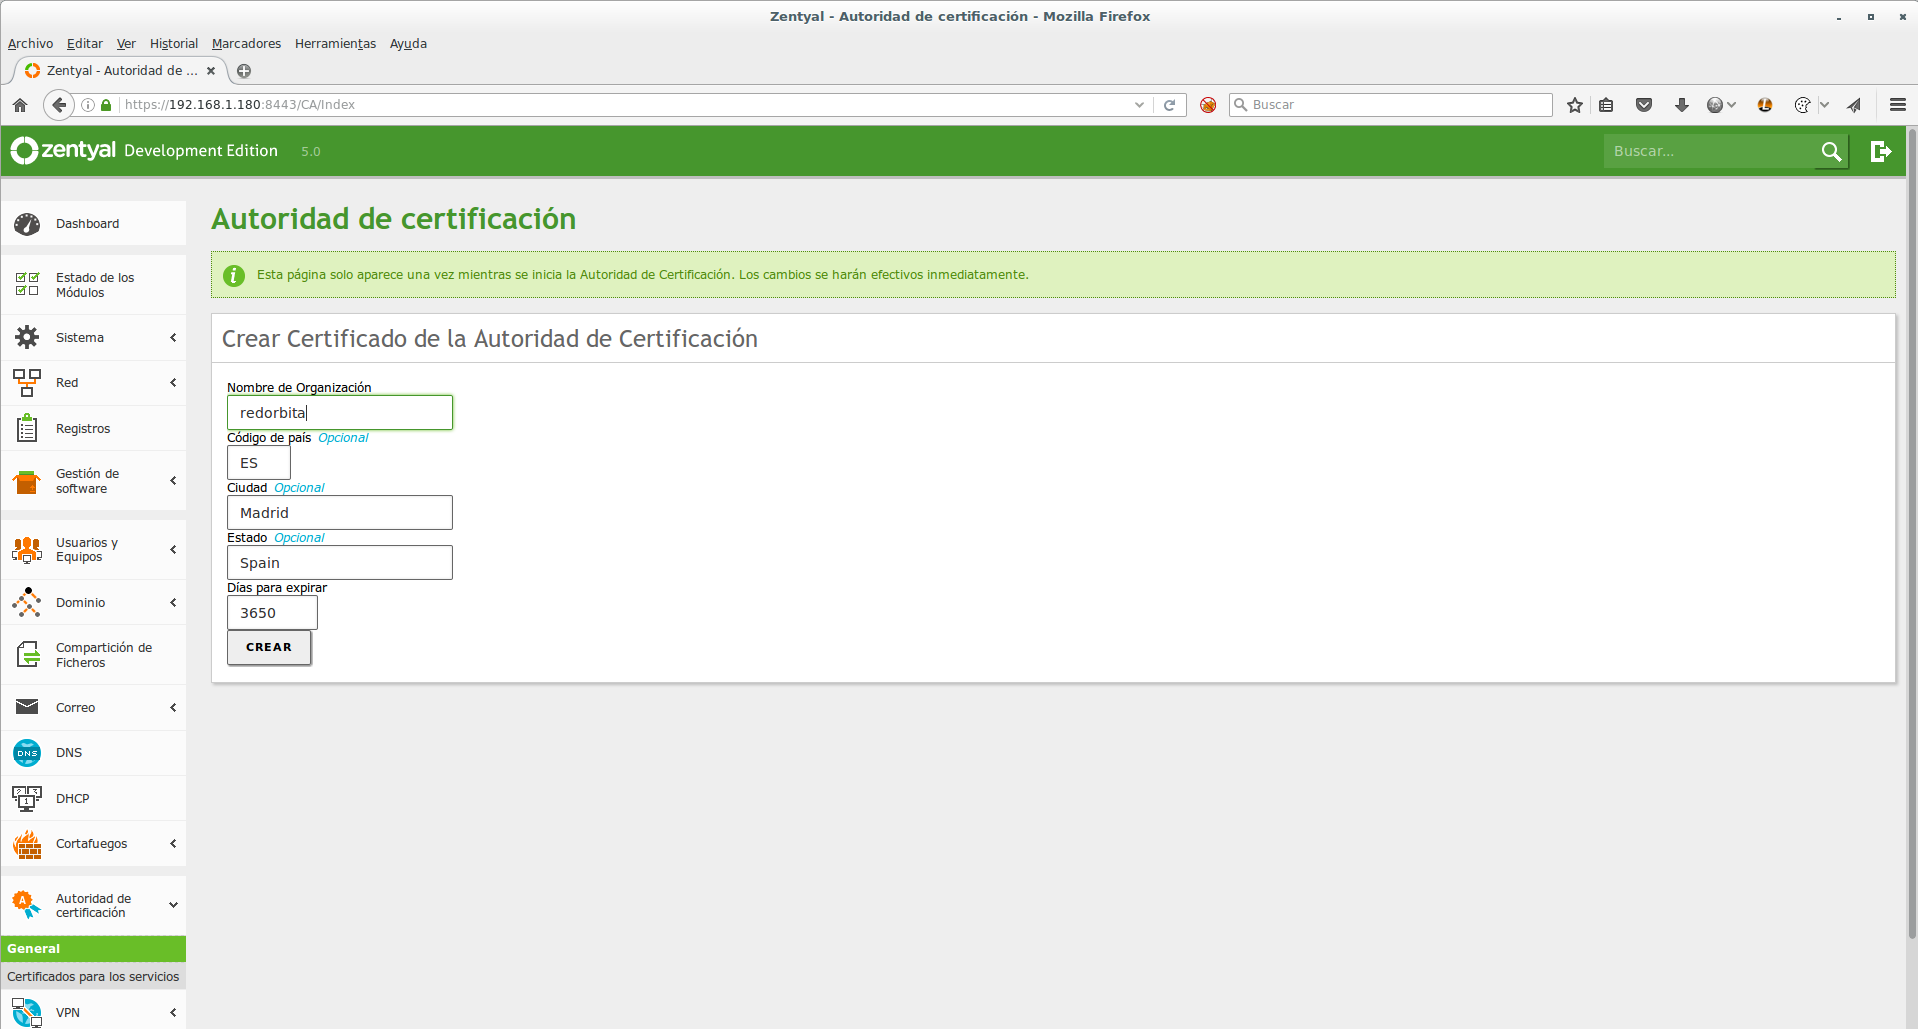
We fill in the data to create the certificate.
Once the certificate is created we go again to VPN > Server and we give a name for our VPN server
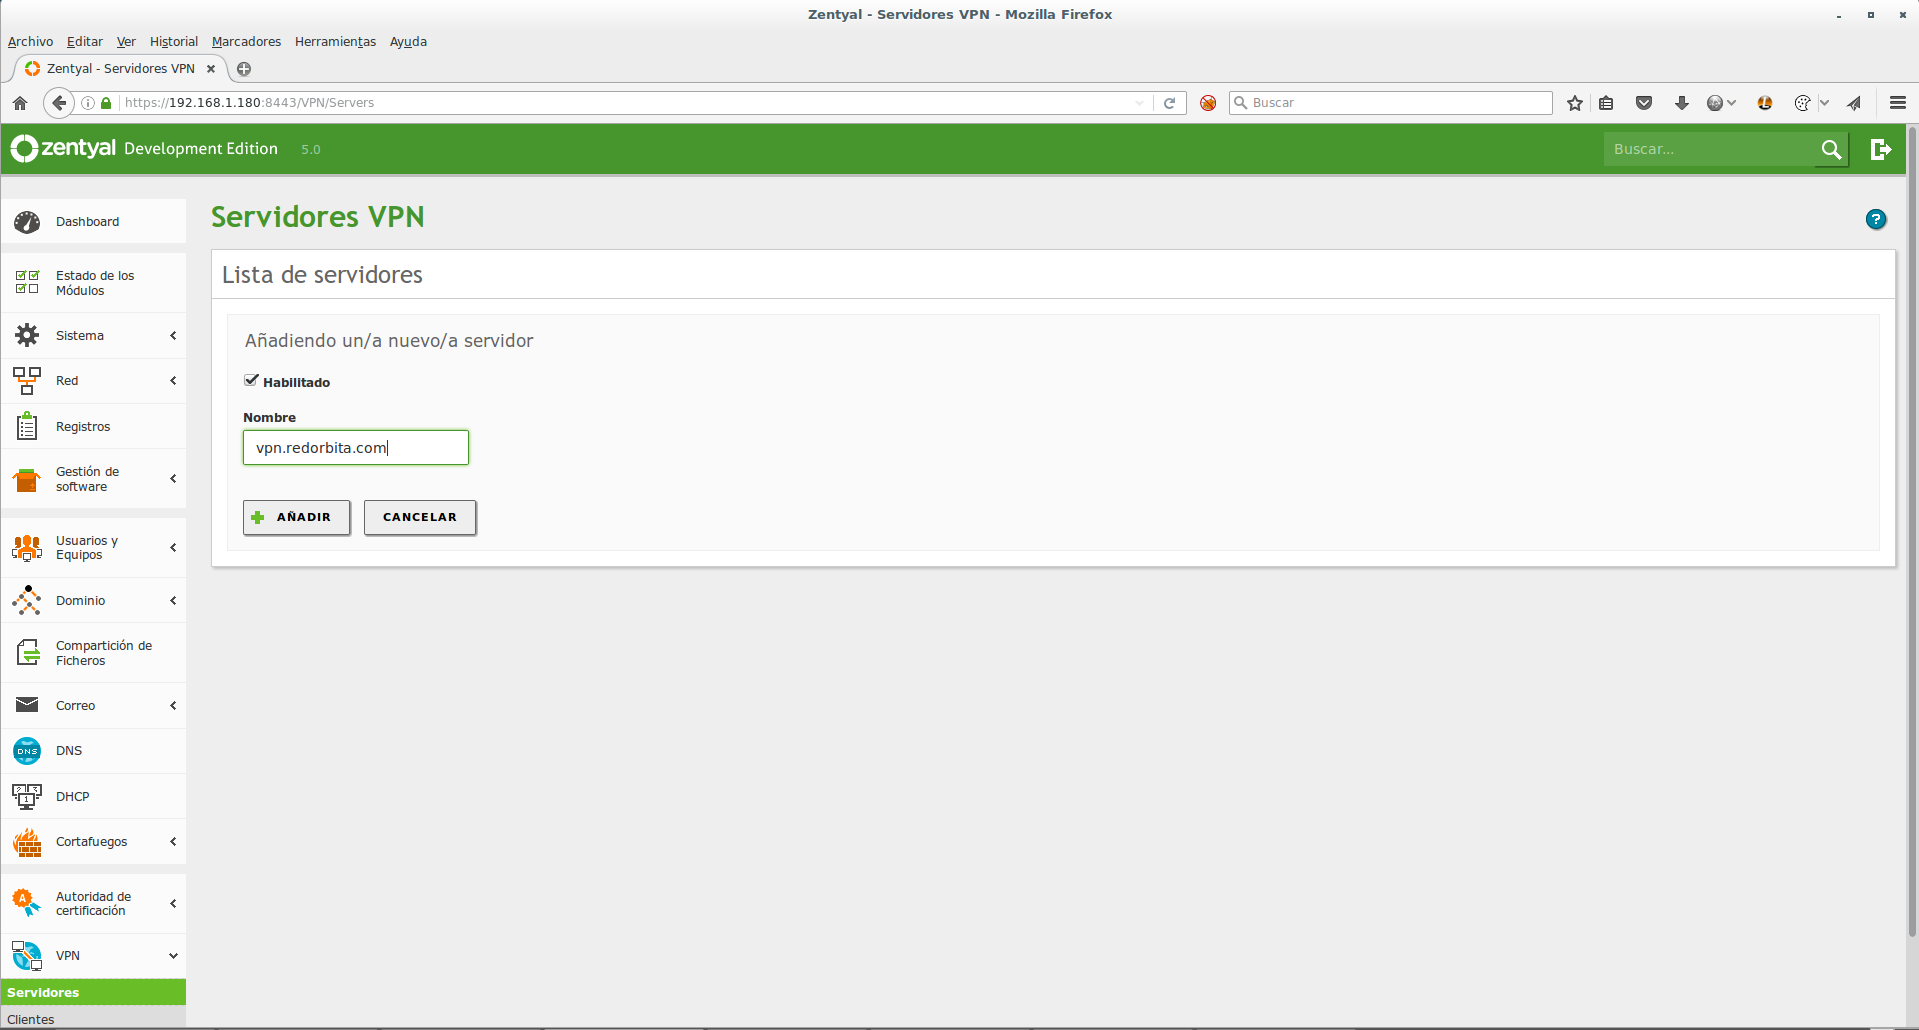
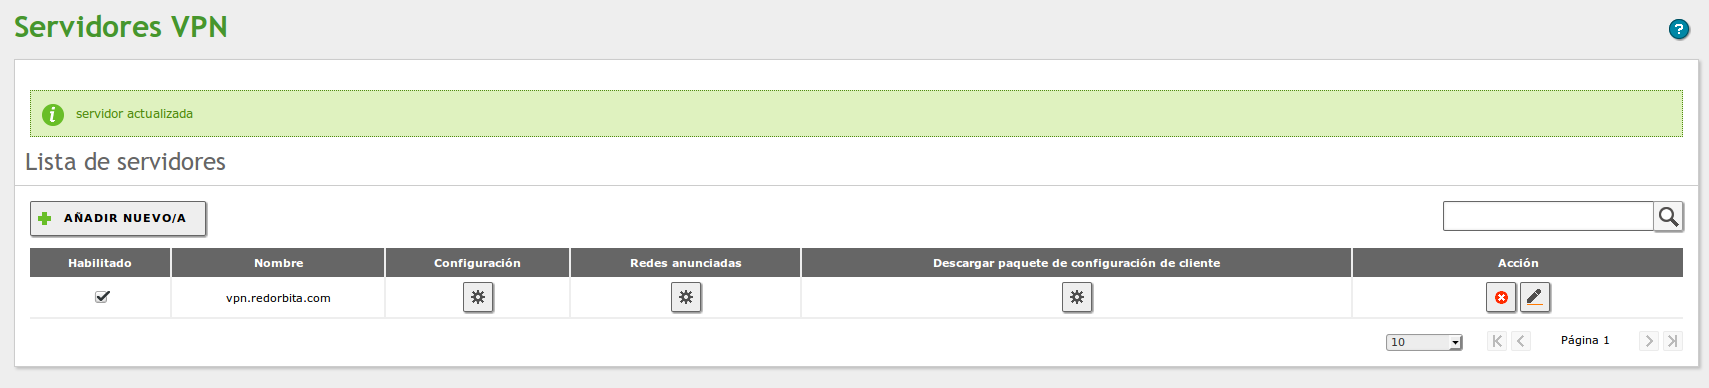
Once created, click Configure
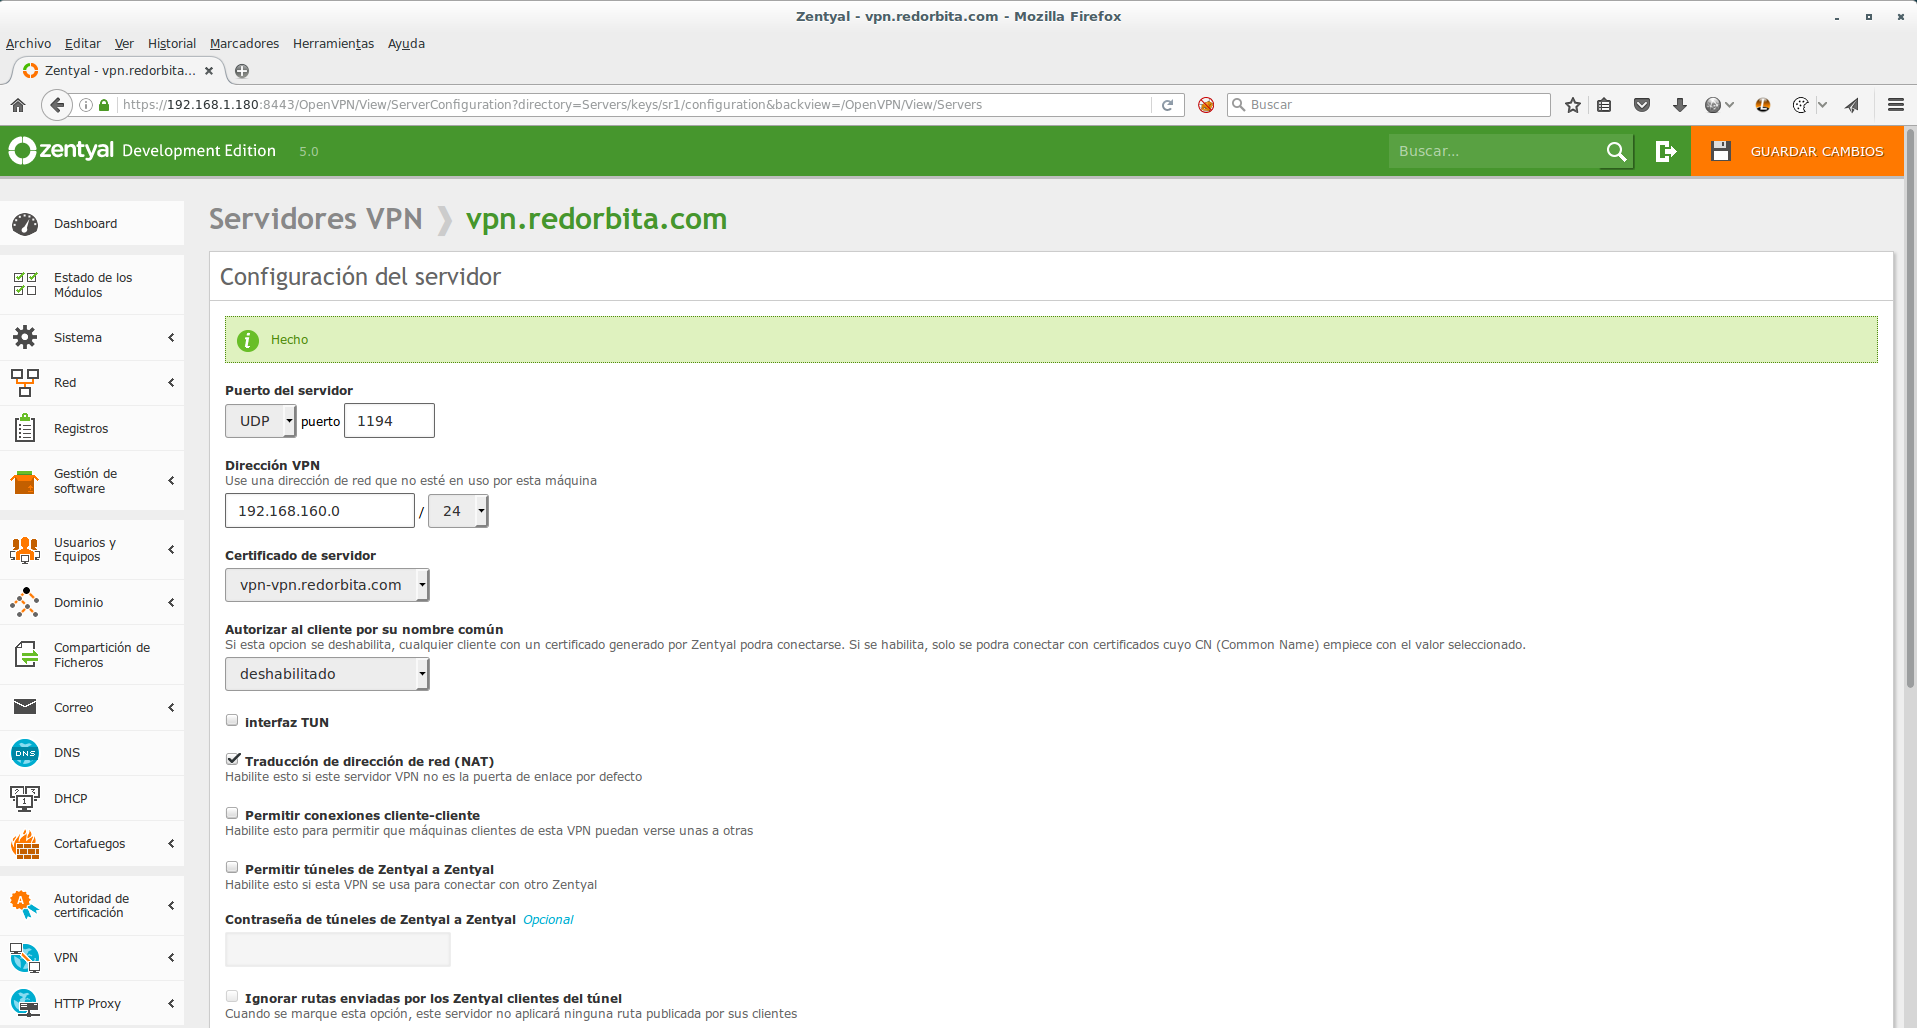
We add the IP range
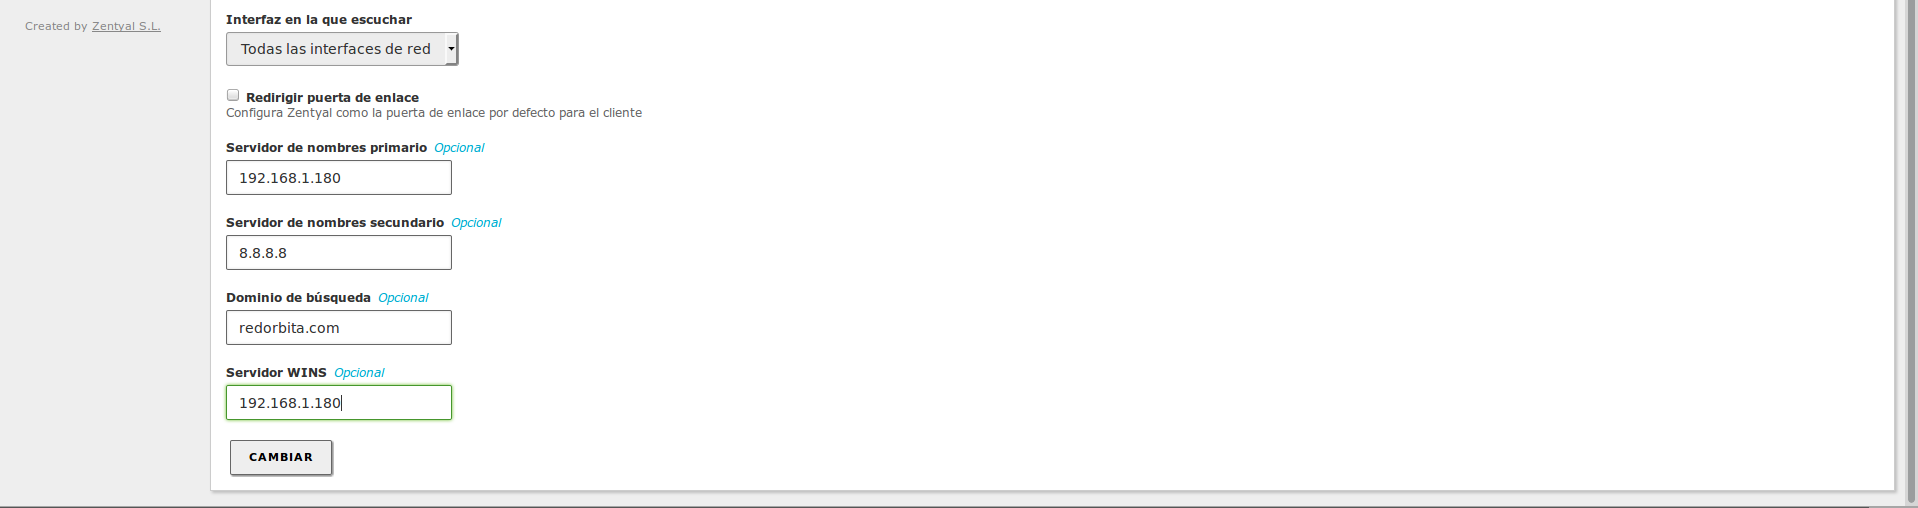
We configure the interface where it will listen, dns, domain and wins server
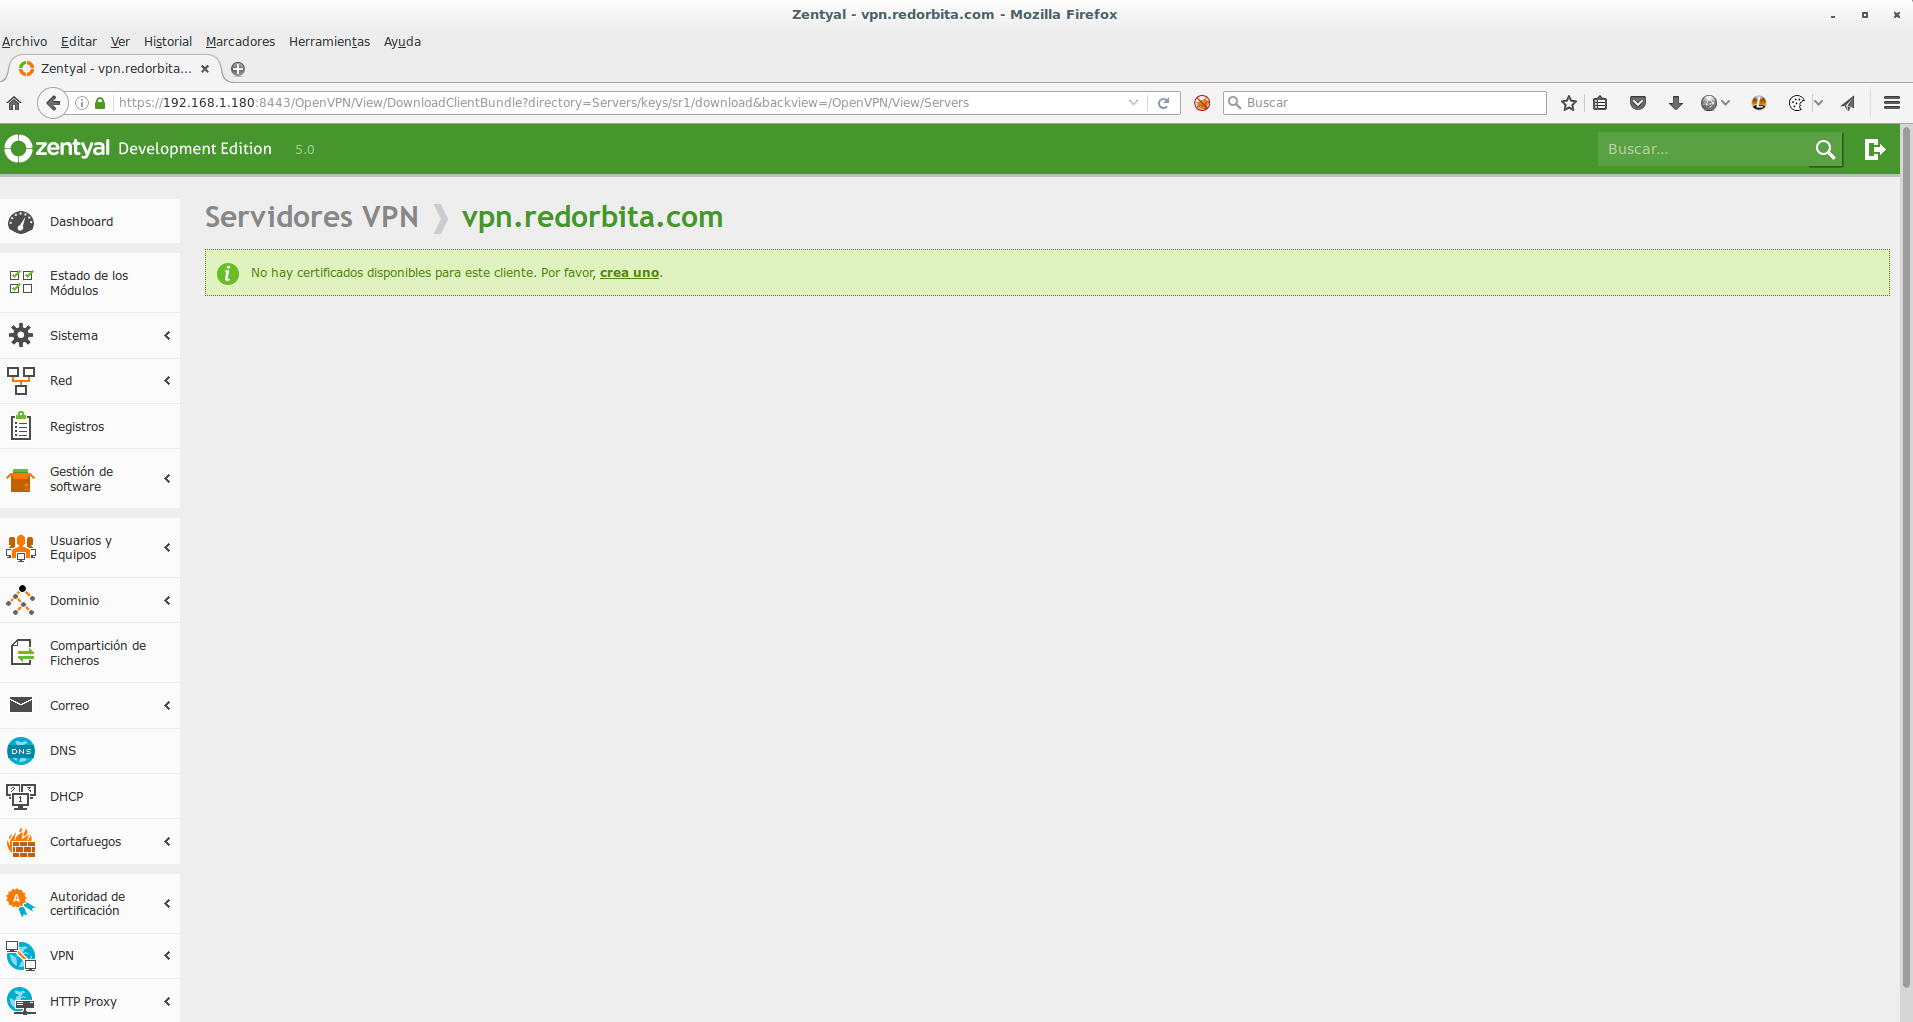
Again we go to VPN > Servers and we press on Download client configuration package
We create a certificate
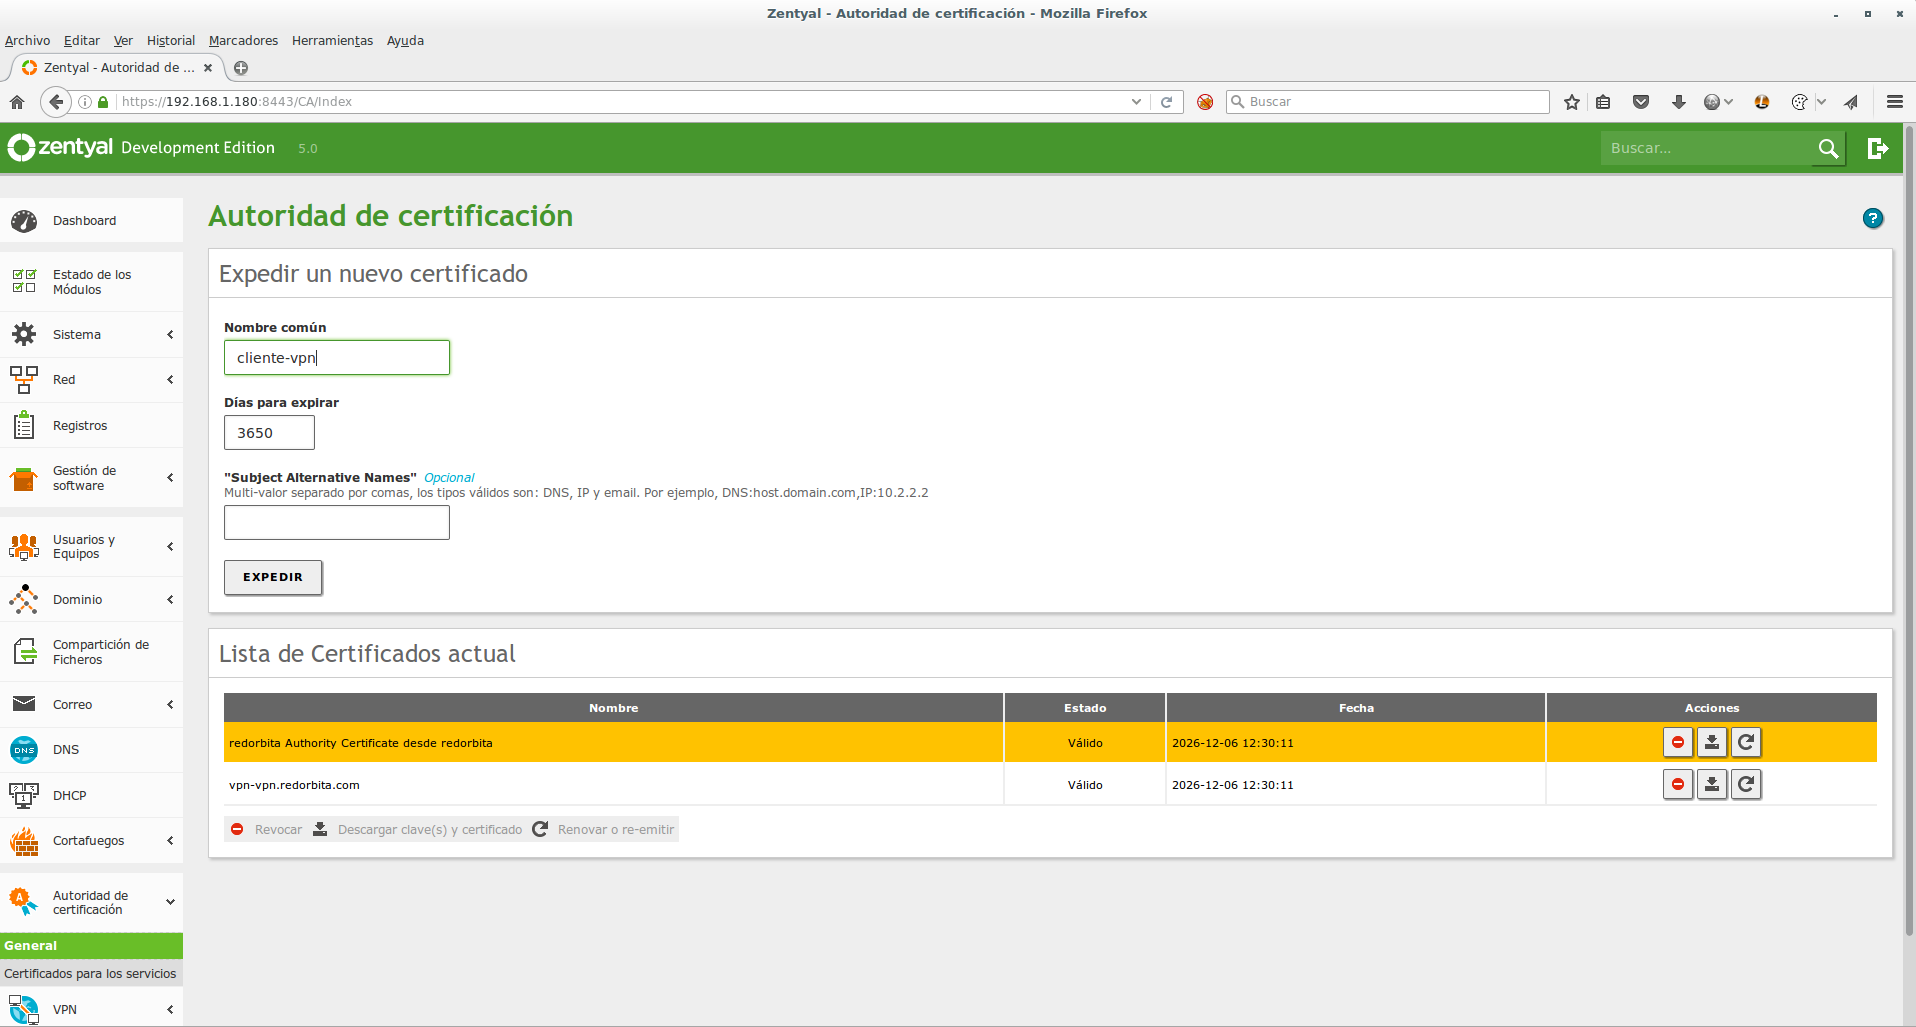
We add a name to the certificate.
Finally, all that remains is to download the configuration, it gives us the choice between GNU/Linux, Windows and Mac OS X
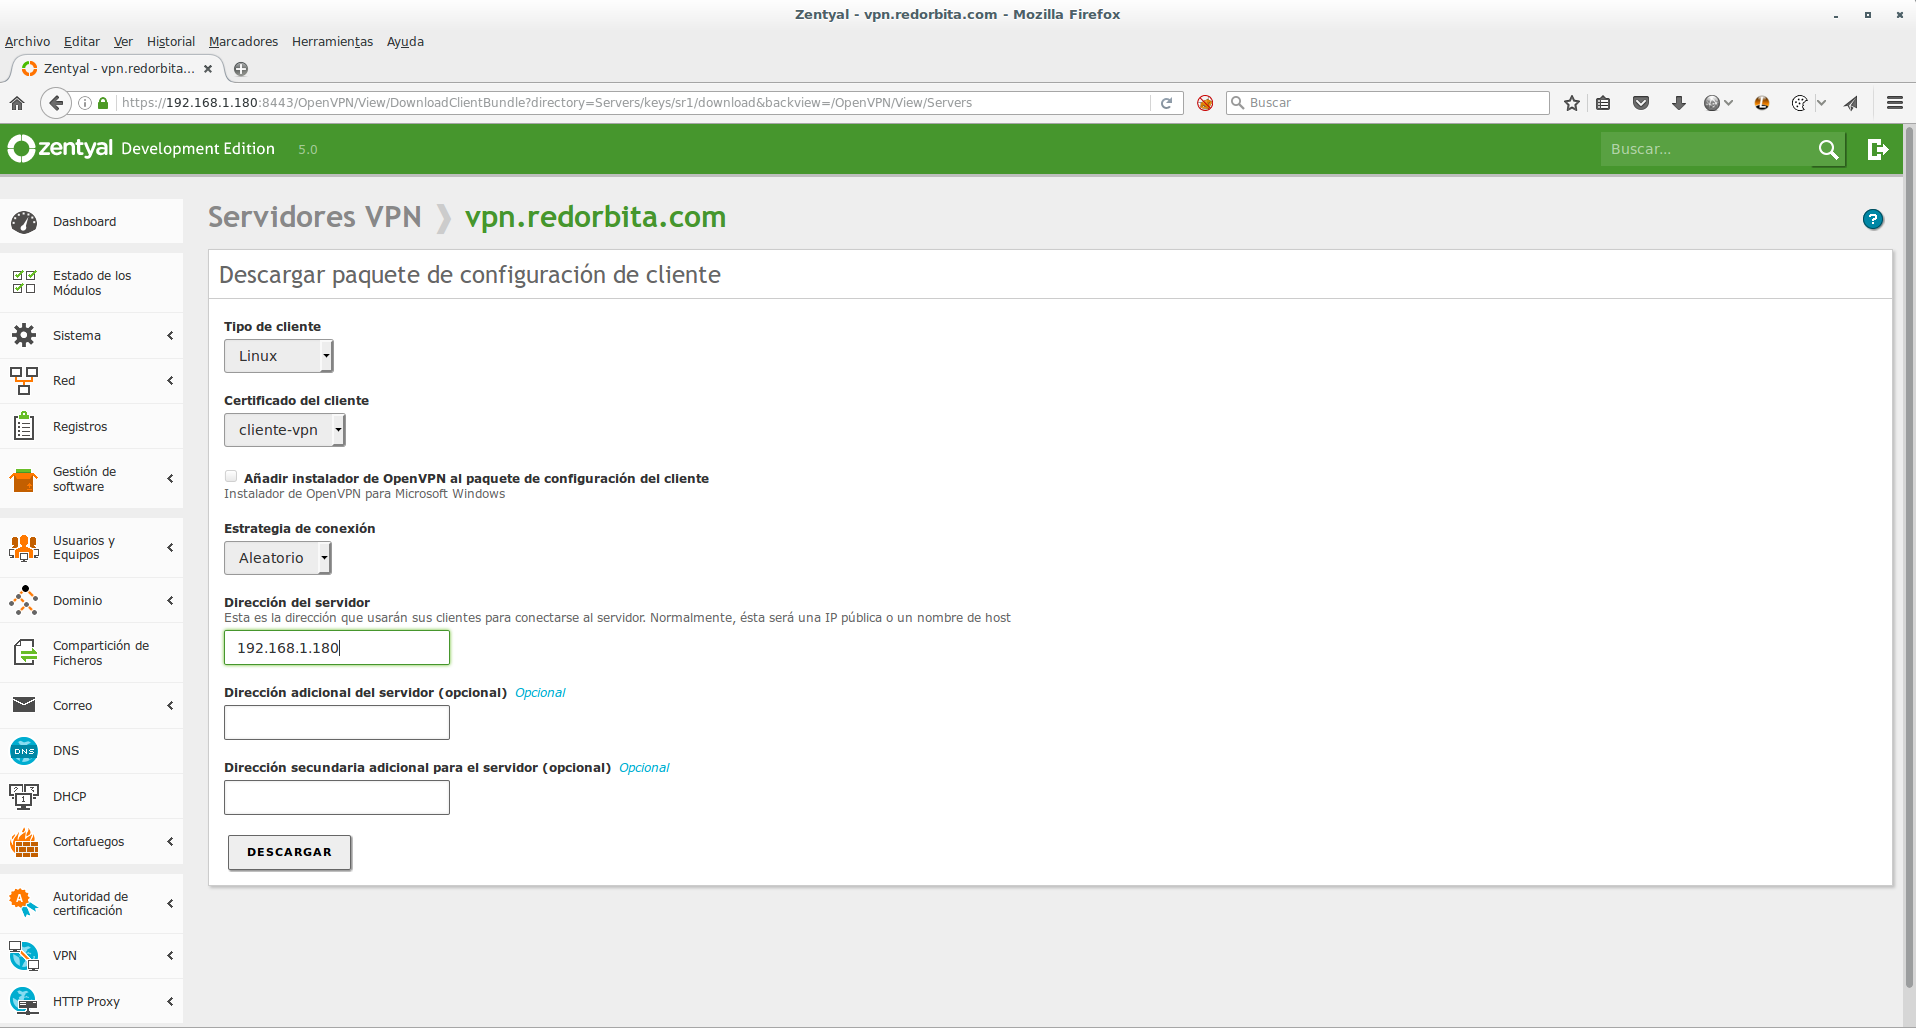
We download the configuration, unzip it and try to connect:
rokitoh@redorbita:~# sudo openvpn –config vpn.redorbita.com-client.conf

Thu Dec  8 13:57:41 2016 OpenVPN 2.3.4 x86_64-pc-linux-gnu [SSL (OpenSSL)] [LZO] [EPOLL] [PKCS11] [MH] [IPv6] built on Nov 12 2015

Thu Dec  8 13:57:41 2016 library versions: OpenSSL 1.0.1t  3 May 2016, LZO 2.08

Thu Dec  8 13:57:41 2016 WARNING: file ‘cliente-vpn.pem’ is group or others accessible

Thu Dec  8 13:57:41 2016 Socket Buffers: R=[212992->131072] S=[212992->131072]

Thu Dec  8 13:57:41 2016 UDPv4 link local: [undef]

Thu Dec  8 13:57:41 2016 UDPv4 link remote: [AF_INET]192.168.1.180:1194

Thu Dec  8 13:57:41 2016 TLS: Initial packet from [AF_INET]192.168.1.180:1194, sid=1927eab5 0557cb10

Thu Dec  8 13:57:41 2016 VERIFY OK: depth=1, C=ES, ST=Spain, L=Madrid, O=redorbita, CN=redorbita Authority Certificate

Thu Dec  8 13:57:41 2016 VERIFY X509NAME OK: C=ES, ST=Spain, L=Madrid, O=redorbita, CN=vpn-vpn.redorbita.com

Thu Dec  8 13:57:41 2016 VERIFY OK: depth=0, C=ES, ST=Spain, L=Madrid, O=redorbita, CN=vpn-vpn.redorbita.com

Thu Dec  8 13:57:41 2016 Data Channel Encrypt: Cipher ‘BF-CBC’ initialized with 128 bit key

Thu Dec  8 13:57:41 2016 Data Channel Encrypt: Using 160 bit message hash ‘SHA1’ for HMAC authentication

Thu Dec  8 13:57:41 2016 Data Channel Decrypt: Cipher ‘BF-CBC’ initialized with 128 bit key

Thu Dec  8 13:57:41 2016 Data Channel Decrypt: Using 160 bit message hash ‘SHA1’ for HMAC authentication

Thu Dec  8 13:57:41 2016 Control Channel: TLSv1, cipher TLSv1/SSLv3 DHE-RSA-AES256-SHA, 2048 bit RSA

Thu Dec  8 13:57:41 2016 [vpn-vpn.redorbita.com] Peer Connection Initiated with [AF_INET]192.168.1.180:1194

Thu Dec  8 13:57:43 2016 SENT CONTROL [vpn-vpn.redorbita.com]: ‘PUSH_REQUEST’ (status=1)

Thu Dec  8 13:57:43 2016 PUSH: Received control message: ‘PUSH_REPLY,dhcp-option DNS 192.168.1.180,dhcp-option DNS 8.8.8.8,dhcp-option WINS 192.168.1.180,dhcp-option DOMAIN redorbita.com,route 192.168.2.0 255.255.255.0,route-gateway 192.168.160.1,ping 10,ping-restart 120,ifconfig 192.168.160.2 255.255.255.0’

Thu Dec  8 13:57:43 2016 OPTIONS IMPORT: timers and/or timeouts modified

Thu Dec  8 13:57:43 2016 OPTIONS IMPORT: –ifconfig/up options modified

Thu Dec  8 13:57:43 2016 OPTIONS IMPORT: route options modified

Thu Dec  8 13:57:43 2016 OPTIONS IMPORT: route-related options modified

Thu Dec  8 13:57:43 2016 OPTIONS IMPORT: –ip-win32 and/or –dhcp-option options modified

Thu Dec  8 13:57:43 2016 ROUTE_GATEWAY 192.168.1.1/255.255.255.0 IFACE=eth0 HWADDR=fc:aa:14:28:ec:f0

Thu Dec  8 13:57:43 2016 TUN/TAP device tap0 opened

Thu Dec  8 13:57:43 2016 TUN/TAP TX queue length set to 100

Thu Dec  8 13:57:43 2016 do_ifconfig, tt->ipv6=0, tt->did_ifconfig_ipv6_setup=0

Thu Dec  8 13:57:43 2016 /sbin/ip link set dev tap0 up mtu 1500

Thu Dec  8 13:57:43 2016 /sbin/ip addr add dev tap0 192.168.160.2/24 broadcast 192.168.160.255

Thu Dec  8 13:57:43 2016 /sbin/ip route add 192.168.2.0/24 via 192.168.160.1

Thu Dec  8 13:57:43 2016 Initialization Sequence Completed
All the best
:wq!
Comments